Annotation Page
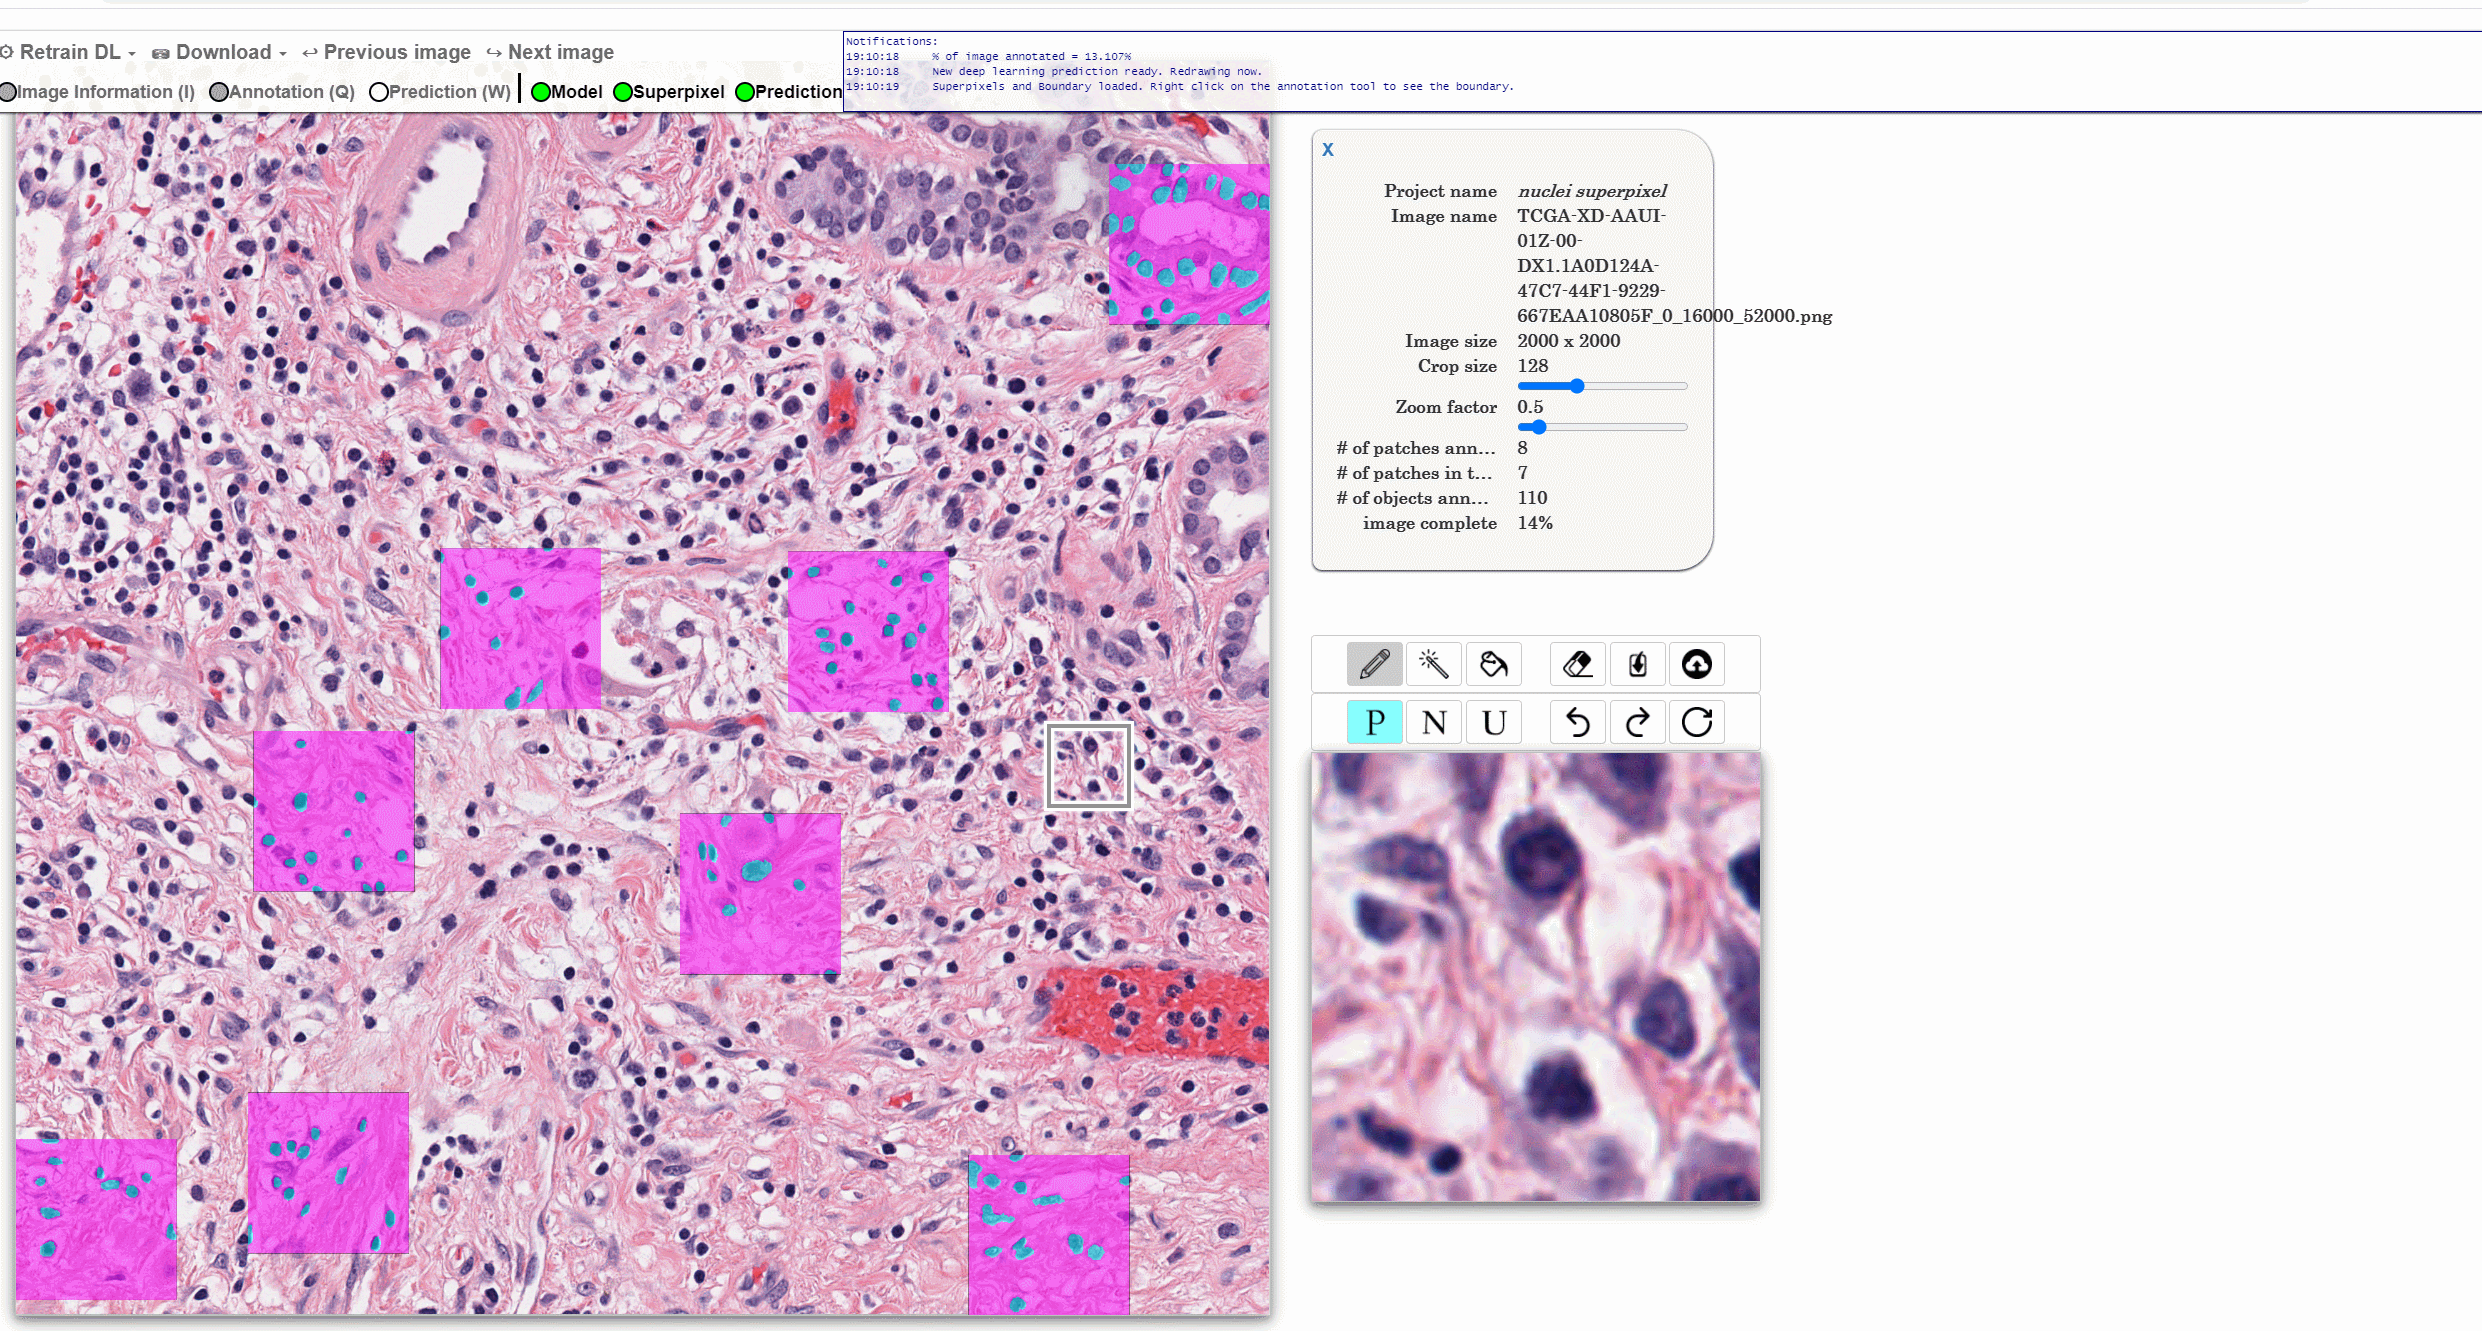
Quick Annotator (QA) Annotation Page UI mainly consists of Navigation Bar (red rectangle), Notification Window, Information Window (blue rectangle), Annotation Window (green rectangle), and the Image tile.
The user makes annotations on this page. Several common image annotation tools aid in this process, such as brushes and erasers of various sizes, along with polygon style annotation tools and region filling tools. A deep learning model can be trained after a certain amount of training, and testing samples are added to the dataset. The Annotation Page will update to show the deep learning output. User switches layers to view or hide the annotation/prediction result.
We are presenting a brief introduction to each function.
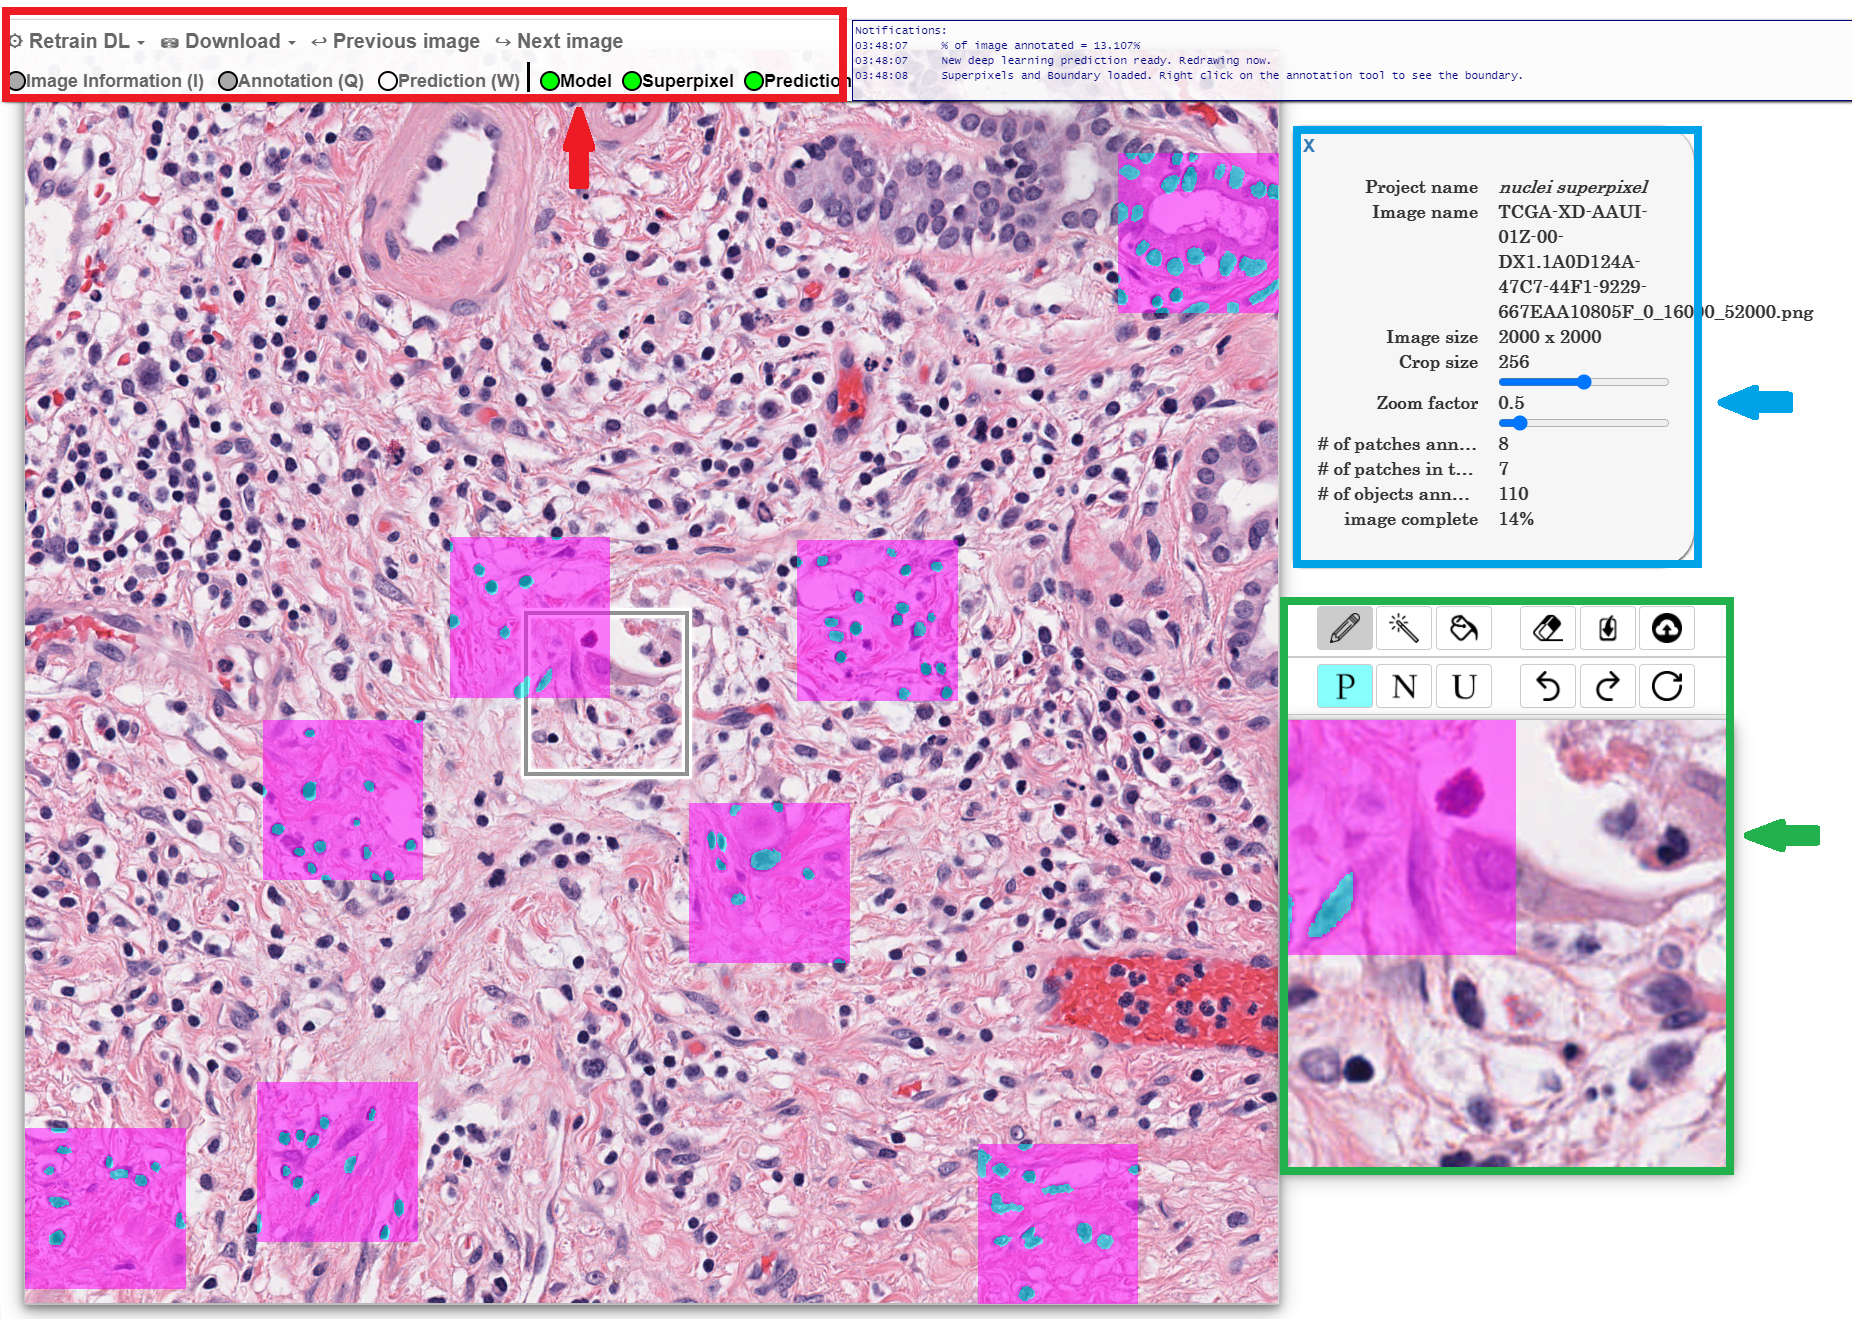
The Navigation Bar consists of function buttons, layer switches, and status indicators.

- Retrain DL: after the user uploads some annotations to the dataset (at least on the train set and one testing set), the user could use the annotation data to train a classifier. Users can make annotations and upload annotation data in Annotation Window(more details about making annotation). When the training process is finished, a u-net model can be applied to make suggestions that can be accepted or modified. There are two options for Retrain DL: From base is to apply the annotation dataset on the autoencoder (model 0); From the last is to apply the annotation dataset on the last previous model, which can be used when the previous model gives satisfied prediction already.
-
Download: the user can export Trained DL, DL Result Image, Human Annotation Image, and Annotation Statistics. Train DL is the download link for the latest trained model (path file). DL Result Image is to download the binary prediction mask on the image, where white areas represent regions of interest. Human Annotation Image is to download the annotation mask of the current image. Annotation Statistics is to download the statistical results of the image annotation data. Note: the column header of the results match with the label in the database file.
-
Previous image, Next image: a user could go to the previous/next image in the image list without exiting the page.
Users can use these layer switches to decide what to look at on the annotation page. All switches have related short cut keys.
- Image Information (I): the switch for the information box with short cut key I.
- Annotation (Q): the switch for annotation layer with short cut key Q; see gif demo.
- Prediction (W): the switch for prediction layer with short cut key W; see gif demo.
Note: When hiding the annotation layer from the layer switches, the user can not make annotations in Annotation Window. When making manual annotation or revising the prediction, the user can use layer switches frequently to compare the difference between prediction/annotation results with the original images.
The "traffic light" status indicators reveal how the program runs in the backend to some extent. The status indicators have green, yellow, and red colors representing Done, Running, and Not available. The green light indicates the related feature/function is ready to use; the yellow light indicates the related feature/function is in the process of running; the red light indicates there is an error happening when running the related feature/function in the backend.
QA could communicate with users through these traffic lights:
- Model: indicates whether the classifier is ready or not. As the user presses the Retrain DL, the Model light turns from green to yellow; the classifier is ready to the user, the Model light turns from yellow to green. If an error happens in the backend when training the model, it will turn "red" to notify the user.
- Superpixel: indicates whether the superpixel segmentation is ready in the backend. See details about superpixel. When opening a new image, the Superpixel light shows yellow and will turn green when the superpixel feature is ready to use.
- Prediction: indicates whether there is a prediction layer ready for the user to modify. When a new Model is ready (turning to green), the prediction will turn to yellow, generating the prediction layer suggested by the new model. A few seconds later, the Prediction turns green, indicating that the new model's annotation suggestion is ready to use.
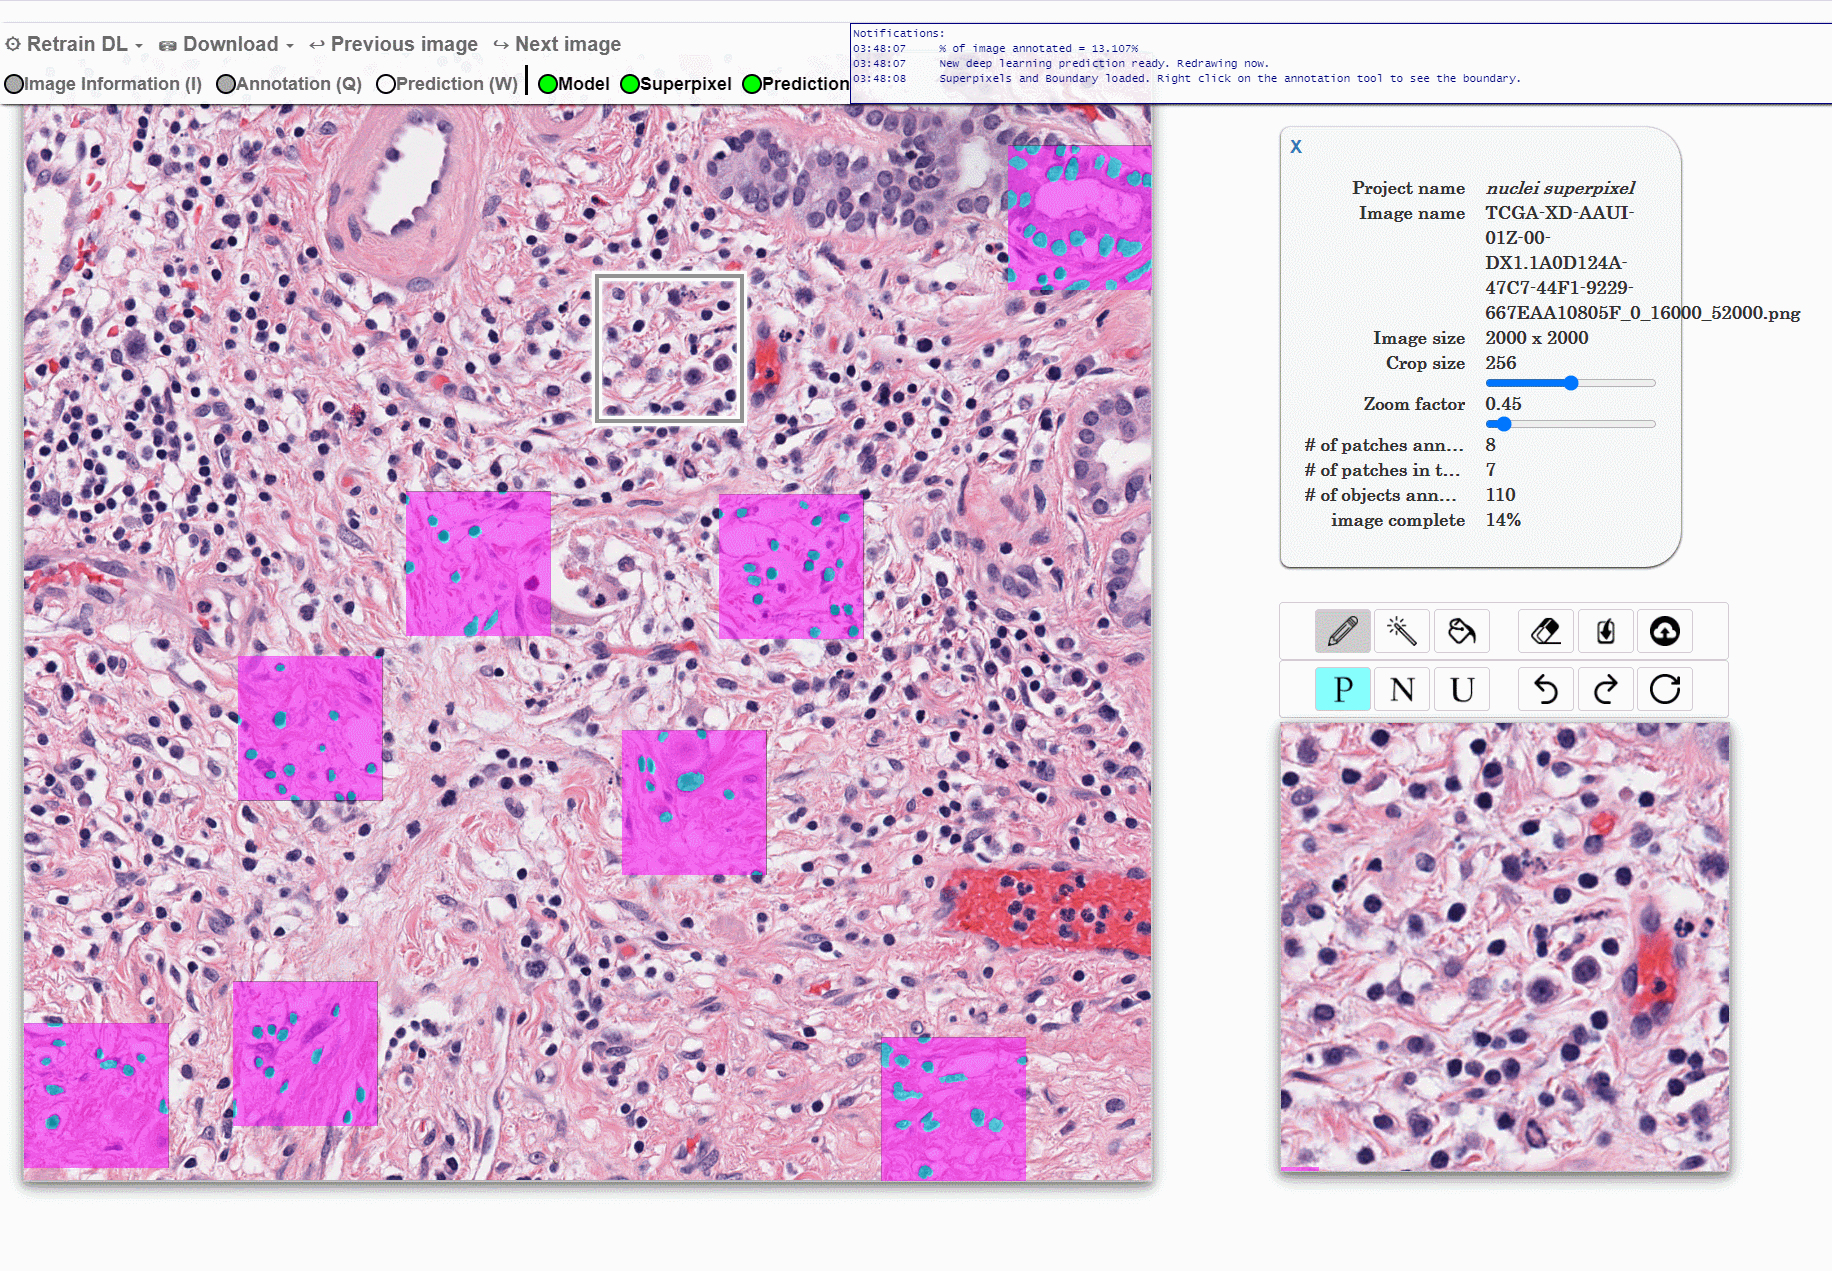
The Information Window contains metadata information for the image tile.
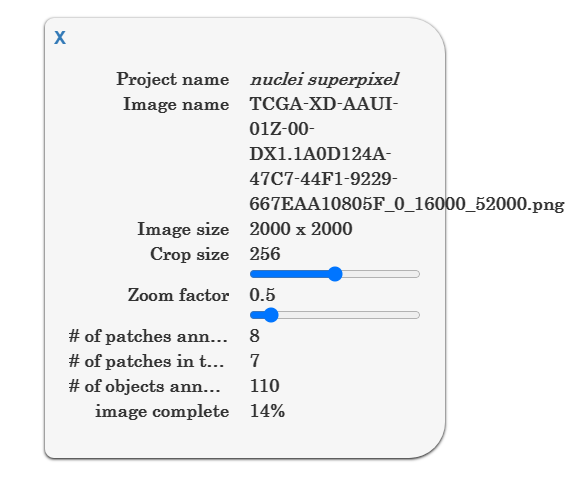
It shows project name, Image name, and Image size. The crop size can adjust the size of the selection rectangle, and the Zoom factor can zoom in/out the annotation page. The user can view the image annotation percentage as well.
The user can toggle the information Window in the layer switches. When the user closes the Information Window with the X, it will appear on the layer switches.
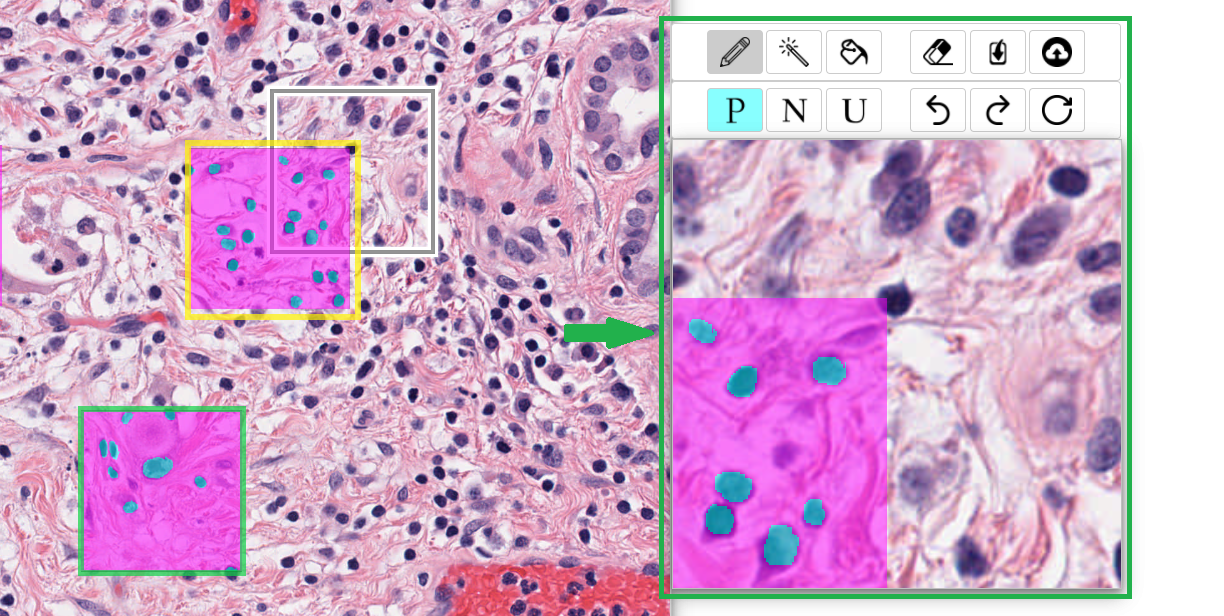
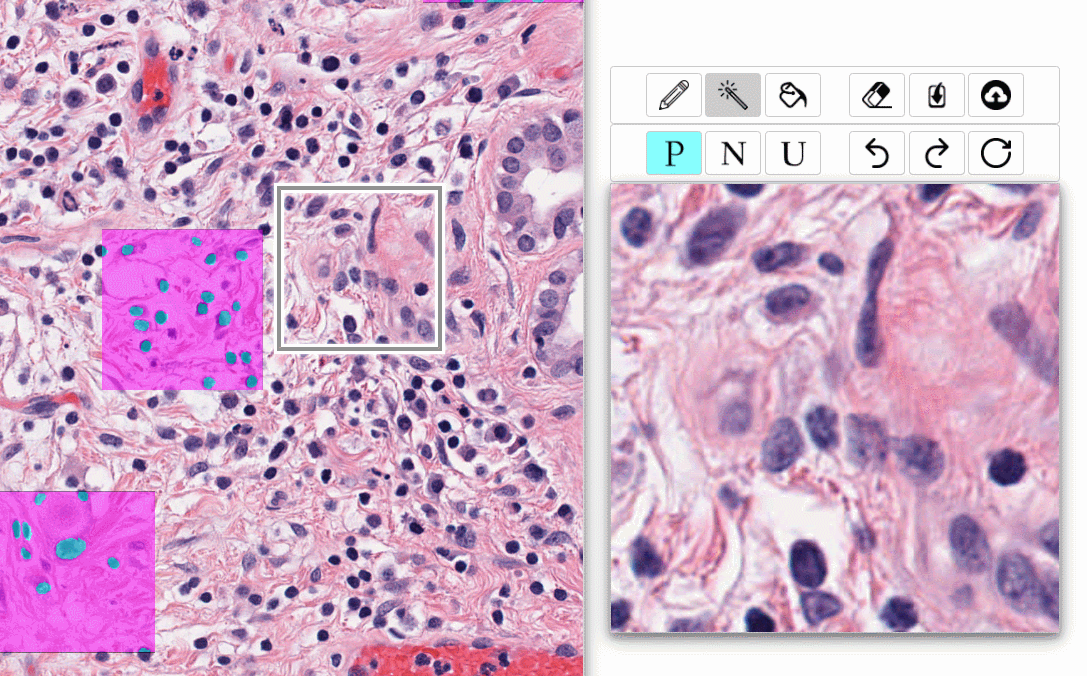
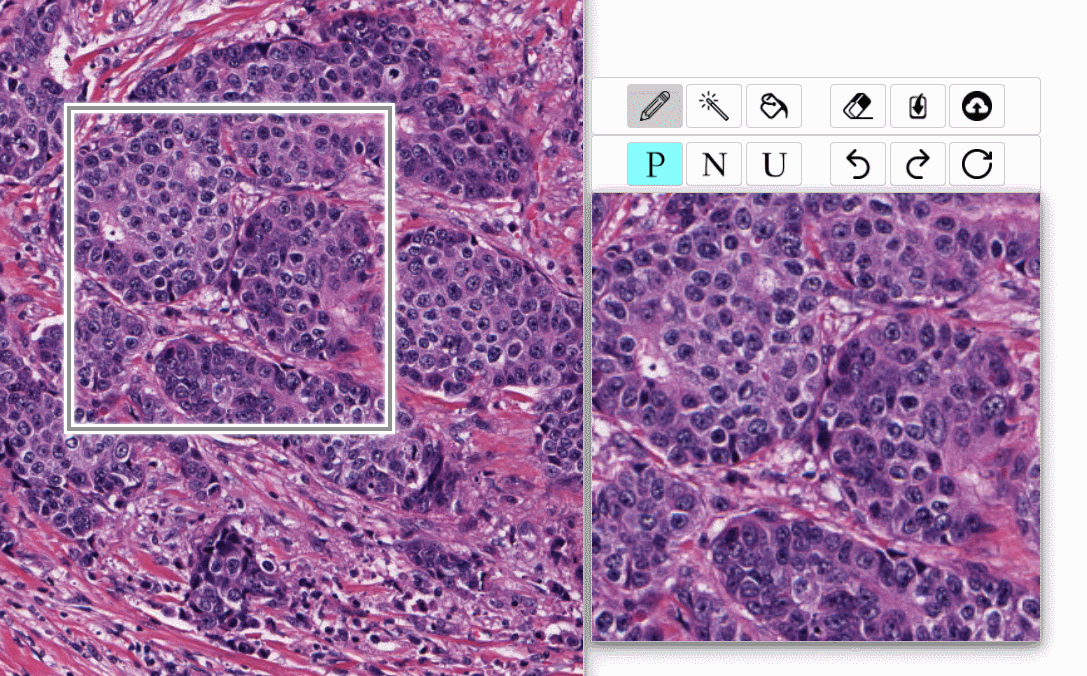
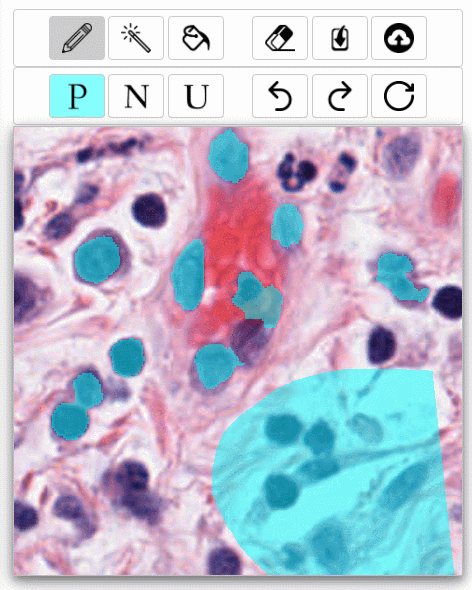
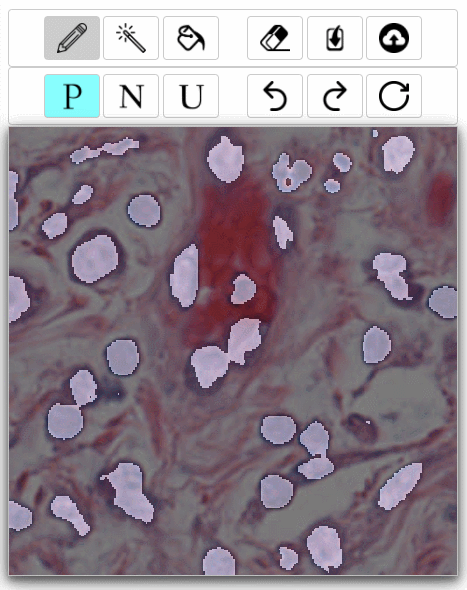
Annotation Window (green rectangle) is where the user makes annotation by adaptively utilizing various annotation tools provided by QA. First, the user selects a square region loaded into the high magnification Annotation Window. The user then annotates positive regions in turquoise and non-target areas in fuchsia using common image markup tools. Training and Testing annotations are outlined with yellow and green color border respectively.
After annotating at least 2 patches (1 Training and 1 Testing), the user can train a DL classifier to generate annotation suggestions in the white overlay. The user may then import the classifier’s suggestions into the annotation window and edit, if needed, before accepting. See demos for these processes here.
The follows are 12 function buttons in Annotation Window with associated hot keys and hyperlinks to detailed introductions: ![]() Freehand (A),
Freehand (A),
![]() Superpixels (S),
Superpixels (S),
![]() Flood fill (D),
Flood fill (D),
![]() Eraser (F),
Eraser (F),
![]() Import DL result into annotator (G),
Import DL result into annotator (G),
![]() Upload complete annotation (H),
Upload complete annotation (H),
![]() Annotate positive region (Z),
Annotate positive region (Z),
![]() Annotate negative region (X),
Annotate negative region (X),
![]() Annotate unknown region (C),
Annotate unknown region (C),
![]() Undo (V),
Undo (V),
![]() Redo (B),
Redo (B),
![]() Reset (N).
Reset (N).
- Freehand (A): in Freehand mode, the user can delineate the boundary of the primitives by moving the mouse
- Superpixels (S): A superpixel is defined as a group of adjacent pixels sharing similar characteristics in terms of chromatic, texture, or deep learned feature values. QA provides Superpixels mode, which enabled one-click selection for a subset of primitives, notably improving annotation efficiency.
In our demo, the Superpixel boundaries can be toggled by right-click.
![]()
- Eraser (F): The user can de-annotated pixels with erasers of different sizes provided in Eraser mode.
- Import DL result into annotator (G): Import button is on the right of Eraser. When the user has trained a DL classifier to generate suggestions for annotations (white overlay), the user may then import the classifier’s suggestions into the annotation window and edit.
- Upload complete annotation (H): The user can upload the annotated patches into training or testing dataset. These datasets will be used for training deep learning (DL) classifiers. See more about Retrain DL here.
- Annotate positive region (Z), Annotate negative region (X), and Annotate Unknown region (C): Under these modes, the user could annotate pixels with different labels. The user annotates regions of interest as positive region, marking non-primitive regions as negative region. QA also provides the option of marking an area as an unknown region when users could not identify a region.
- Undo (V), Redo (B), and Reset (N): QA also keeps track of the user's annotation operations. Therefore, the user could easily Redo, or Undo any annotations if annotating some unintended areas. Also, the user can remove all annotations in the annotation window by the Reset button.
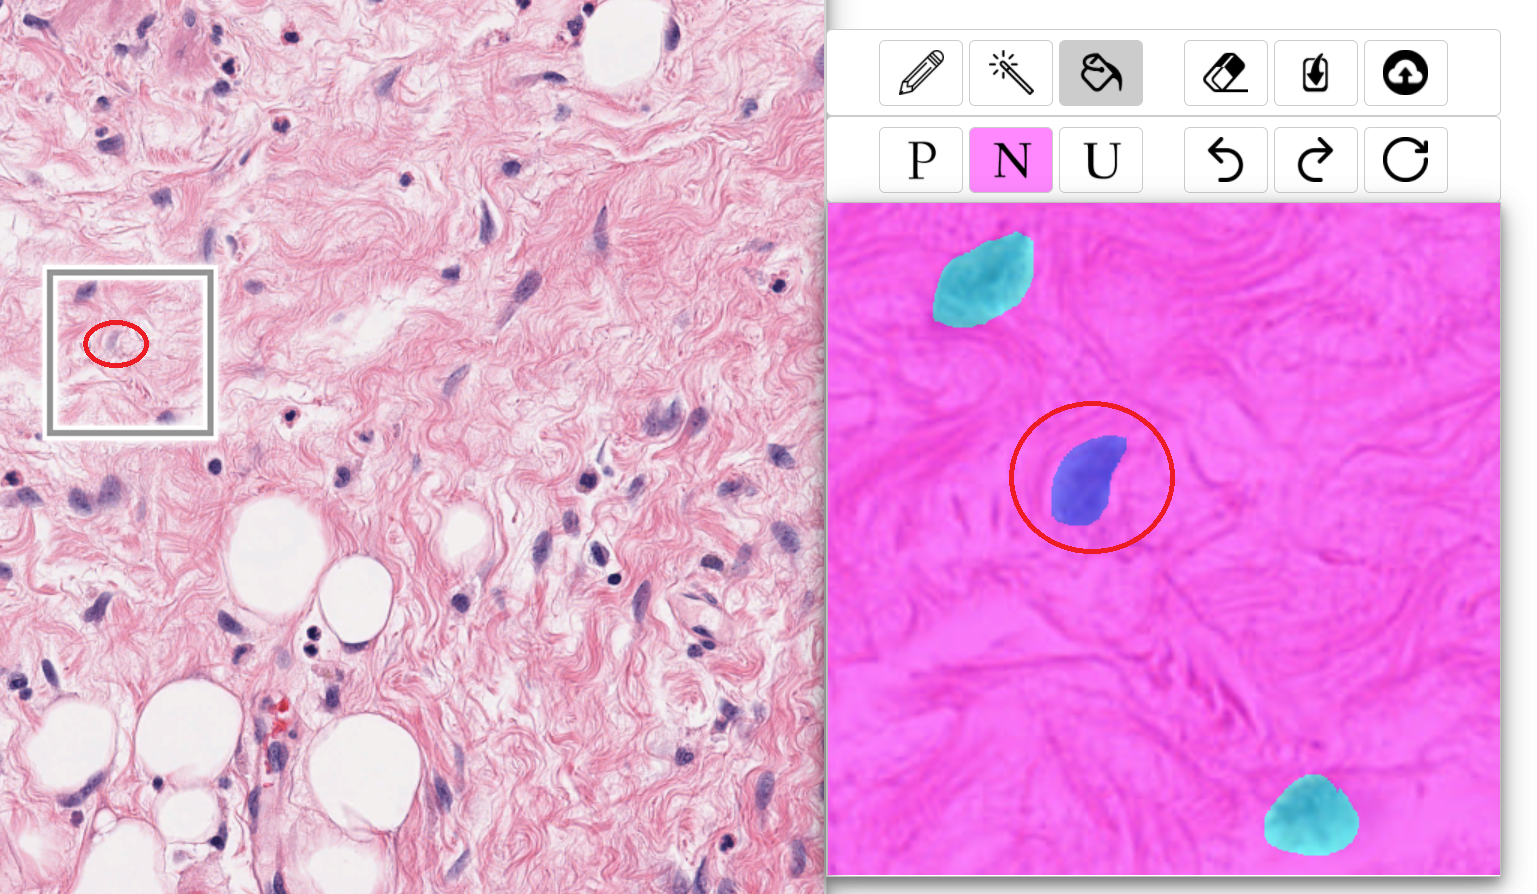
Note: Quick Annotator provide Annotate Unknown region for some uncertain regions. The user could have difficulty deciding the labeling during annotation due to images' quality, users' experience, etc. For an example of nuclei annotations, it may be difficult for a user to decide whether the object in the red circle is a nucleus or not. Thus, the user could annotate this object into unknown to optimize the classifier performance.