-
Notifications
You must be signed in to change notification settings - Fork 344
Multistream Quickstart Guide
Caution
This documentation may no longer be current. Click here to view the updated content on our Developer Portal.
With multistream, developers gain greater flexibility when displaying remote media streams. Instead of receiving a single stream featuring all participants, multistream enables the showcasing of multiple streams simultaneously. This means you can easily view each remote participant's stream individually, enhancing clarity and engagement during collaborative sessions.
This guide provides a quick glimpse into consuming multistream in Webex Meetings using the Webex JavaScript SDK. You'll find code snippets below that can quickly get you up and running.
To work with the multistream feature you'll need to install via npm or yarn or reference via an HTML <script> tag, the Meetings Web SDK version 3.0.0 or higher:
npm install [email protected]yarn add [email protected]<script defer src="https://unpkg.com/[email protected]/umd/webex.min.js"></script>To integrate multistream functionality into your meetings, include the enableMultistream flag within the joinOptions parameter when calling either the meeting.join() or meeting.joinWithMedia() methods:
const joinOptions = {
  enableMultistream: true,
  ...
};

// Use either the join() method:

await meeting.join(joinOptions);

// ...or the joinWithMedia() method:

await meeting.joinWithMedia({joinOptions, mediaOptions});The layout determines how the various streams are positioned and displayed in the user interface. In order to create the layout with remote streams:
-
Create HTML container elements (for example a
<div>) for the video streams:<div id="multistream-remote-video" style="display: flex"> <!-- All the remote videos will render here --> </div>
-
For each streams
-
Create an HTML
<video>element and attach theremoteMedia.stream.// Create an html "video" element and attach the `remoteMedia.stream` function createVideoElement(stream) { const videoElement = document.createElement('video'); videoElement.srcObject = stream; videoElement.height = 480; videoElement.width = 620; videoElement.autoplay = true; videoElement.muted = true; return videoElement; }
-
(Optional) Add elements for name label, overlay and overlay text elements to display participant information on top of the video streams.
-
-
Append all the video elements to the container element.
const remoteVideoContainerElm = document.getElementById('multistream-remote-video');

function updateTheLayout(activeSpeakerVideoElems, memberVideoElems) {
  [...activeSpeakerVideoElems, ...memberVideoElems].forEach((videoElement) => {
    // Append all the video elements to the container element
    remoteVideoContainerElm.appendChild(videoElement);
  });
}
Once you've joined a meeting successfully, the meetings backend will start sending the remote streams which can be received by listening to the following two events:
-
media:remoteAudio:created- For remote audio streams. -
media:remoteVideo:layoutChanged- For remote video streams including active speaker, participants and screen sharing.
You'll need to define HTML elements to which you'll attach the audio streams. For example:
<!-- Audio elements -->
<audio id="multistream-remote-audio-0" class="multistream-remote-audio" autoplay></audio>
<audio id="multistream-remote-audio-1" class="multistream-remote-audio" autoplay></audio>
<audio id="multistream-remote-audio-2" class="multistream-remote-audio" autoplay></audio>To bind the streams to the HTML elements, you can use the following JavaScript snippet:
meeting.on('media:remoteAudio:created', (audioMediaGroup) => {
  audioMediaGroup.getRemoteMedia().forEach((media, index) => {
    document.getElementsByClassName('multistream-remote-audio')[index].srcObject = media.stream;
  });
});Now, let's link all the remote video and screenshare streams here by listening for the media:remoteVideo:layoutChanged event and updating the video elements accordingly:
const remoteScreenshareElm = document.getElementById('remote-screenshare');

const activeSpeakerVideoElems = [];
const memberVideoElems = [];

meeting.on('media:remoteVideo:layoutChanged', ({
  layoutId, activeSpeakerVideoPanes, memberVideoPanes, screenShareVideo
}) => {
  for (const [groupId, group] of Object.entries(activeSpeakerVideoPanes)) {
    group.getRemoteMedia().forEach((remoteMedia, index) => {
      // Attach the "remoteMedia.stream" of active speakers to video elements
      if(remoteMedia.sourceState === 'live') {
        activeSpeakerVideoElems.push(createVideoElement(remoteMedia.stream));
      }
    });
  }

  // The Staged layout has memberVideoPanes defined. Read through the comprehensive guide for more details.
  for (const [paneId, remoteMedia] of Object.entries(memberVideoPanes)) {
    // Attach the "remoteMedia.stream" of member videos to video elements
    if(remoteMedia.sourceState === 'live') {
      memberVideoElems.push(createVideoElement(remoteMedia.stream));
    }
  }

  updateTheLayout(activeSpeakerVideoElems, memberVideoElems);

  if (screenShareVideo) {
    // Attach the "screenShareVideo.stream" to a video element
    remoteScreenshareElm.srcObject = screenShareVideo.stream;
  }
});
Now that you've witnessed multistream in action, for a more thorough understanding and access to all available features, see the Multistream Comprehensive Guide.
To experiment with more features of multistream, see the Meeting Samples App.
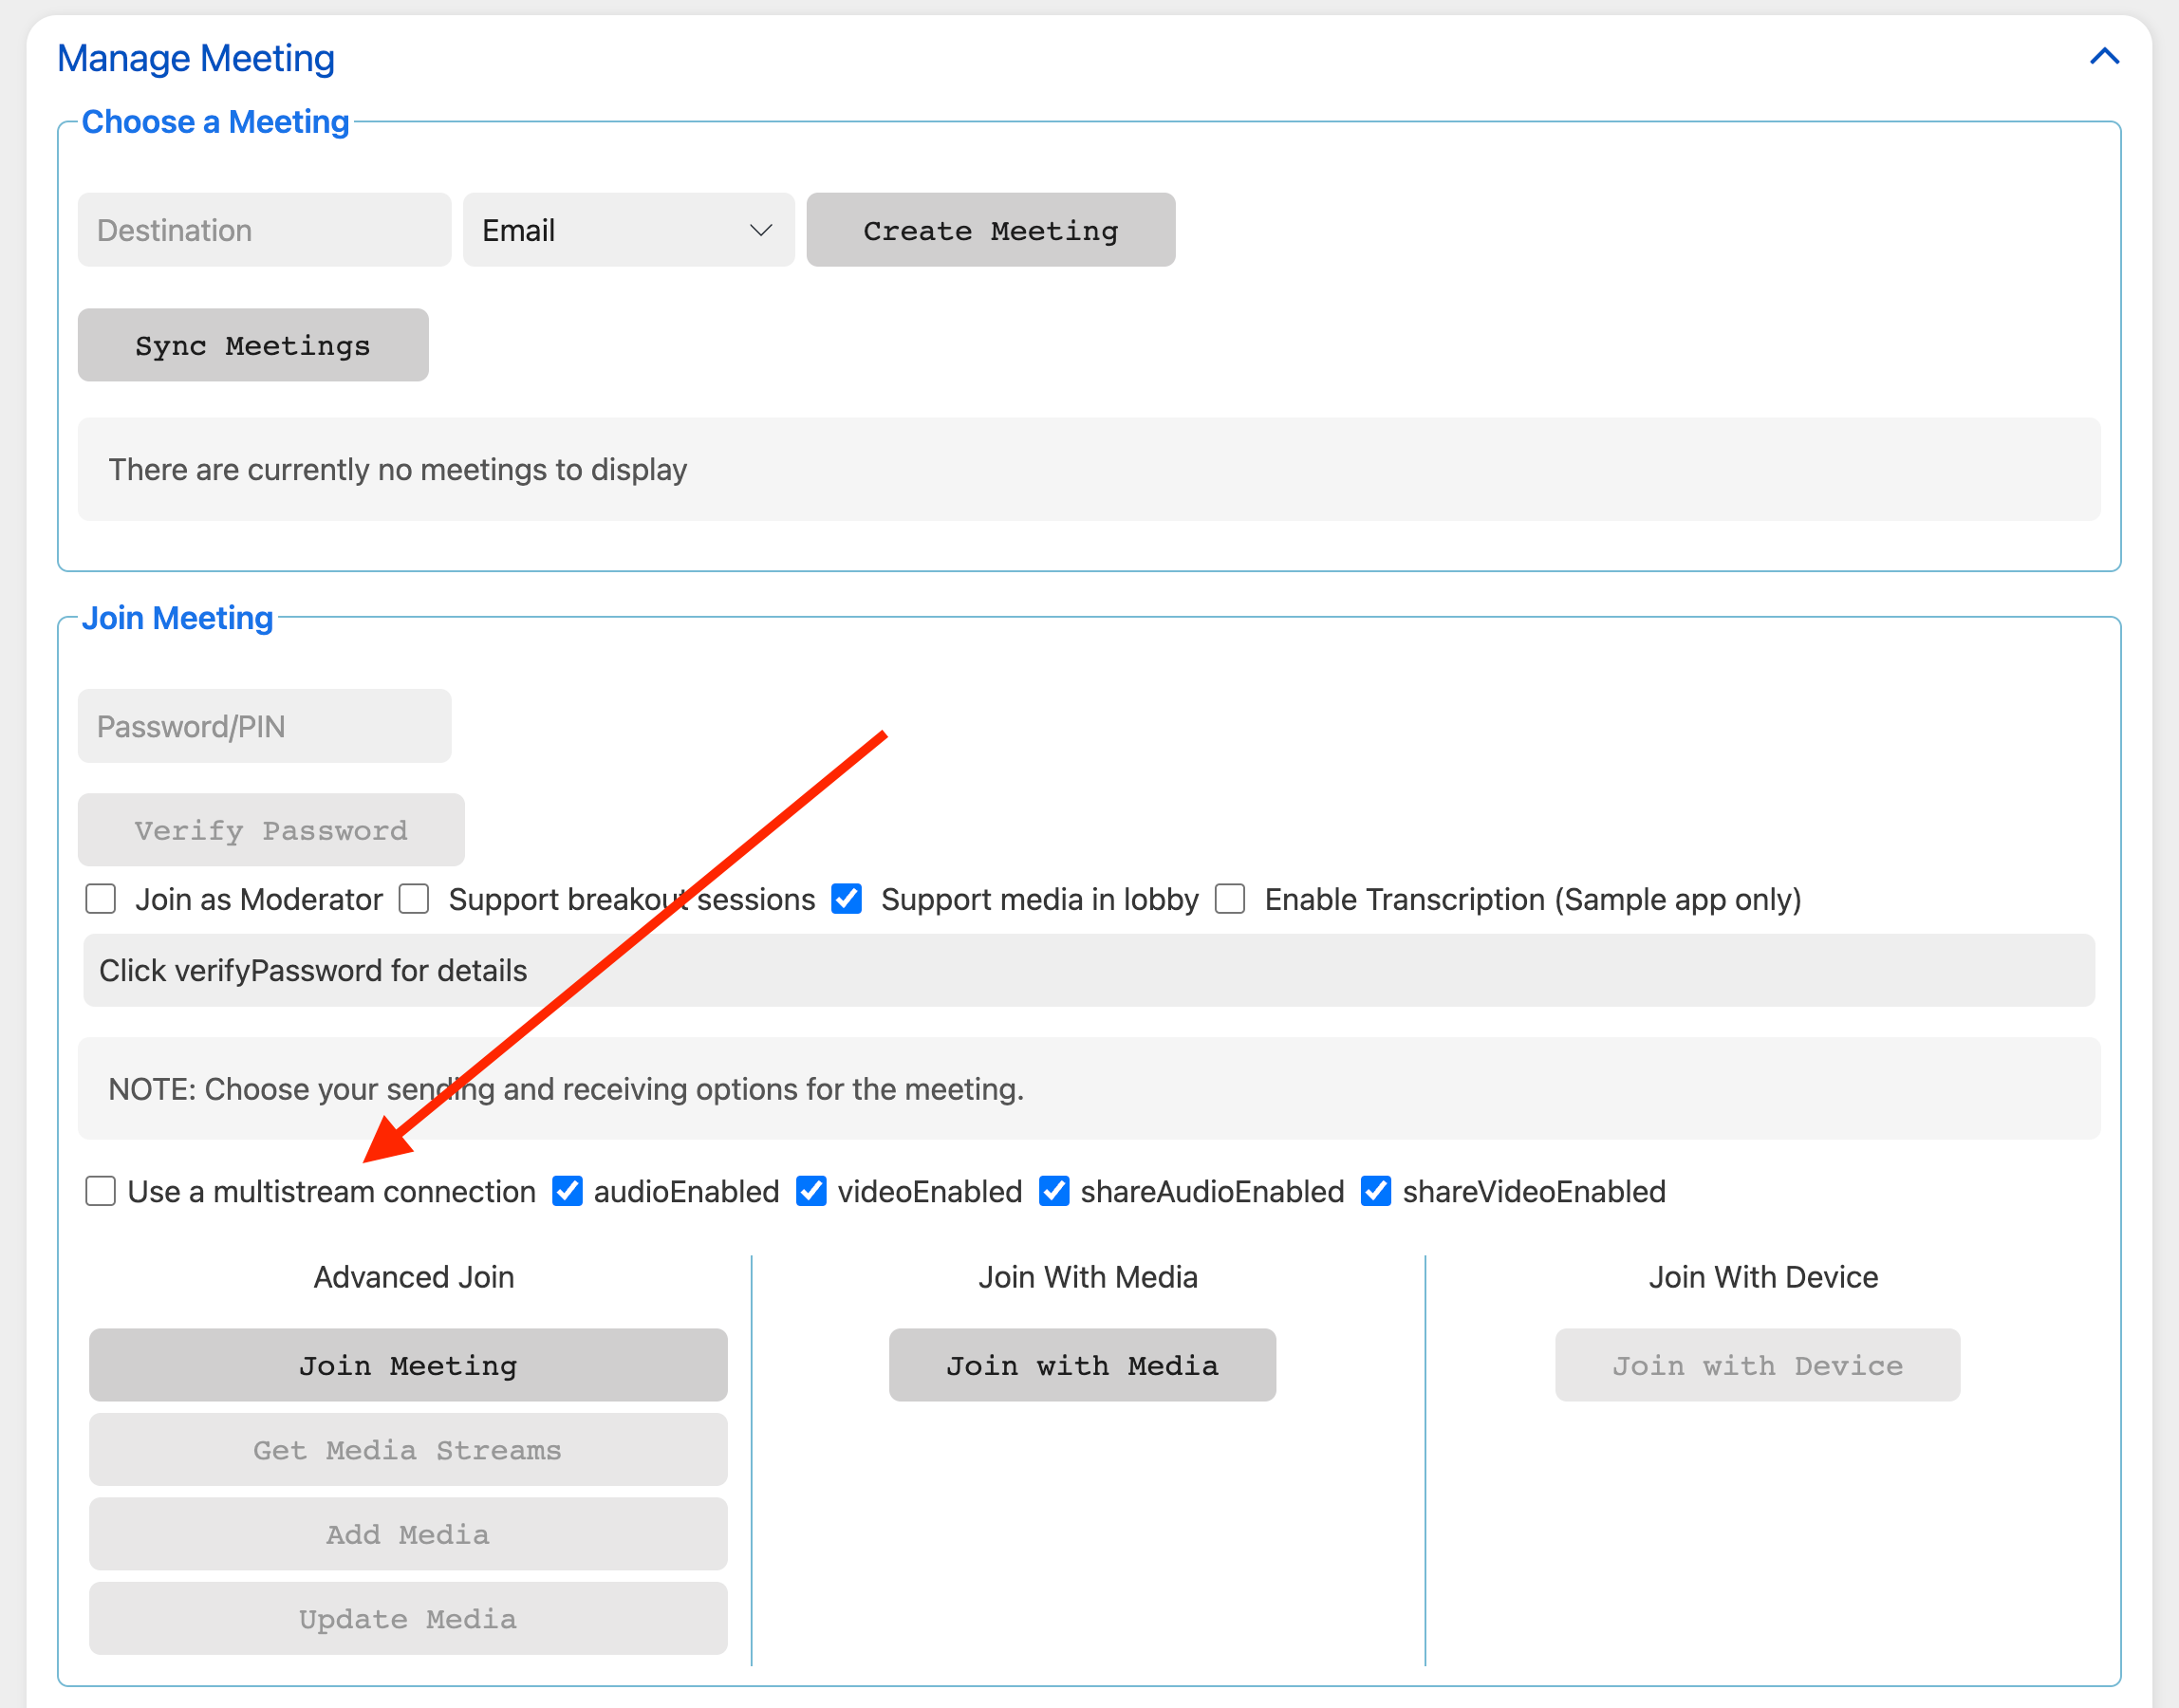
When using the sample app, in the Manage Meeting section, select the checkbox labeled Use a multistream connection (which automatically sets enableMultistream to true and passes it to the join() methods) before clicking on Join Meeting or Join with Media:
Enabling the Use a multistream connection replaces Remote Video fieldset with Multistream Remote Videos under the Streams section.
Caution
- Introducing the Webex Web Calling SDK
- Core Concepts
- Quickstart guide
- Authorization
- Basic Features
- Advanced Features
- Introduction
- Quickstart Guide
- Basic Features
- Advanced Features
- Multistream
- Migrating SDK version 1 or 2 to version 3
