The Store Sitemap app is responsible for automatically generating a sitemap.xml file of your store website.
Once the app is deployed and installed in your account, your store will benefit from having a sitemap, which can lead to increased visibility of your site in search tools, such as Google.
For more information about generating a sitemap, check the following sections.
This app is available to stores using [email protected] or a later version of the Edition App. To check which Edition App is installed on your account, run vtex edition get. If it is an older Edition, please open a ticket to VTEX Support asking for the installation of the [email protected] Edition App or a newer version.
Before generating your store's sitemap, you might want to adjust if products, navigation, app and/or custom routes will be included in it or not. If that is the case, check the Advanced Configuration section for more information.
-
Using your terminal and the VTEX IO CLI, log into your account.
-
Run
vtex use {workspaceName} --productionto use a production workspace or create a production workspace from scratch.⚠️ Remember to replace the values between the curly brackets according to your scenario. -
Run
vtex install [email protected]to install the Sitemap app.ℹ️ If you are using
[email protected], skip step 3, as the[email protected]app is installed by default in this version. Check out our Edition App documentation to know more about its different versions. -
Run
vtex install [email protected]to install the GraphQL admin IDE. -
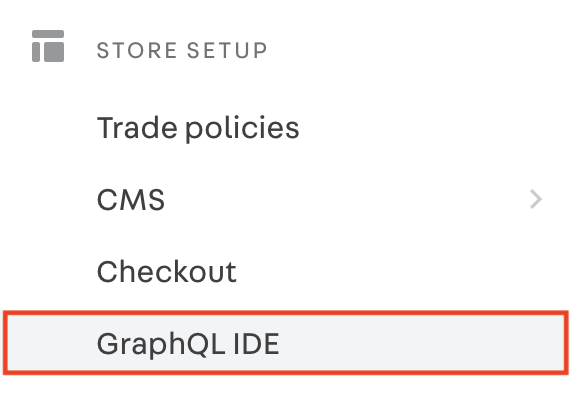
In your browser, access the account's administrative panel and select the GraphQL IDE.
-
From the dropdown list, choose the
[email protected]app. -
If this is not the first time you are generating your store's sitemap or if your store's routes did not suffer any changes since the last time you generated your store's sitemap, go to step 8. Otherwise, run the following query:
{
  bootstrap {
    brands
    categories
  }
}
The expected response body is
{ "data":{ "bootstrap": { "brands": true, "categories": true } } } -
Now, from the GraphQL IDE dropdown list, choose the
[email protected]app. -
Run the following query:
{
  generateSitemap
}
The expected response body is
{
  "data": {
    "generateSitemap": true
  }
}
This means your sitemap will be available in some minutes, after being processed and saved on our database.
ℹ️ Keep in mind that the time taken to generate a sitemap is proportional to the number of products. For example, the average time to generate a sitemap for a store with 60k products is 30 minutes. For 5k products, the duration should be about 5 minutes.
If you attempt to send a new request to the Sitemap API while your store's sitemap generation is already taking place, the following message will be displayed:
Sitemap generation already in place
Next generation available: <End-date>
To make a force restart, add the
forceargument to the query, as in:generateSitemap(force: true). But, be aware that this will cancel the previous process. -
Check the sitemap generated for the current workspace you are working on by accessing
https://{workspace}--{account}.myvtex.com/sitemap.xmlon your browser. Notice that if your store is a cross-border one, you will first see an index containing a website's sitemap for each locale.ℹ️ Notice that different
.xmlfiles are generated according to their entity type (product, category, subcategory, user routes, brand and department) and that each.xmlfile supports a maximum of 5k routes. -
If you are happy with the results, run
vtex promoteto promote your workspace and to have your sitemap in your master workspace.Once you promoted your workspace, no further actions are needed on your part: you are ready to check out your store's sitemap by accessing
https://{account}.myvtex.com/sitemap.xmlon your browser.
You can manage if you want to include product, navigation, apps and/or routes containing your specific term in your sitemap or not. To do that, check the following step by step.
-
In your browser, access the account's Admin in which you are working using the Production workspace used in the step 2 of the Configuration section (
{workspace}--{account}.myvtex.com/admin). -
Go to Account settings > Apps > My apps and search for Sitemap app.
-
Enable or disable product, navigation, app or routes containing your specific term according to your scenario.

If you have custom pages configured in a routes.json file and want them to be included in your store's sitemap, add isSitemapEntry=true as a prop of the routes you want to include in the sitemap. Take the following example:
{
    "store.custom#about-us": {
      "path": "/about-us",
      "isSitemapEntry": true
  }
}
Once everything is set up, go back to the step 4 of the Configuration section.
To add custom routes created by an app (for example, the ones created by the store-locator) to your store's sitemap, the app must respond to an XML file containing a list of the routes created by that app. Lastly, you must include the path to the XML file that your app responds to as an index of your store's sitemap.
For implementation details, check the following step by step.
-
Create or modify your app to respond to the following route
/sitemap/{index-name}.xmland to return an XML file containing the data that you want the search engine (e.g., Google) to index. Remember to replace the values between the curly brackets according to your scenario.ℹ️ We recommend that you use a pre-created XML file. Otherwise, the XML file will be built from scratch for every request, consuming more time to complete the task.
-
Publish and install your app in a production workspace.
-
Now, to make your index available in the sitemap root file (
/sitemap.xml), access your account's admin, relative to the workspace you're working on, and select the GraphQL IDE. -
From the dropdown list, choose the
[email protected]app and perform the following mutation, adapting it to your scenario:mutation { saveIndex(index: "{index-name}") }
ℹ️ If your store is a cross-border one, note that the
saveIndexmutation also accepts thebindingid as an argument. That means that by specifying thebindingid, you can add your new index to the sitemap of the desired binding. If thebindingid is not specified, the mutation will consider the store's default binding. -
Check the updated sitemap for the current workspace you are working on by accessing
https://{workspace}--{account}.myvtex.com/sitemap.xmlin your browser. -
If you are happy with the results, run
vtex promoteto promote your workspace and to have your sitemap in your master workspace.
If it is ever desired to remove a custom route, you may execute the following mutation, which takes the same arguments as saveIndex:
mutation {
   deleteIndex(index: "{index-name}")
}