-
Notifications
You must be signed in to change notification settings - Fork 3
Step by Step Porting Guide for Murasaki
On this page, we explain how to install the Murasaki library to your Nucleo based project.
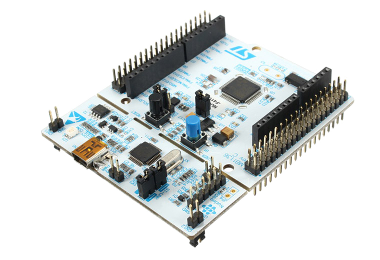
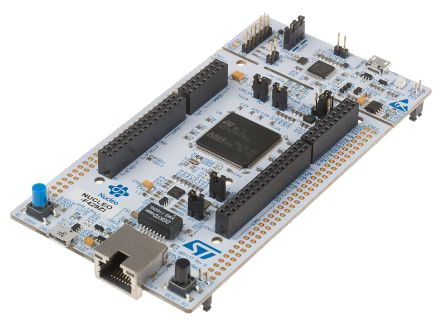
- Prerequisite
- Code Generation by STM32 CubeIDE
- Clone and install Murasaki
- Nucleo 64 Specific work
- Test the program
The followings are the test environment of the procedure on this page.
- Ubuntu 16.04 LTS / 18.04 LTS ( Windows 10 WSL is OK )
- STM32CubeIDE 1.3.0
We use STM32 Cube IDE to generate an application skeleton. The following are the procedure to generate.
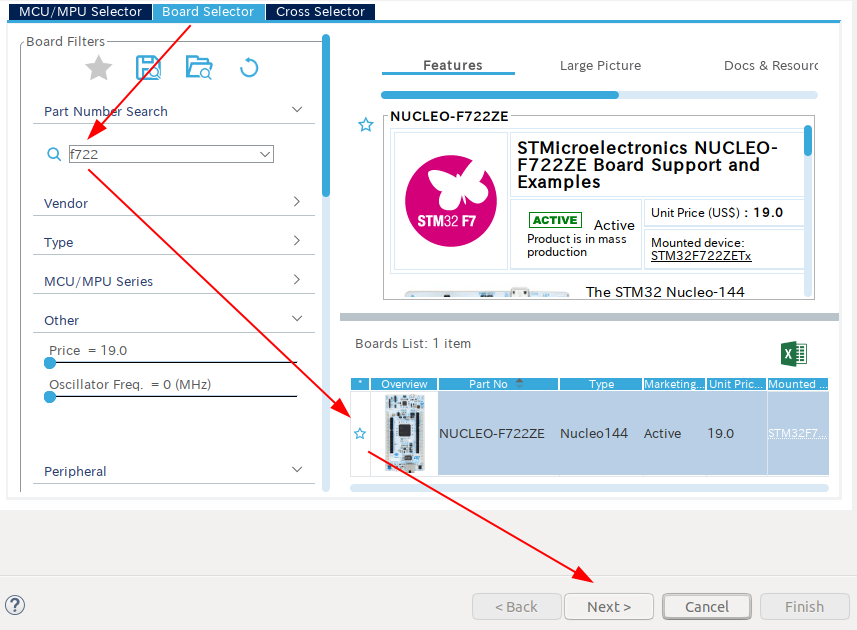
At first, create a project by CubeIDE. You can search the Nucleo board name incrementally.
- Menu -> File -> New -> STM32 Project
- Select a target board
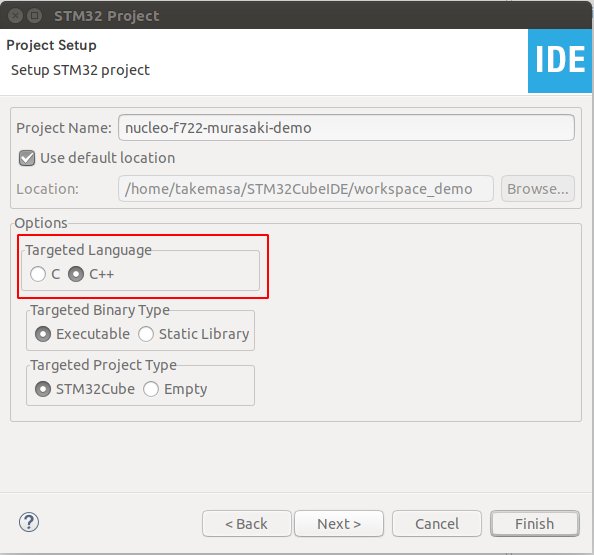
The Murasaki library is a C++ class collection. We have to choose C++ as a project language.
- Select C++ as the project type.
- Click Finish to generate a project.
- The configurator automatically starts
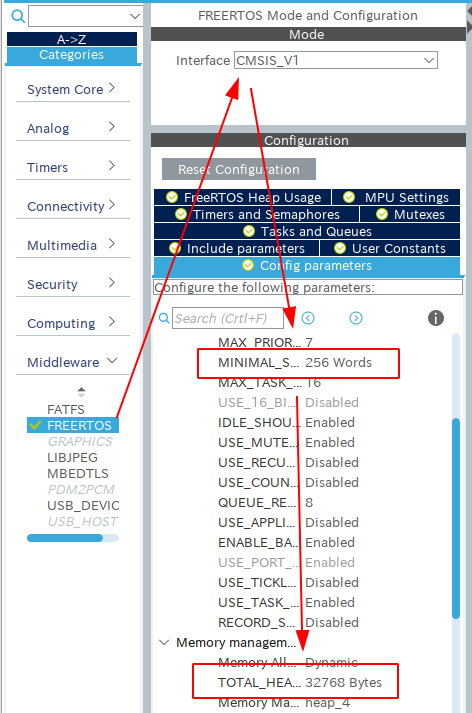
The Murasaki library utilizes the FreeRTOS. Using RTOS is not an option but essential.
- Open the Middleware group
- Click FreeRTOS
- Choose CMSIS_V1 as an interface.
- Set the memory size
- The min Stack Size: 256
- The heap size: larger than 16kB
The task stack size depends on your algorithm in the task. For the LED blinking and message output by printf, 256byte is enough.
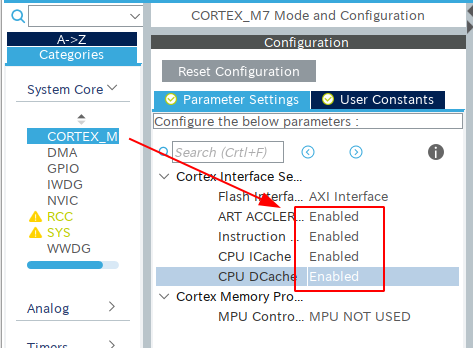
CORTEX-M7 core has several mechanisms to accelerate memory access. This configuration is required only for Cortex-M7. And sometimes it's different between the CORTEX-M7 based microprocessor.
- Open System Core.
- Click Cortex-M7.
- Open Cortex Interface Settings.
- Enable all features.
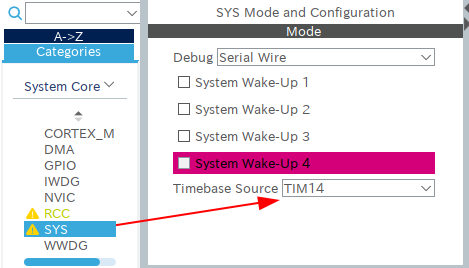
The default time base of the STM32 Cube HAL is SYSTICK. But the SYSTICK timer is used by FreeRTOS. To avoid trouble, we have to change the timer for the time base.
- Open System Core.
- Click SYS.
- Choose TIMxx as Timebase Source.
- You may want to use the largest xx (ex: TIM14).
- FreeRTOS occupy SYSTICK. This time base for HAL should not be SYSTICK.
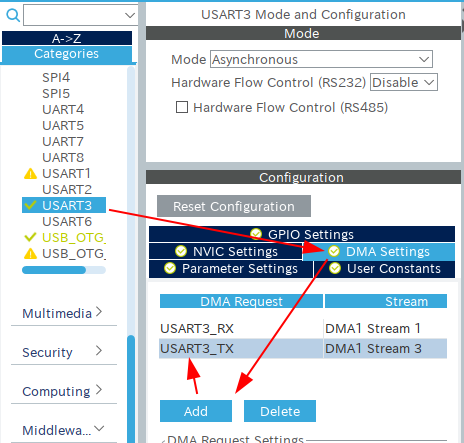
The UART class of the Murasaki library uses DMA. Thus, Configuring the DMA is essential. The different class has their own DMA usage. See the API documentation of the Murasaki.
- Click UART3 ( UART2 for Nucleo 64)
- Select DMA Settings
- Add DMA and set it as TX
- Add DMA and set it as RX
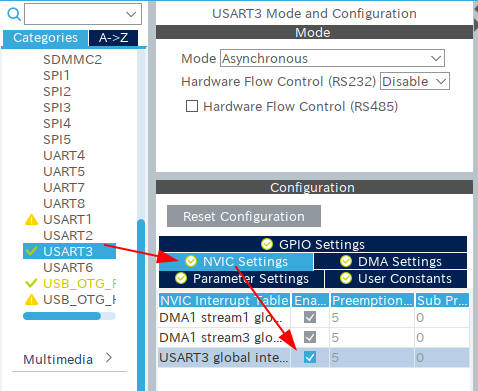
The UART class of the Murasaki library uses interrupt. Thus, enabling the interrupt is essential.
- Select NVIC Settings
- Check UARTx Global interrupt
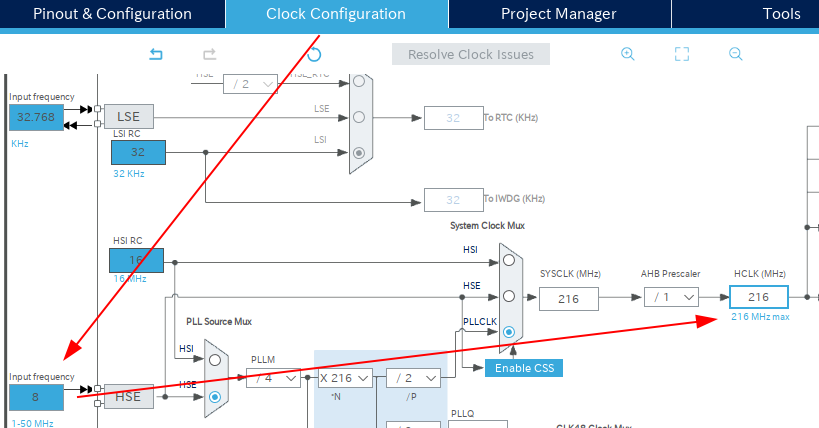
The Firmware for Nucleo F722 has a bug on the clock configuration. We have to fix it before generating code.
- Select Clock configuration
- Change Input Frequency to 8Mhz
- Change HCLK to 216MHz
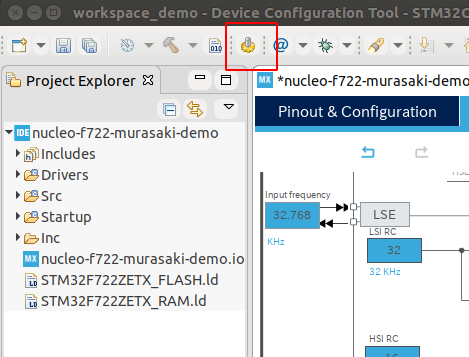
- Click the gear icon to generate.
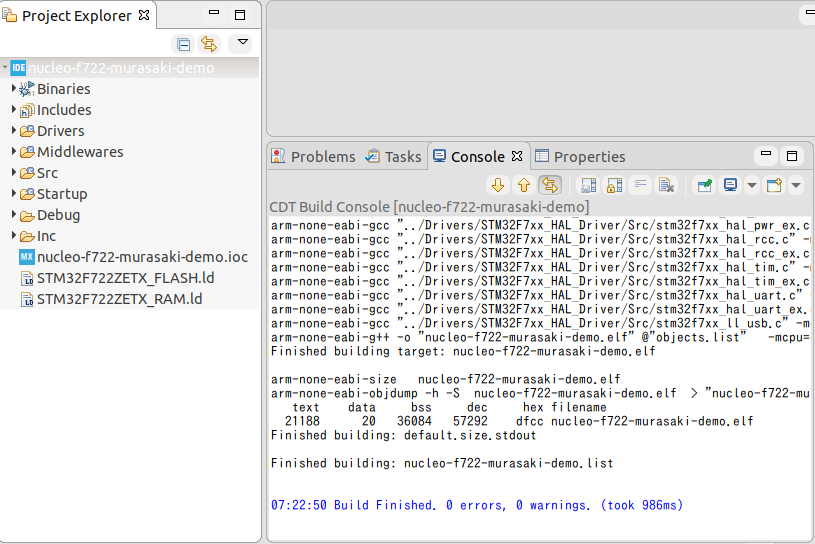
Once the code is generated, you can build it. Build it for sure.
- Click the project.
- Ctrl-B to build
In this section, we clone the Murasaki repository.
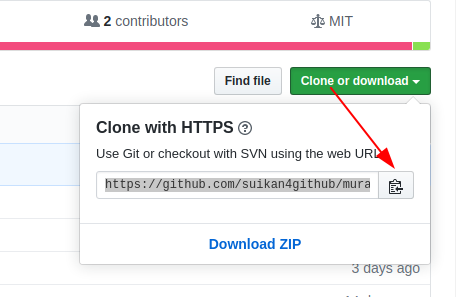
First, open the Murasaki project and get the project repository address. Note that we recommend you get the URL of the HTTPS protocol.
- open Murasaki project in the GitHub
- Click Clone or download
- Copy the URL
https://github.com/suikan4github/murasaki
- Open the shell window
- Go to the project directory
- Run following command :
git clone URL-of-the-repository
If you are using Windows 10 command line, run following command (Assuming the Ubuntu 16.04 or 18.04 is installed on the WSL) :
wsl git clone URL-of-the-repository

The installer copies the template of the code to the appropriate directory, and then, insert the hook in the existing code to allow to run the Murasaki application.
- Run the following command
cd murasaki
./install
If you are using Windows 10 command line, run following command (Assuming the Ubuntu 16.04 or 18.04 is installed on the WSL) :
cd murasaki
wsl ./install
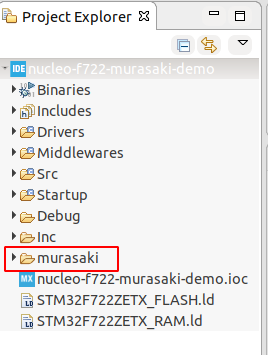
The installation is done in the command-line shell, to reflect the result, we have to refresh the IDE.
- Go back to the CubeIDE
- Click the project
- Type F5 to refresh.
- The Murasaki directory appears.
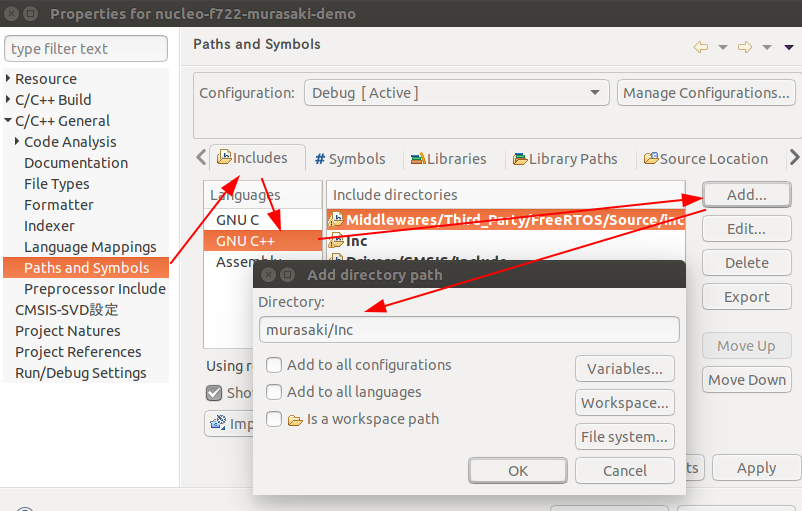
We have to add the include directory to the project property because the Murasaki include directory is not in the existing include path, by default.
- Open the Project Properties
- C/C++ General -> Paths and Symbols -> Includes -> GNU C++
- Click Add button
- Add "murasaki/Inc"
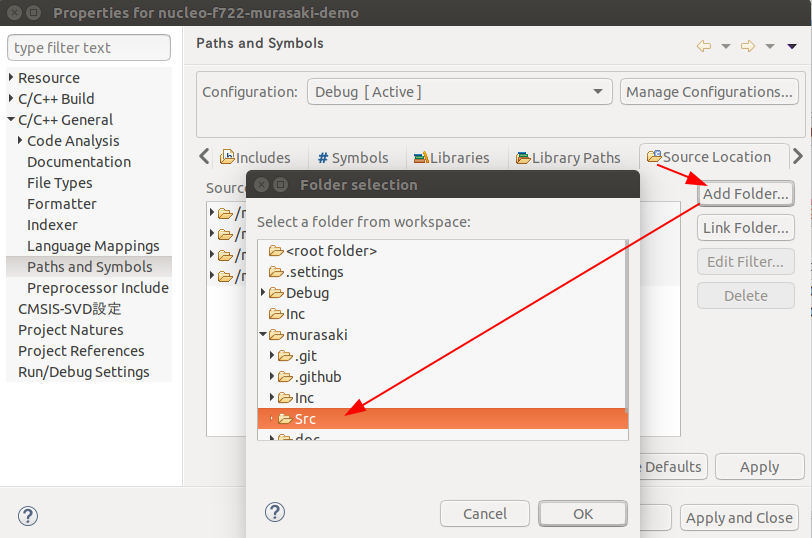
Same as the include path, we have to add a source path.
- In the Paths and Symbols.
- Click the Source Location tab.
- Click Add Folder... button.
- Choose murasaki/Src.
- Click OK
- Close Project Properties.
- Type F5 to build.
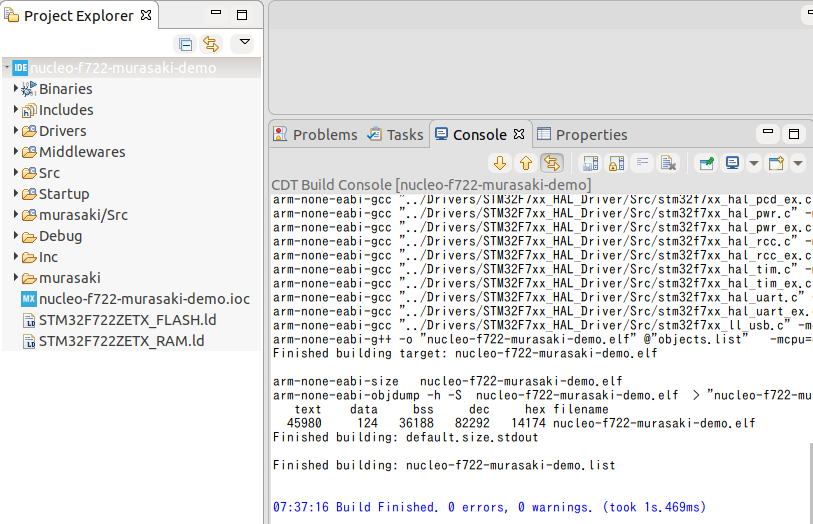
- Build without problem (Except Nucleo 64)
Nucleo 64 series are using different UART and LED port compared to the Nucleo 144.
Nucleo 144
- UART3 for USB serial.
- LD2 for status.
Nucleo 64
- UART2/3 for USB serial
- LD2/3/4 for status.
- Check the appropriate UART number by Nucleo Document.
- Confirm the device handle name ( huart# ) in main.c.
- Open Src/murasaki_platform.cpp.
- Substitute all UART3 with the console UART.
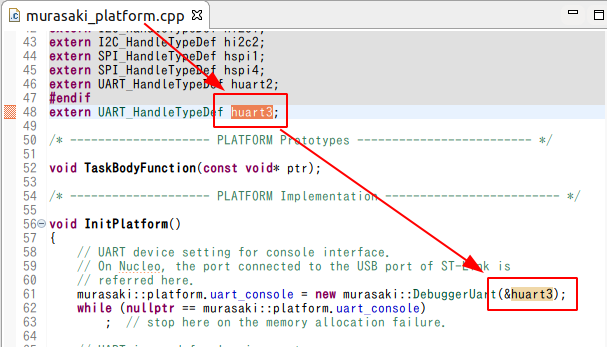
- In Src/murasaki_platform.cpp.
- Substitute all LD2 with LD3 ( or LD4 ).
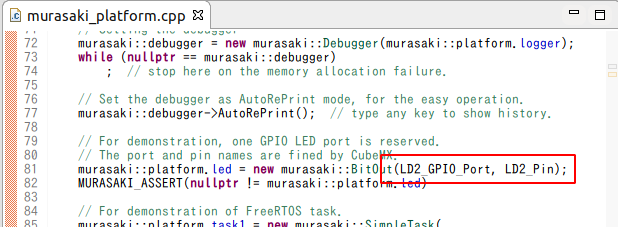
- Save the file.
- Choose the project.
- Type F5 to build.
- Build without problem (Except Nucleo 64)

- Choose the project
- Debug As STM32 MCU C/C++ Application
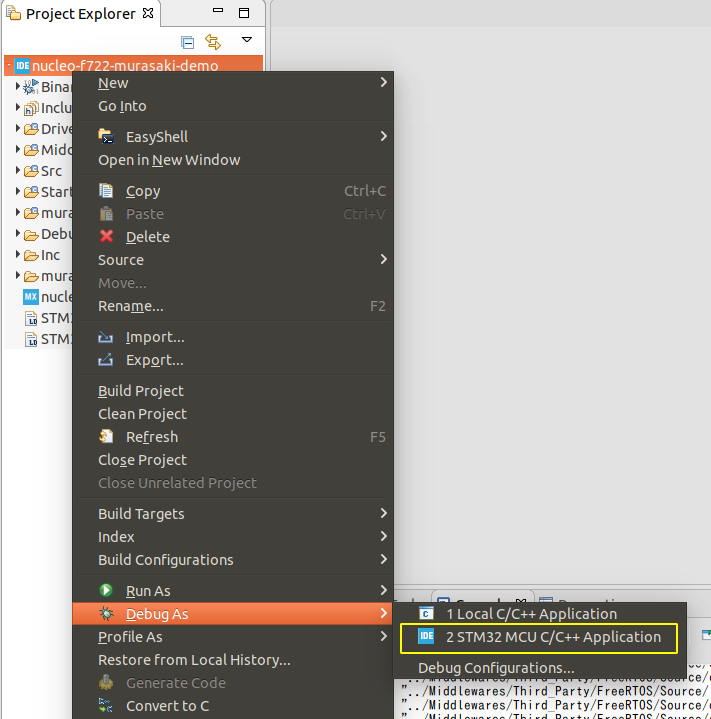
- Just confirmation,
- Nothing to do.
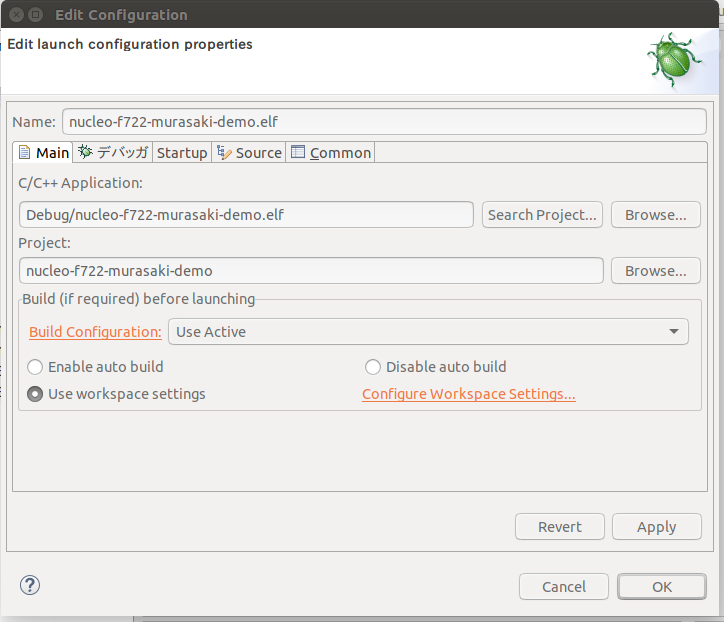
- Wait a second until the Debugger becomes ready.
- Then, click the Run button.
- You must see the LD blinks
- LD2: Nucleo 144
- LD2, 3 or 4: Nucleo 64

Murasaki Project