The second project of the Software Engineering immersive course at General Assembly London was a React project. We had to build a React app that used an external API.
- Consume a public API – this could be anything but it must make sense for your project.
- Have several components.
- Include wireframes - that you designed before building the app.
- The app can have a router - with several "pages".
- Have a visually impressive design.
- Be deployed online and accessible to the public.
This was a pair project with Eunyeong Jeong and the timeframe was roughly 36 hours.
Planning:
- Figma
Front-end:
- HTML5
- CSS3
- SASS
- JavaScript ES6+
- React.js
- VSCode
- Bootstrap
- Insomnia
- Google Fonts
- Git & GitHub
- Clone or download the repo
npm installfor installing the packagesnpm run startfor opening the local host on the browser
Before planning, my teammate and I had to find an open API. We had a chat about what we liked and what we were interested in. We both picked art and the next step was to start looking for an open art API. The Harvard Art Museum has an open API and we decided to proceed with this one. The wireframe was done in Figma to have an overview of the project and to decide where to place all the elements.
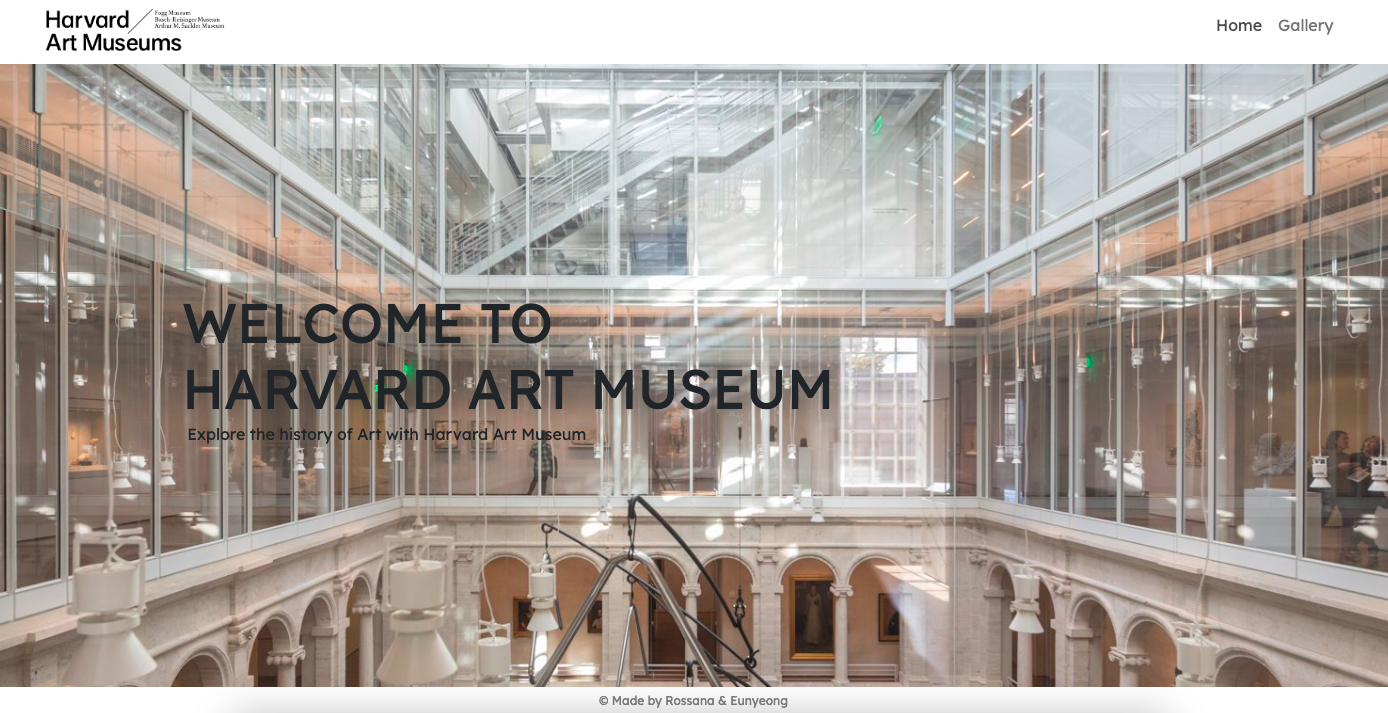
The application would start with a home page with the ‘Welcome’. We decided to create the navbar with a logo on the left hand side and on the right hand side the page Gallery, which will show all the paintings and the Search where the user will be able to type the name of the artist and find just his/her artwork. When using the application on a small screen or mobile device, Gallery and Search would become a drop down instead.
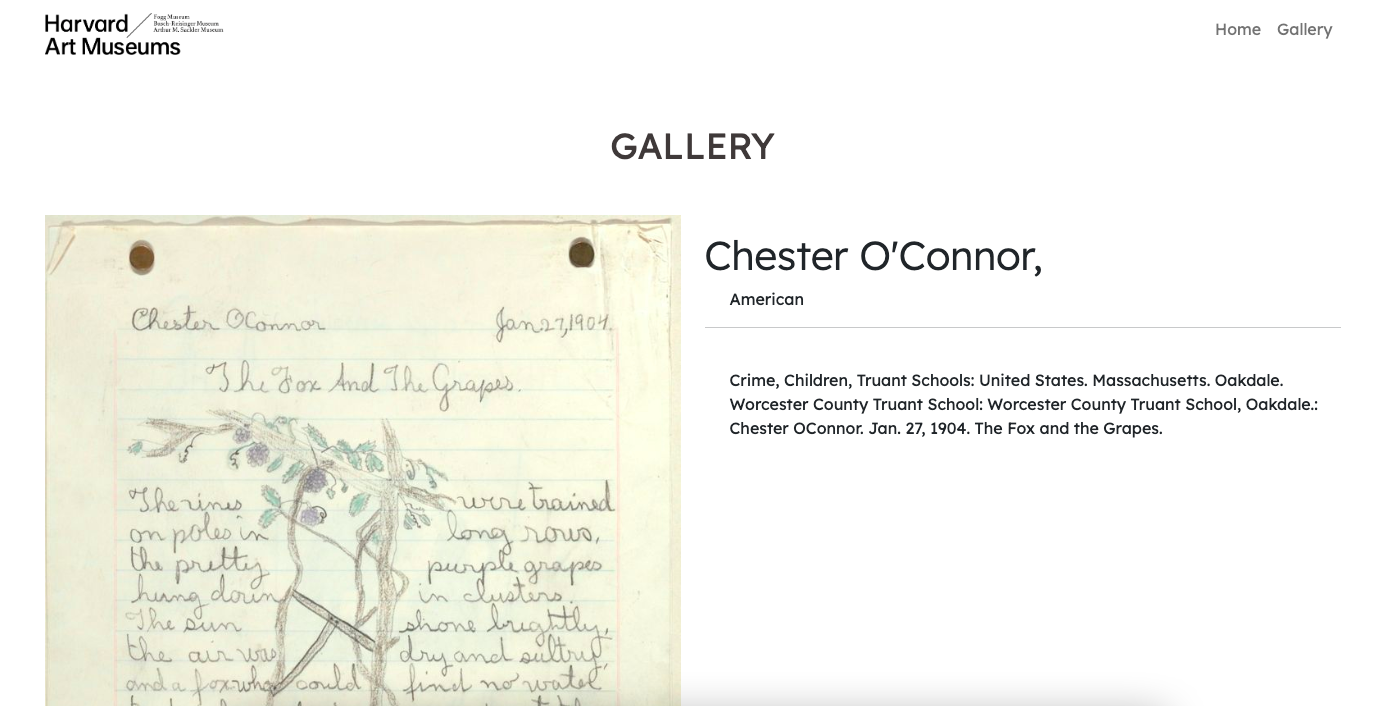
Gallery Single means that when clicking on the single painting it will show only the painting that the user clicked on, provide more information on the artist, display date and description of the painting. On this page, as per wireframe, we were still unsure whether placing the painting and the information vertically or horizontally. Every page was built using Bootstrap.
From the beginning of the project my teammate showed a very big interest in styling. Therefore, we came to the conclusion that she was going to look after CSS and I was going to look after React. I created a plan to follow and once I finished one component, I was going to inform my teammate, so she could style it. Plan for React:
- Create all the folders and components. Import them in
App.jsand create all the routes - Consume the API and get familiar with the data
- NavBar
- HomePage
- Gallery Index
- Gallery Single
Final project:
- I created all the folders and components inside the folder src → components. This may sound like something not very important but it is if you are an organised person. The second step was to import the components in
App.js.
- In order to request the correct data it is important to read through the documentation, in this particular scenario I worked with the Harvard Art Museum documentation API. I spent some time testing the URLs. This was done in Insomnia as well. In the function below I fetched the data through an
axios.get, which is a popular JavaScript library that is used to make HTTP requests from a web browser or a Node.js server. - Axios is commonly used in web development when interacting with APIs, fetching data from servers and sending data to servers. It supports various features such as handling requests and response headers, intercepting requests and responses, and handling errors in a straightforward manner.
- In the code below, Axios is used to send a GET request to the Harvard Art Museums API and retrieve art data. It simplifies the process of making the API request by providing a convenient
get()method. - Once the request was working, I started getting familiar with the data and started testing on how I could manipulate the data that I needed.
useEffect(() => {
    const getArt = async () => {
      try {
        const { data } = await axios.get(`https://api.harvardartmuseums.org/object?apikey=${process.env.REACT_APP_API_KEY}&size=50`)
        setArt(data.records)
        console.log(data.records)
      } catch (err) {
        //console.log(err)
        setError(err.message)
      }
    }
    getArt()
}, [])- React router is one of the best features that React has. I imported and installed
react-router-dom. TheBrowserRouterwraps all our Routes and any component that sits outside Browser Route will not be able to useLink, so if we need the latter one, we need to nest every component or element inside of theBrowserRouter. For instance, when the user clicks on the logo that we have on the left hand side it will redirect the user back to the homepage. Thanks to the React router, when redirecting the user the page will not reload and the navbar will always be there and will never change. - In the code below, routes are the different pages that we are creating in the Nav Bar such as the HomePage, Gallery Index (the page that contains all the images) and Gallery Single, which is the page when the user clicks on a particular image.
const App = () => {
return (
<div className='site-wrapper'>
<BrowserRouter>
<PageNavBar />
<Routes>
<Route path="/" element={<Home />} />
<Route path="/gallery" element={<GalleryIndex />} />
<Route path="/gallery/:objectid" element={<GallerySingle />} />
</Routes>
<footer className='footer'>© Made by Rossana & Eunyeong</footer>
</BrowserRouter>
</div>
)
}- The navigation bar component is typically displayed at the top of the page. Thanks to this, the user can navigate between different sections of the website.
- This code represents the PageNavBar and I used bootstrap, which was imported at the top of the page
PageNavBar.js. - The
as={Link}attribute indicates that the logo is a clickable link and it will navigate the user to the homepage. - Within the
<Nav>component, there are two<Nav.Link>components. These components represent the individual navigation items in the menu: ‘Home’ and ‘Gallery’.
const PageNavBar = () => {
  return (
    <Navbar expand="md">
      <Container>
        <Navbar.Brand to="/" as={Link} className='logo'><img src={Logo} /></Navbar.Brand>
        <Navbar.Toggle aria-controls="basic-navbar-nav" />
        <Navbar.Collapse id="basic-navbar-nav" className='justify-content-end'>
          <Nav>
            <Nav.Link to="/" as={Link}>Home</Nav.Link>
            <Nav.Link to="/gallery" as={Link}>Gallery</Nav.Link>
          </Nav>
        </Navbar.Collapse>
      </Container>
    </Navbar>
  )
}- Something new that I learned during the project was the environment variables. Environment variables are a way of storing sensitive or important variables used in our app in a way that is secure and not publicly available. This is usually in the form of a hidden config file called
.envthat always goes in the same folder as mypackage.json. Under the file.envI have theREACT_APP_API_KEY, which is the secret key that I received from the Harvard Art Museum API when I registered. Of course I cannot show the code snippet or you will be able to see the API key. However, to get this API key, I had to send a request to the Harvard Art Museum and I received the key by email. - To make use of this environment variable in the code it is concatenated with the API URL in the
axios.get()call to pass the API key as a parameter, ensuring that the request to the Harvard Art Museums API is authenticated and authorised. - Once I pushed the project to gitHub this
.envfile disappeared and I am the only person able to see it.
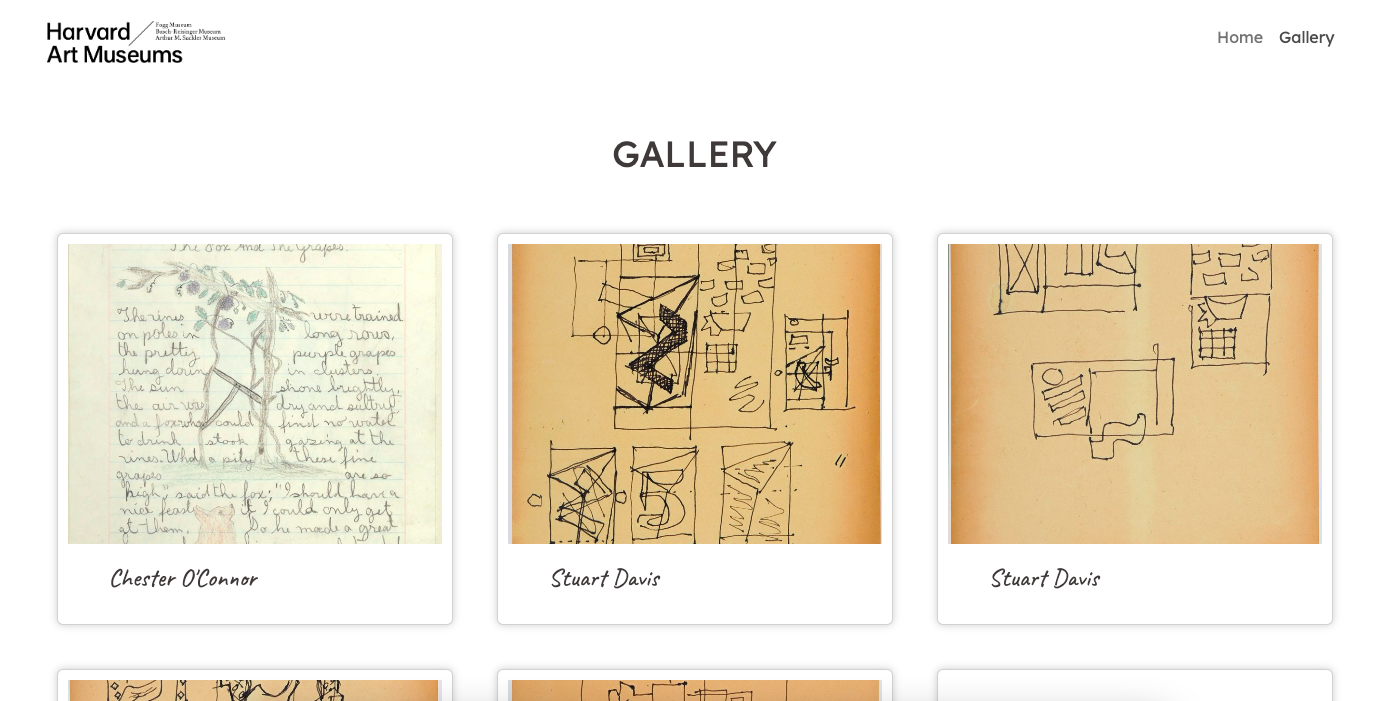
const { data } = await axios.get(`https://api.harvardartmuseums.org/object?apikey=${process.env.REACT_APP_API_KEY}&size=50`)- On the Gallery Page while looking at the data, I realised that not all paintings had a name or a painting. It took some time to figure out how to solve this problem before mapping through them.
- In the code below, I used the ternary operator. First, I checked if the length of the array was greater than 0. This condition ensures that there is at least one element in the array before proceeding. If the condition is true, it will proceed with the filter method and then with the map method. While if the condition is false, it renders the
Errorcomponent, otherwise it renders theSpinnercomponent.
 <Container>
        <Row>
          <Col xs="12">
            <h1 id='title' className='display-4 mt-4 mb-5 text-center'>Gallery</h1>
          </Col>
          {art.length > 0 ?
            art.filter(art => {
              return art.people
            }).map(art => {
              const { id, people, images } = art
              console.log(images)
              return (
                <Col key={id} lg="4" md="6" sm="12" className='art'>
                  <Link to={`/gallery/${id}`}>
                    <Card>
                      <div className="card-image" style={{ backgroundImage: `url('${images && images[0] && images[0].baseimageurl ? images[0].baseimageurl : placeholder}')` }}></div>
                      <Card.Body>
                        <Card.Text>{people[0].name}</Card.Text>
                      </Card.Body>
                    </Card>
                  </Link>
                </Col>
              )
            })
            : (
              <>
                {error ?
                  <Error error={error} />
                  :
                  <Spinner />}
              </>
            )}
        </Row>
</Container>- The main challenge of this project was getting the data for the Gallery Single page. For instance, when clicking on a particular painting, the browser should have redirected to a new page to see the single painting and all the information about it. This wasn't happening. I spent almost an entire morning trying to figure this out. After a while, and with some help from the instructor, we realised that I was fetching the data from the wrong endpoint. The Harvard Art Museum has several resources accessible, and the solution was to get the data from
objectidinstead. This is when I realised that reading the documentation is very important because it explains every endpoint.
const { data } = await axios.get(`https://api.harvardartmuseums.org/object/${objectid}?apikey=${process.env.REACT_APP_API_KEY}`)- Working in a team with another developer when you are randomly teamed up by the instructor can be very challenging. However the positive part was that my teammate wanted to focus on CSS and luckily I got the opportunity to practise React, which was the main focus of this project. The difficult part was that we had different visions on the style part in particular, but we found a balance between both of us.
- Another challenge, which happened after the deployment was that we were not able to see the images on the Gallery Index and Single page. It took me some time to understand what was happening. Due to the nature of the API, some days there weren’t any images in the array and for this reason they weren’t showing on the browser. For this reason I had to create a ternary and replace the empty image with a placeholder. I had to do this on both pages.
The ternary below in the Gallery Index page, checks if the array of images exists and if the first image has a
baseimageurlproperty. If the condition is true it will show the URL of the image. If the condition is false it means that the images array is empty and it will show the placeholder as an image URL:
<div className="card-image" style={{ backgroundImage: `url('${images && images[0] && images[0].baseimageurl ? images[0].baseimageurl : placeholder}')` }}></div>The screenshot below shows that today the images array was empty:
- Glad that I got the chance to practise React which helped me gain a better understanding of fetching data from an API and how they work.
- I gained valuable experience from pair coding with my teammate and despite some occasional challenges, we enjoyed working together and had a fun time collaborating.
- This project had a significant impact on my development journey in several ways. Firstly, it emphasised the importance of thoroughly reading and understanding API documentation. I have definitely learned my lesson.
- Working with APIs has further fueled my fascination with their functionality. This experience provided me with an opportunity to put into practice the concepts and techniques we learned from the instructor, reinforcing my understanding of API integration.
- This project reinforced the significance of effective planning. It highlighted the importance of thoughtful organisation and preparation in achieving project goals efficiently and successfully.
- No bugs.
- Fetch data from another API and improve the website.
- Implement the Search function.


