Releases: pierpaolosichera/NormaTEI
v0.6-beta (AIUCD2024)
NormaTEI

NormaTEI is software for analyzing the content of one or more XML files.
NormaTEI is designed mainly for two uses:
- control of encoding uniformity: when an XML/TEI edition is made up of multiple files, NormaTEI allows you to control them in an organic way, allowing you to easily identify errors or different encoding choices;
- encoding analysis: personalized and complex searches on the selected corpus.
The name "Norma" recalls both the operation for which the software was developed ("normalization") and the most famous work of Vincenzo Bellini: NormaTEI was in fact developed during the creation of Bellini Digital Correspondence, © Cnr Edizioni, 2023 ISBN: 978-88-8080-562-5, electronic edition.
Credits
Analysis
- Daria Spampinato (ISTC-CNR)
- Angelo Mario Del Grosso (ILC-CNR)
- Laura Mazzagufo (UNIPI)
Development
- Pierpaolo Sichera (ILIESI-CNR)
Test
- Salvatore Cristofaro (ILIESI-CNR)
Environment

NormaTEI was developed using 4D (https://www.4d.com/).
Among the many features of this platform, native XML support has been exploited (thanks to the Apache Foundation's Xerces library) and access to the structure of an XML via the DOM (Document Object Model) standard.
NormaTEI is compatible with Windows 10 – Windows 11 - from Windows Server 2012 R2 to Windows Server 2022 - from macOS Big Sur (11) to macOS Ventura (13) (the latest releases for each version).
Installation
To use NormaTEI:
Windows
- download the Windows folder (downloading the entire repository or downloading the single folder via download services or software);
- extract the compressed files to obtain a zip file that you can extract to the folder you prefer and then run the NormaTEI.exe file.
MacOSX
- go to "System Settings -> Privacy and Security" and check that the "Everywhere" option is enabled. If the "Everywhere" item is not present, you can enable it with this command given by Terminal:
sudo spctl --master-disable
- download the MacOSX folder (downloading the entire repository or downloading the single folder via download services or software);
- extract the compressed files to obtain a zip file that you can extract to the folder you prefer and then run the NormaTEI.app file;
- note (1): if you tried to open NormaTEI.app before going to "Privacy and security", the operating system may have returned an error, preventing the application from opening. In this case, delete the file and download and extract it again;
- note (2): to enable Gatekeeper again (if you have deactivated it) just give the same command by inserting the word enable:
sudo spctl --master-enable
Instructions for use
NormaTEI offers two search modes:
- Standard: For simple searches, quickly find coding errors;
- Advanced: for in-depth analysis and evaluation of corpuses.
Standard usage
At the first start a window for creating the data file may appear.
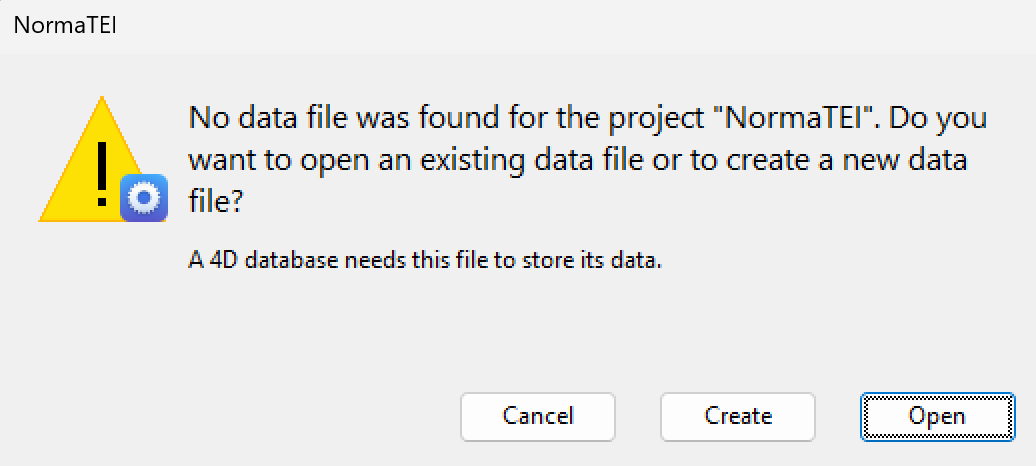
Choose "Create" and save it wherever you want, NormaTEI will remember the path used.
Corpus import
In the launch window click on "Change..." to choose the folder containing the XML files, then press the "Import and analyze" button.
If you have already imported files, you can view the results without performing a new import with the "Open already uploaded files" button below.
You can open multiple import and analysis windows at the same time by going to the main program window and choosing the "Start NormaTEI" menu item.
Search
At the end of the chosen operation, NormaTEI will show the data, generating a list that lists:
- the file where that tag is present;
- the complete route;
- the tag;
- the value of that tag;
- the attributes of that tag;
- the values of the attributes;
- the unique path.
By "unique path" we mean attributing a unique identifier to each path, adding a numeric code of the type "[N]" to each path tag. For example "/TEI[1]/text[3]/body[2]/" indicates that body is the second child of the text tag which is the third child of the TEI tag which is the first child of the root.
The total number of results compared to the corpus examined is shown at the top left.
The results show: - one line for each attribute of a tag: therefore if a tag has three attributes the list shows three lines, one for each attribute;
- a row with a value in the Tag column and no value in the Attribute column if the tag has no attributes.
It is possible to carry out searches by entering for each column a part of the text to be searched for in the yellow boxes at the top.
By clicking on the border between the column headers you can resize them.
If a tag has no attributes, a row with empty attribute data is shown. If a tag has an attribute it is shown with its value. If a tag has multiple attributes, one row is shown for each attribute.
The number of distinct values for each column is shown at the bottom.
Counting
The "Count" button allows you to go to a summary window with respect to the data displayed.
The following are displayed:
- the metric on which the counting is performed (the columns of the search window);
- the total number of occurrences of that phenomenon;
- in how many files is that phenomenon present at least once;
- the files in which that phenomenon is present/absent (if the line has a green background those shown are the corpus files where that phenomenon is not present, if the line has a red background they are the corpus files where that phenomenon is found) ;
Counting can be done by attribute or tag. Example: for the tag
<ab n="ab_02" next="#LL1.10_ab_01_1v" part="I" rend="first_line_indented" type="parag" xml:id="LL1.10_ab_01_1r">counting on the "Tag" metric:
- if the counting is carried out by Attribute, the value of ab is 5 (how many attributes are present in this tag);
- if the counting is done by Tag, the value of ab is 1 (because ab is a single tag).
Advanced usage
By clicking on "Advanced" at the top right you can activate the advanced search window.
Above the search string you can choose the criterion to apply to the search string:
- Contains: the string is contained in the field (case insensitive);
- Starts with: the string is found in the initial part of the field;
- Ends with: the string is found in the final part of the field;
- Equals: the exact value of the string;
- Doesn't contain: the string isn't present in the field;
- Match RegEx: the search string is evaluated as a regular expression.
Here too it is possible to activate the counting function to analyze the results.
Search on subsets of the corpus
By clicking on the "Use" button you can copy the search results in the lower part of the window for later use:
-
What I use:
- The selection: uses the rows found
- Column values: takes all the rows of the corpus that have that value in that column. The most classic case is the one in which I have searched for where a certain characteristic is present in my corpus and I would like to carry out subsequent searches only on those files: in this case I will choose the values in the "File" column.
-
What I do:
- Add: the results are added to the results in the lower part of the window;
- Remove: the results are removed from the results in the lower part of the window;
- Get common: results common to those already present in the lower part of the window are selected;
- New selection: the selected results are used, removing any already present in the lower part of the window.
At this point it is possible to carry out a new search on the entire corpus or by pressing "Search among results" a search can be carried out among the data selected in the lower part of the window.
You can also count the lines displayed at the Top or Bottom of the window.

NormaTEI
NormaTEI is software for analyzing the content of one or more XML files.
NormaTEI is designed mainly for two uses:
- control of coding uniformity: when an XML/TEI edition is made up of multiple files, NormaTEI allows you to control them in an organic way, allowing you to easily identify errors or different coding choices;
- coding analysis: personalized and complex searches on the selected corpus.
The name "Norma" recalls both the operation for which the software was developed ("normalization") and the most famous work of Vincenzo Bellini: NormaTEI was in fact developed during the creation of Bellini Digital Correspondence, © Cnr Edizioni, 2023 ISBN : 978-88-8080-562-5 (electronic edition).
Bellini Digital Correspondence, © Cnr Edizioni, 2023 ISBN: 978-88-8080-562-5 -electronic edition-
Environment
NormaTEI was developed using 4D (https://www.4d.com/).
Among the many features of this platform, native XML support with the Apache Foundation's Xerces library and access to the structure of an XML via the DOM (Document Object Model) standard have been exploited.
NormaTEI is compatible with Windows 10 – Windows 11 Windows Server 2012 R2 – Windows Server 2022 - macOS Big Sur (11) – macOS Ventura (13) (the latest releases for each version).
Installation
To use NormaTEI:
Windows
- download the Windows folder (downloading the entire repository or downloading the single folder via download services or software);
- extract the compressed files to obtain a zip file that you can extract to the folder you prefer and then run the NormaTEI.exe file.
MacOSX
- go to "System Settings -> Privacy and Security" and check that the "Everywhere" option is enabled. If the "Everywhere" item is not present, you can enable it with this command given by Terminal:
sudo spctl --master-disable
- download the MacOSX folder (downloading the entire repository or downloading the single folder via download services or software);
- extract the compressed files to obtain a zip file that you can extract to the folder you prefer and then run the NormaTEI.app file;
- note (1): if you tried to open NormaTEI.app before going to "Privacy and security", the operating system may have returned an error, preventing the application from opening. In this case, delete the file and download and extract it again;
- note (2): to enable Gatekeeper again (if you have deactivated it) just give the same command by inserting the word enable:
sudo spctl --master-enable
Instructions for use
NormaTEI offers two search modes:
- Standard: For simple searches, quickly find coding errors;
- Advanced: for in-depth analysis and evaluation of corpuses.
Standard usage
At the first start a window for creating the data file may appear.

Choose "Create" and save it wherever you want, NormaTEI will remember the path used.
Corpus import

In the launch window click on "Change..." to choose the folder containing the XML files, then press the "Import and analyze" button.
If you have already imported files, you can view the results without performing a new import with the "Open already uploaded files" button below.
Research

At the end of the chosen operation, NormaTEI will show the data, generating a list that lists:
- the file where that tag is present;
- the complete route;
- the tag;
- the value of that tag;
- the attributes of that tag;
- the values of the attributes;
- the unique path.
By "unique path" we mean attributing a unique identifier to each path, adding a numeric code of the type "[N]" to each path tag. For example "/TEI[1]/text[3]/body[2]/" indicates that body is the second child of the text tag which is the third child of the TEI tag which is the first child of the root.
The total number of results compared to the corpus examined is shown at the top left.
The results show: - one line for each attribute of a tag: therefore if a tag has three attributes the list shows three lines, one for each attribute;
- a row with a value in the Tag column and no value in the Attribute column if the tag has no attributes.
It is possible to carry out searches by entering for each column a part of the text to be searched for in the yellow boxes at the top.
By clicking on the border between the column headers you can resize them.
If a tag has no attributes, a row with empty attribute data is shown. If a tag has an attribute it is shown with its value. If a tag has multiple attributes, one row is shown for each attribute.
The number of distinct values for each column is shown at the bottom.
Counting

The "Count" button allows you to go to a summary window with respect to the data displayed.
The following are displayed:
- the metric on which the counting is performed (the columns of the search window);
- the total number of occurrences of that phenomenon;
- in how many files is that phenomenon present at least once;
- the files in which that phenomenon is present/absent (if the line has a green background those shown are the corpus files where that phenomenon is not present, if the line has a red background they are the corpus files where that phenomenon is found) ;

Counting can be done by attribute or tag. Example: for the tag
<ab n="ab_02" next="#LL1.10_ab_01_1v" part="I" rend="first_line_indented" type="parag" xml:id="LL1.10_ab_01_1r">
counting on the "Tag" metric:
- if the counting is carried out by Attribute, the value of ab is 5 (how many attributes are present in this tag);
- if the counting is done by Tag, the value of ab is 1 (because ab is a single tag).
Advanced usage

By clicking on "Advanced" at the top right you can activate the advanced search window.
Above the search string you can choose the criterion to apply to the search string:
- Contains: the string is contained in the field (case insensitive);
- Starts with: the string is found in the initial part of the field;
- Ends with: the string is found in the final part of the field;
- Exact: the exact value of the string;
- Does not contain: the string nin is present in the field;
- Match RegEx: the search string is evaluated as a regular expression.
Here too it is possible to activate the counting function to analyze the results.
Search on subsets of the corpus

By clicking on the "Use" button you can copy the search results in the lower part of the window for later use:
-
What I use:
- The selection: uses the rows found
- Column values: takes all the rows of the corpus that have that value in that column. The most classic case is the one in which I have searched for where a certain characteristic is present in my corpus and I would like to carry out subsequent searches only on those files: in this case I will choose the values in the "File" column.
-
What I do:
- Add: the results are added to the results in the lower part of the window;
- Remove: the results are removed from the results in the lower part of the window;
- Get common: results common to those already present in the lower part of the window are selected;
- New selection: the selected results are used, removing any already present in the lower part of the window.

At this point it is possible to carry out a new search on the entire corpus or by pressing "Search among results" a search can be carried out among the data selected in the lower part of the window.
You can also count the lines displayed at the Top or Bottom of the window.

v0.4-beta (AIUCD2023)
- Updated to 4D v19
- Added a lot of features
- Added executable for Mac
v0.3-beta
Create .gitattributes
v0.1-beta.4
installer 4d