Live, continuous audit of Google Analytics implementations
Testing proper implementation of Google Analytics Tracking on a website can be a tricky thing to do. Unless you run a daily gamut of tests, what works one day may be broken the next one without you ever noticing.
But it doesn't have to be that way.
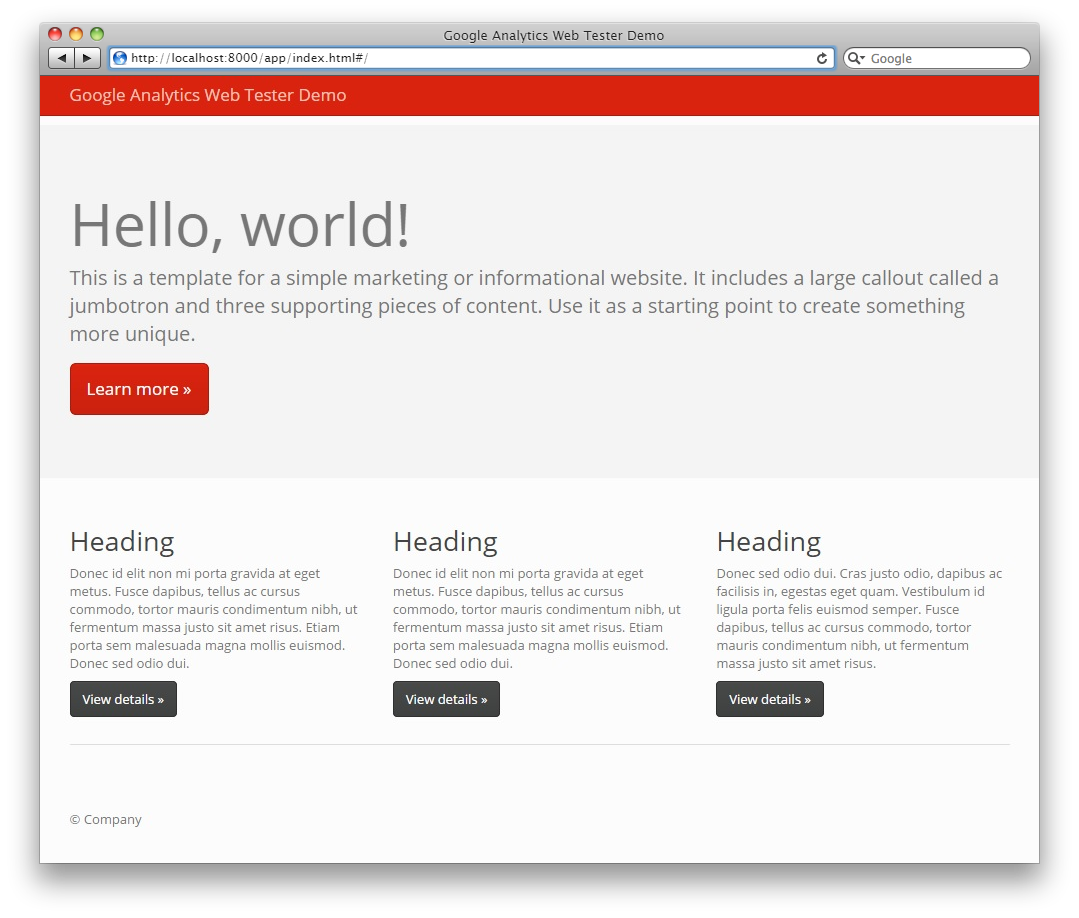
This library eases the process of writing automated tests by providing a set of easy to use utility methods. It comes with an AngularJS demo application to show how to validate that the ga() snippet receives the expected data when the user interacts with the page.
Whether using the Google Analytics snippet directly (ga()) or Google Tag Manager, all tracking interactions can be recorded the exact same way:
- Pageviews
- Custom Events
- Custom Metrics / Dimensions
- Enhanced E-Commerce
- Social Interactions
- Timings
- etc.
Just set the URL of your website, write a couple of specs and run the app, or set it to run after each build/deployment.
Easy!
Here's what the demo Application looks like:

The library uses the Protractor test runner and Jasmine's BDD notation to execute End-to-End (E2) tests in real browsers (Chrome, Firefox, Safari, IE, PhantomJS, etc.).
It's fast, lightweight, easy to configure, and integrates beautifully with existing build systems, providing nice integration reports with Jenkins, Travis CI and many others.
describe('The Google Analytics "click" tracking', function () {
   beforeEach(function () {
      // Load the page to test:
      browser.get('index.html');

      // Register the Google Analytics Event Data Interceptor:
      browser.driver.registerGoogleAnalyticsEventDataInterceptor();
   });

   it('should fire an Event when clicking on the Jumbotron CTA', function (done) {
      // Click on the "Jumbotron" CTA:
      element( by.css('#jumbotronCTA') ).click();

      // Get the "LastEvent" object back from the browser:
      browser.driver.executeScript(function () {
         return window.GAWebTester.getLastEvent();
      })
      .then(
         // Validate the content of the "LastData" object:
         function successCallback (LastData) {
            expect( LastData ).toEqual( ['send', 'event', 'Button', 'Click', 'Jumbotron CTA'] );
         },
         // If there was an error getting back the "LastData" object from the browser, fail the test:
         function errorCallback (error) {
            fail('Should not have received Error: ' + JSON.stringify(error));
         }
      )
      .then(done);
   });
});
Or, if you find the syntax too verbose and you feel confident, you can always use the condensed version:
describe('The Google Analytics "click" tracking', function () {
   beforeEach(function () {
      // Load the page to test:
      browser.get('index.html');

      // Register the Google Analytics Event Data Interceptor:
      browser.driver.registerGoogleAnalyticsEventDataInterceptor();
   });

   it('should fire an Event when clicking on the Jumbotron CTA', function (done) {
      // Click on the "Jumbotron" CTA:
      element( by.css('#jumbotronCTA') ).click();

      // Get the "LastEvent" object back from the browser and validate its data:
      browser.driver.executeScript(function () { return window.GAWebTester.getLastEvent(); })
      .then(function (LastEvent) {
         expect( LastEvent ).toEqual( ['send', 'event', 'Button', 'Click', 'Jumbotron CTA'] );
      })
      .then(done);
   });
});How do you know which Event structure to expect in order to write your tests?
Let's say your standard ga() call looks like this when clicking on the Jumbotron CTA of the demo application (will be the same if Event Tracking is set through GTM*):
ga('send', 'event', 'Button', 'Click', 'Jumbotron CTA');
    │       │        │         │        └──> 5. Event Label
    │       │        │         └───────────> 4. Event Action
    │       │        └─────────────────────> 3. Event Category
    │       └──────────────────────────────> 2. (Standard Google Analytics parameter)
    └──────────────────────────────────────> 1. (Standard Google Analytics parameter)
Then, after the ga() is executed, the value of window.gaLastEventData will be:
  ['send', 'event', 'Button', 'Click', 'Jumbotron CTA']
    │       │        │         │        └──> 5. Event Label
    │       │        │         └───────────> 4. Event Action
    │       │        └─────────────────────> 3. Event Category
    │       └──────────────────────────────> 2. (Standard Google Analytics parameter)
    └──────────────────────────────────────> 1. (Standard Google Analytics parameter)
You then just need to use the Jasmine-provided matchers to make sure that the actual value of window.gaLastEventData is the same as the expected one.
*: If using Event tracking through Google Tag Manager (GTM), then the Container will generate some JavaScript exactly matching the pattern of the ga() call above. Just add the send and event values to the Array.
Just follow the same pattern as above for Pageviews, Custom Metrics & Dimensions, Enhanced E-Commerce, Social Interactions, Timings or any other ga() call:
  ['send', 'pageview']
    │       └──────────────────────────────> 2. (Standard Google Analytics parameter)
└──────────────────────────────────────> 1. (Standard Google Analytics parameter) ['set', 'metric1', '123']
│ │ └────────────────────> 3. Metric Value
│ └───────────────────────────────> 2. Metric Index
└──────────────────────────────────────> 1. (Standard Google Analytics parameter)
['set', 'dimension1', 'Visitor']
│ │ └─────────────────> 3. Dimension Value
│ └───────────────────────────────> 2. Dimension Index
└──────────────────────────────────────> 1. (Standard Google Analytics parameter) ['ec:addProduct', { ─────────────────────> 1. (Standard Google Analytics parameters)
'id': 'P12345', ──────────────────────> 2. Product ID
'name': 'Android Warhol T-Shirt', ────> 3. Product Name
'category': 'Apparel', ───────────────> 4. Product Category
'brand': 'Google', ───────────────────> 5. Product Brand
'variant': 'black', ──────────────────> 6. Product Variant
'price': '29.20', ────────────────────> 7. Product Price
'quantity': 1 ──────────────────────> 8. Product quantity
}]
['ec:setAction', 'checkout', { ──────────> 1&2. (Standard Google Analytics parameters)
'step': 1, ───────────────────────────> 3. Checkout Step
'option': 'MasterCard' ───────────────> 4. Checkout Option
}] ['send', 'social', { ────────────────────> 1&2. (Standard Google Analytics parameters)
'socialNetwork': 'Facebook', ─────────> 3. Social Interaction Network
'socialAction': 'Like', ──────────────> 4. Social Interaction Action
'socialTarget': 'http://test.com' ────> 5. Social Interaction Target (URL)
}] ['send', 'timing', { ────────────────────> 1&2. (Standard Google Analytics parameters)
'timingCategory': 'External Libs', ───> 3. Timing Category
'timingVar': 'Load Time', ────────────> 4. Timing Variable
'timingValue': 123, ──────────────────> 5. Timing Value (in ms)
'timingLabel': 'jQuery' ──────────────> 6. Timing Label
}]To get started, simply clone this repository and install the dependencies:
git clone https://github.com/philsawicki/GoogleAnalytics-WebTester.git
npm install
The project comes preconfigured with a simple web server. If you want, you can check the demo by opening up a browser and heading over to http://localhost:8000/app/index.html#/.
npm start
npm run protractor
The tests should now run, and the calls to Google Analytics' ga() method should be intercepted and logged to the console.
For more information, please check out http://philippesawicki.com