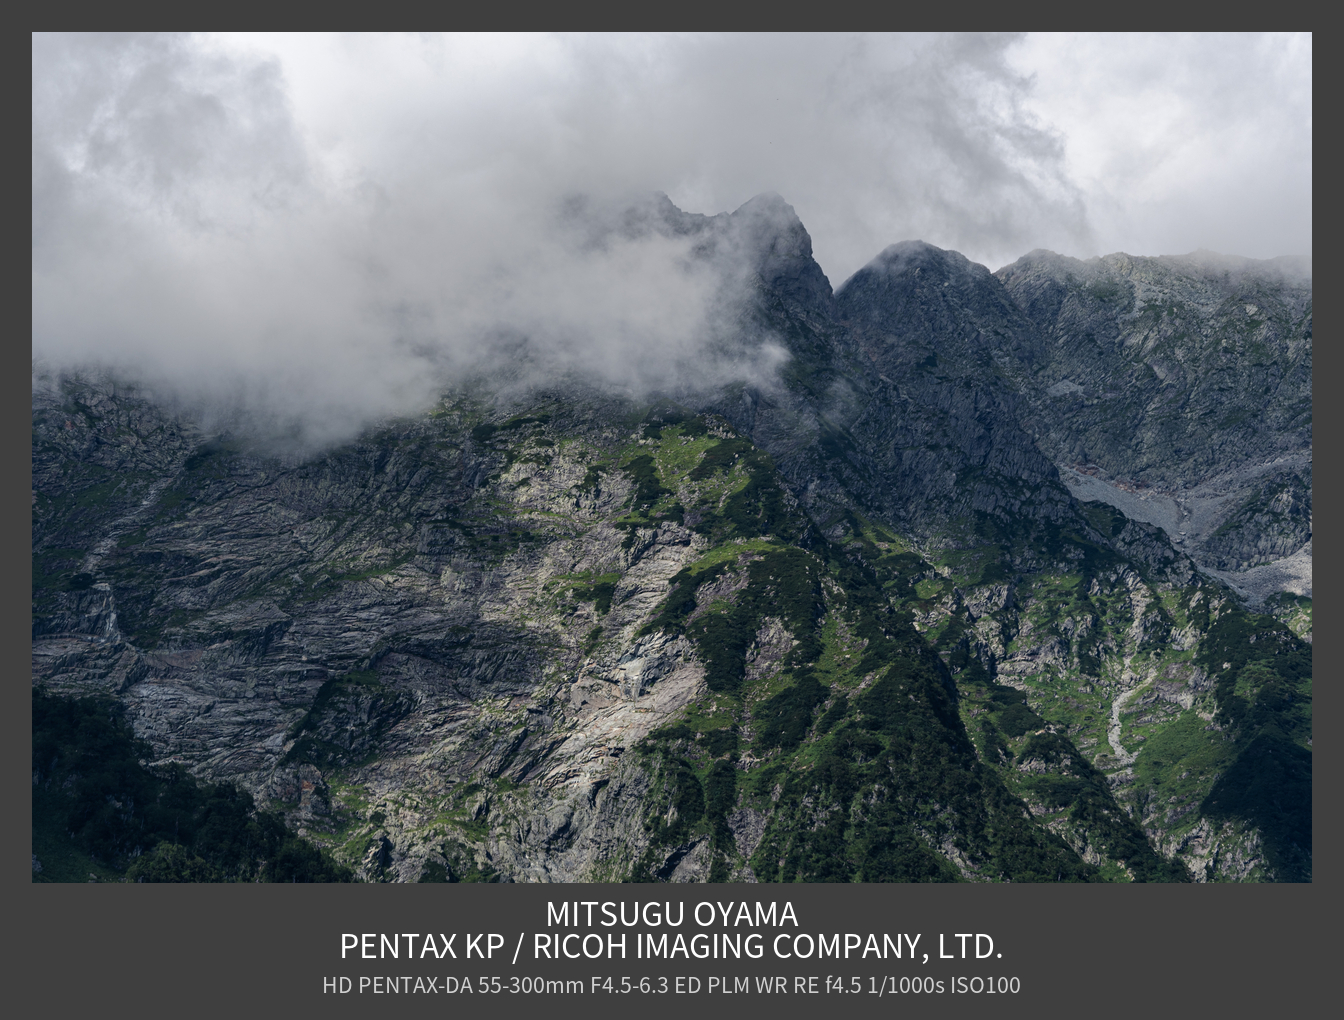
Reduces the size of a photo taken with a digital camera and converts it into a photo with a frame added.
The copyright, maker, camera, lens, and shooting data obtained from Exif are printed at the bottom of the frame.
go install github.com/mitsugu/addframe@<tag name>
- download release zip file
- extract the zip file
- Please put it in any directory.
- Pass the path to the addframe directory. Or put the addframe executable file in a directory that is in your path.
// addframe.json example
{
	"path": {
		"imagemagick": "/path/to//magick",
		"exiftool": "/bin/exiftool"
	},
	"length": 1280,
	"frame": {
		"top": 32,
		"left": 32,
		"right": 32,
		"bottom": 128,
		"color": "#3f3f3f"
	},
	"text": {
		"direction": "South",
		"margin": 0,
		"dpi": 96,
		"element": [{
			"font": "/usr/share/fonts/opentype/noto/NotoSansCJK-Regular.ttc",
			"color": "white",
			"size": 24,
			"margintop": 32,
			"marginbottom": 4
		}, {
			"font": "/usr/share/fonts/opentype/noto/NotoSansCJK-Regular.ttc",
			"color": "white",
			"size": 24,
			"margintop": 4,
			"marginbottom": 4
		}, {
			"font": "/usr/share/fonts/opentype/noto/NotoSansCJK-Regular.ttc",
			"color": "#cfcfcf",
			"size": 16,
			"margintop": 4,
			"marginbottom": 4
		}]
	}
}
- path.imagemagick
Path to ImageMagick's magick command. Absolute and relative paths can be specified.
Windows users, don't forget to include the .exe extension. - path.exiftool
Path to exiftool command. Absolute and relative paths can be specified.
Windows users, don't forget to include the .exe extension. - length
Specify the size of the long side of the image in pixels. - frame.top
Specifies the width of the top edge of the frame in pixels. - frame.left
Specifies the width of the left side of the frame in pixels. - frame.right
Specifies the width of the right side of the frame in pixels. - frame.bottom
Specify the width of the bottom edge of the frame in pixels.
In the latest version of addframe, it is automatically calculated and ignored by the program. - frame.color
Specify the frame color using ImageMagick method. - text.direction
Specify where to place the text. Specify using ImageMagick method. - text.margin
Specifies the margin of the text area in pixels. 0 is recommended if text.direction is South. For SouthEast, specify the right margin in pixels. For SouthWest, specify the left margin in pixels. - text.dpi
Specify the display DPI. If ImageMagick's DPI and the display's DPI are different, the font size will be abnormal, so be sure to specify it. - text.element
This is a format specification for three lines, so be sure to specify all of them. - text.element.font
Specify the path to the font file. You can specify ttc, ttf, and otf font files. - text.element.color
Specify the font color using ImageMagick method. - text.element.size
Specify the font size. - text.element.margintop
Specifies the top margin of a line of text.
The display position of the line is mainly adjusted using margintop and marginbottom. - text.element.marginbottom
Specifies the bottom margin of a line of text.
The display position of the line is mainly adjusted using margintop and marginbottom.
addframe [--config congiguration_file_path] <--input input_file_path> <--output output_file_path>
or
addframe [-c congiguration_file_path] <-i input_file_path> <-o output_file_path>
- --config (-c)
Optional. If omitted, the configuration file addframe.json in the current directory will be used.
Even if you omit it, the configuration file is not unnecessary. - --input (-i)
The image file to which the frame will be added. Usually a JPEG file. The following data must be written to Exif.
- Copyright
- Author
- Camera Maker
- Camera Model
- Lens Model
- ISO Speed
- F Number
- Shutter Speed
- --output (-o)
Path to the resulting file after adding frames.
NOTE) Many cameras do not record Copyright and Author in Exif. If you have such a camera, you can use a program I wrote called addcopyright.
https://github.com/mitsugu/addframe
enjoy!! 😀
