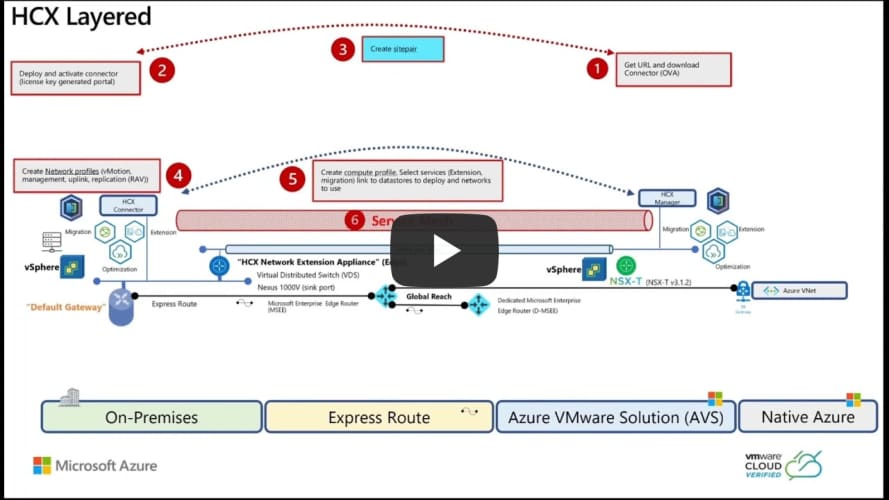
Handling Azure vMware Solution (AVS) network connectivity and migration scenario from on-premises to Azure
In this Microhack, you will :
- be given an overview of the AVS architecture,
- configure HCX and use it to migrate workloads.
This lab is built of :
- 3 vMware vSphere Clusters hosted on-premises along with 3 vCenters,
- 3 AVS solution hosted in Azure regions aligned with the 3 vCenters instances,
- A jumpbox per user deployed in Azure to control a sepcific AVS instance.
Each pair of AVS + on-premises cluster is assigned a unique IP range for the jumpbox. IP ranges info
As part of the preparation tasks and to save time during the Microhack day, you are asked to perform the following prior to the Microhack delivery.
We use BICEP artifacts to deploy part of the solution.
Those artifacts contain bicep files to deploy :
- An Azure Virtual Network named "adminVnet";
- A VPN Gateway inside the "GatewaySubnet" of this vnet,
- A Windows 10 Virtual Machine used as a jumpbox inside the "JumpboxSubnet"
- A bastion service to connect to the jumpbox
This deployment is connected via VPN to the proctor adminVnet that has the Express Route gateway conected to both on-premises vMware environements and AVS.
The Windows 10 machine is using the DNS server hosted by the proctor to resolve all vMware resources.
Steps:
-
Log in to Azure Cloud Shell at https://shell.azure.com/ and select Bash
-
Check if the current subscription is the one you want to deploy resources to :
az account show -
If necessary select your target subscription:
az account set --subscription <Name or ID of subscription> -
Clone the GitHub repository:
git clone https://github.com/alexandreweiss/azure-avs-microhack- Change directory:
cd ./azure-avs-microhack/users -
Now start the deployment:
az deployment sub create -n rg-deploy-user -l canadacentral --template-file 0-main.bicep -
You will be asked to enter the ID of the user you registered to in the excel file so you'll get assigned a unique IP range for your deployment.
Deployment takes approximately 30 minutes.
After the BICEP deployment concludes successfully, the following has been deployed into your subscription:
-
A resource group named azure-avs-microhack-user-XX-rg containing :
- A VNET with a Gateway subnet, a Jumpbox subnet and an Azure Bastion subnet.
- In each of those subnets :
- A VPN gateway connected to proctor gateway
- A Windows 10 desktop
- A bastion host
-
The VM will have an auto-shutdown scheduled at night to save cost in your subscription. REMEMBER TO POWER IT ON THE D DAY !
Verify these resources are present in the portal.
Credentials are identical for all VMs, as follows:
- Username: admin-avs
- Password: MicroHack/123
You may log on to the jumpbox VM through Bastion to test access is successfull.
After a few minutes once the VPN Gateway has been deployed, you may check on the VPN gateway that :
- the connection toHub is in status "connected"
- routes are received from proctor gateway
User deployment finishes here.


