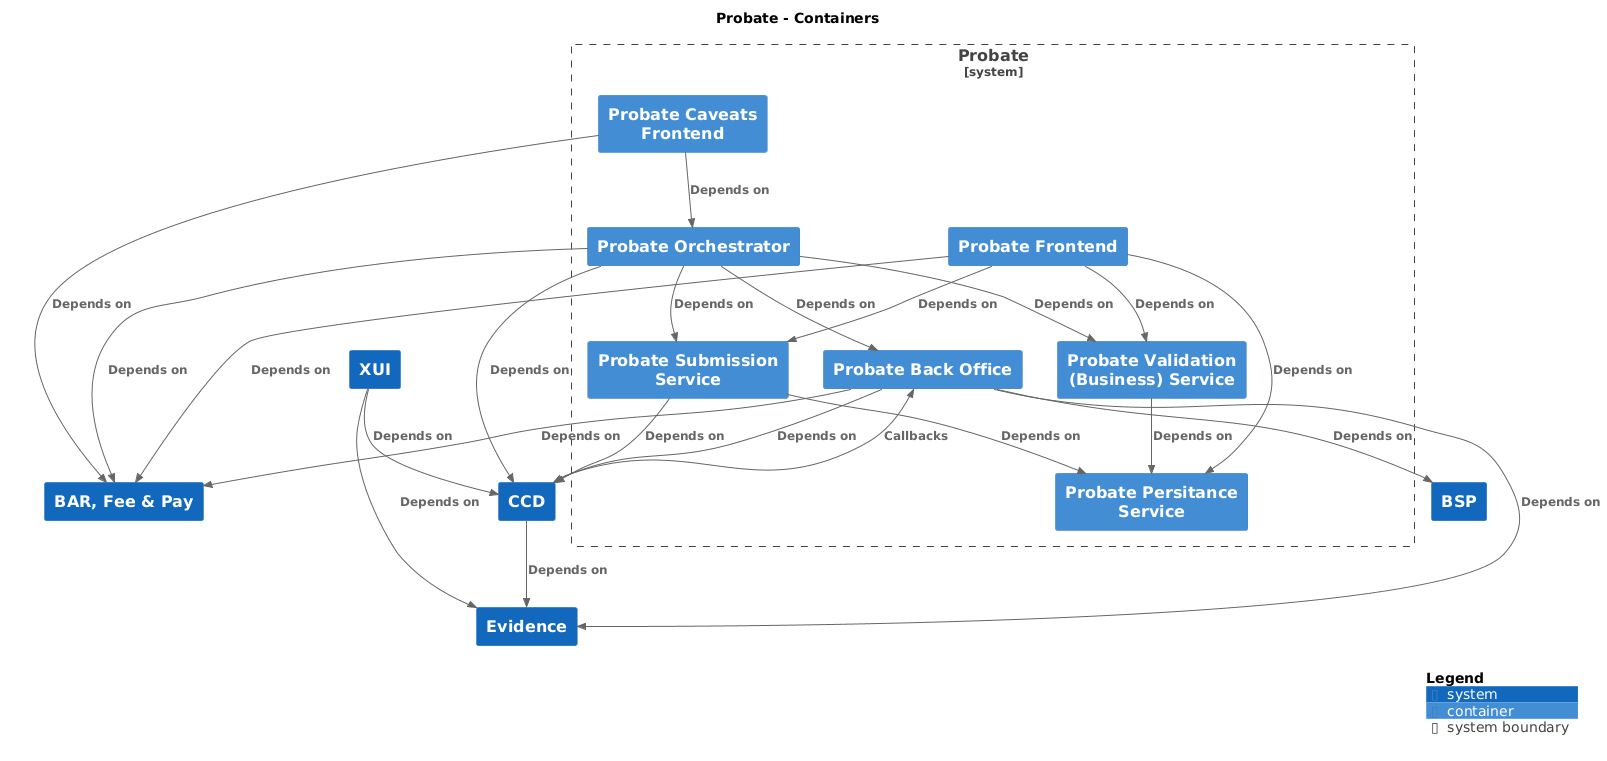
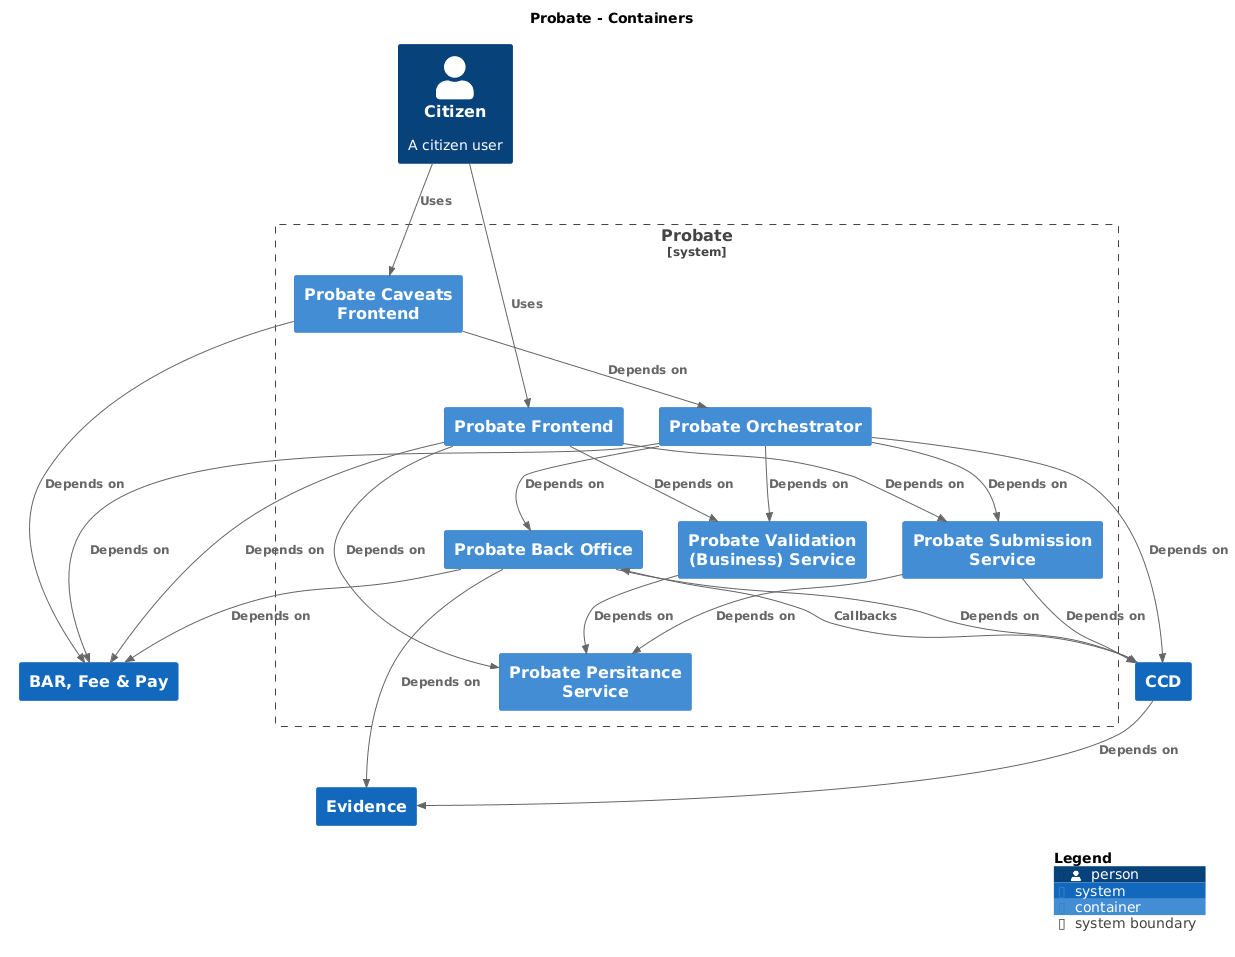
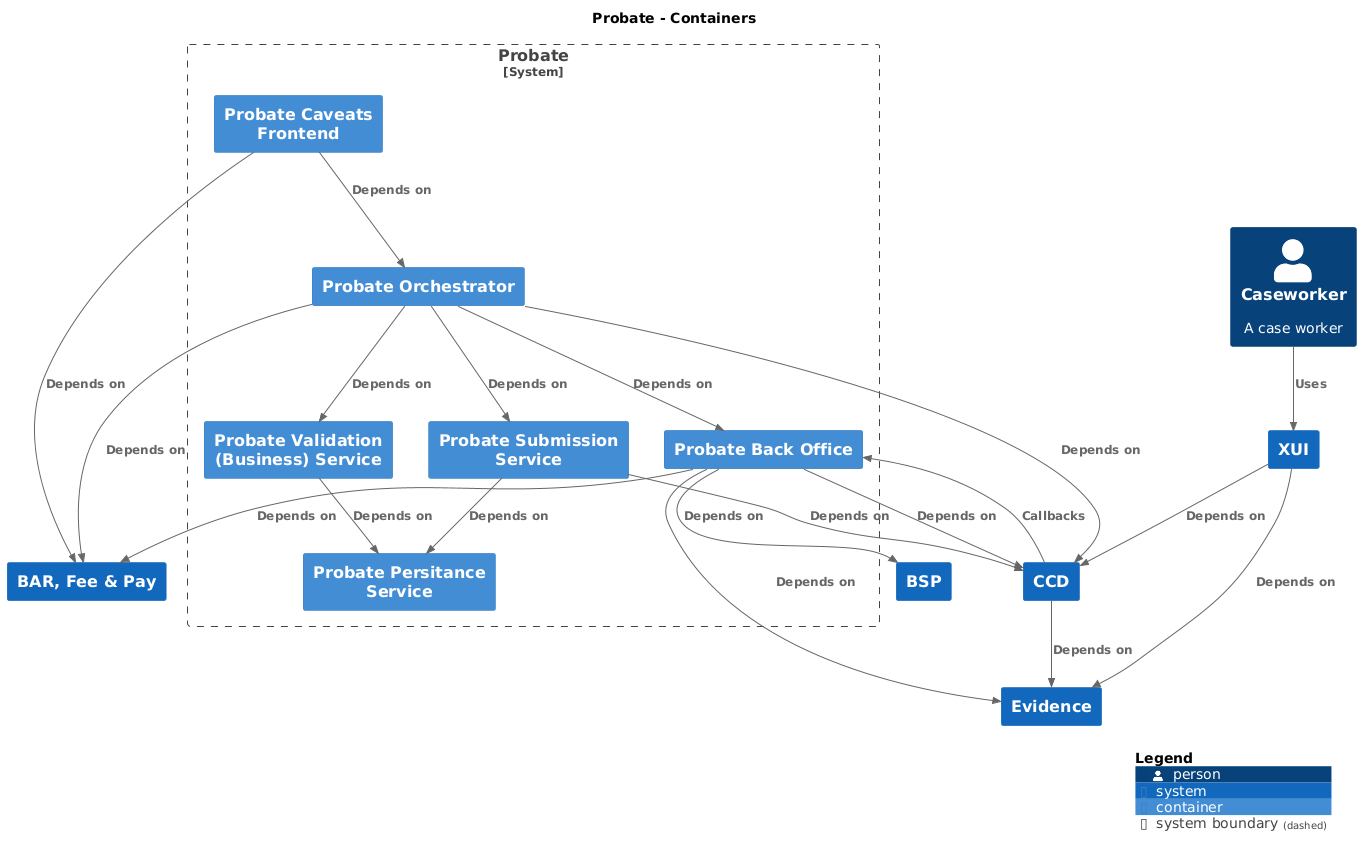
This is the frontend caveats application for the Probate Caveats online service. The service provides a clear interface for citizens, presented as sequence of HTML 5 web pages designed to GDS Service Design guidelines, so that they can check that they're eligible to apply for Caveats online.
probate-frontend • probate-caveats-frontend • probate-back-office • probate-orchestrator-service • probate-business-service • probate-submit-service • probate-persistence-service
Install dependencies by executing the following command:
$ yarn install
Compile SASS stylesheets by running the following command:
$ yarn setup
Build a git.properties.json by running the following command:
$ yarn git-info
Note. if setting up on an M1 with ARM architecure, and node-sass is not successfully installing, make sure you're using node version 15
Git hooks:
We have git hooks that enforce rules for commit messages.
These can be activated by running the following commands:
$ ln -s ../../pre-commit.sh .git/hooks/pre-commit
$ ln -s ../../commit-msg.sh .git/hooks/commit-msg
Run the application local server:
$ yarn start:ld
The application can be completed locally at https://localhost:3000, provided all services are running in the background as described in the next section.
add a dev.yaml file to the /config folder with contents if you want to run LauchDarkly locally
To run probate-frontend with the other services locally you will need to clone and run the following services:
- probate-back-office:
https://github.com/hmcts/probate-back-office- Follow the instructions inprobate-back-office/compose/README.md. - probate-orchestrator-service:
https://github.com/hmcts/probate-orchestrator-service- Follow the instructions inprobate-orchestrator-service/README.md - probate-submit-service:
https://github.com/hmcts/probate-submit-service- Follow the instructions inprobate-submit-service/README.md
Install Redis to local machine i.e.
$ brew install Redis
Then run Redis server from where redis was installed to
$ redis-server
Run the application local server alongside Redis server:
$ yarn start:dev:ld:aat
The application can be completed locally at https://localhost:3001. Caveats will appear in AAT.
Before submitting a Pull Request you will be required to run $ yarn eslint (which is also run automatically when trying to commit anyway).
We have a number of rules relating to code style that can be found in .eslintrc.js.
For development only config, rename the config/dev_template.yaml file to config/dev.yaml. Running the app with the node environment set to dev will ensure this file is used.
This file is not version controlled so any config here will not be pushed to git.
As an example, if you want to use LanuchDarkly locally, place the SDK Key in this file. You can keep the key there as this file is not version controlled.
Mocha is used for writing tests.
The test suite can be run with:
$ yarn test
For unit tests:
$ yarn test-unit
For component tests:
$ yarn test-component
For accessibility tests:
$ yarn test-accessibility
For test coverage:
$ yarn test:coverage
If you are concerned about the impact of your code changes, you may want to run a more comprehensive set of tests as part of the PR build. To do this, you can add the appropriate label to the PR (in GitHub), as detailed below:
nightly: This will runyarn test:fullfunctionalcommand.nightly-without-welsh-tests: This will runyarn test:fullfunctionalcommand but only in English language.
This project is licensed under the MIT License - see the LICENSE file for details


