Deployment
The Bullhorn Starter Kit can be deployed to a variety of environments. We cover how to deploy to Amazon AWS, but deployment to various other hosting providers should require essentially the same steps. The first thing to do regardless of where you want to deploy the application is to run
mvn clean install -P{mavenProfile}which generates a WAR file in the target folder. This archive file consists of the entire application and is what must be deployed to a web application container, regardless of which hosting provider we use to get that container. For information about setting up an AWS web application container and deploying to it, continue reading.
1. Create or sign into an Amazon AWS Account
Hosting the Bullhorn Starter Kit on Amazon AWS requires the use of the Elastic Beanstalk service. If you do not already have an Amazon AWS account, create one here.
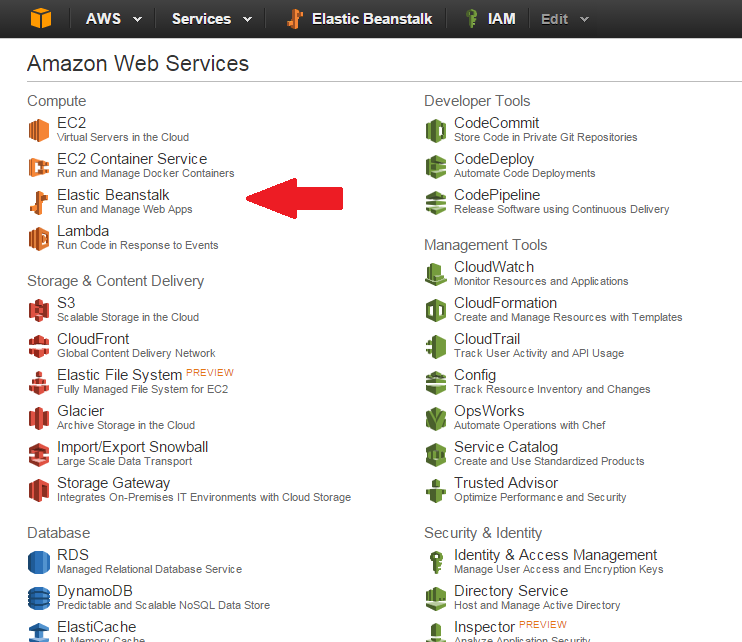
2. Navigate to the Elastic Beanstalk Service
In the AWS Management Console, select Elastic Beanstalk under the Compute section:
The Elastic Beanstalk Management Console displays:
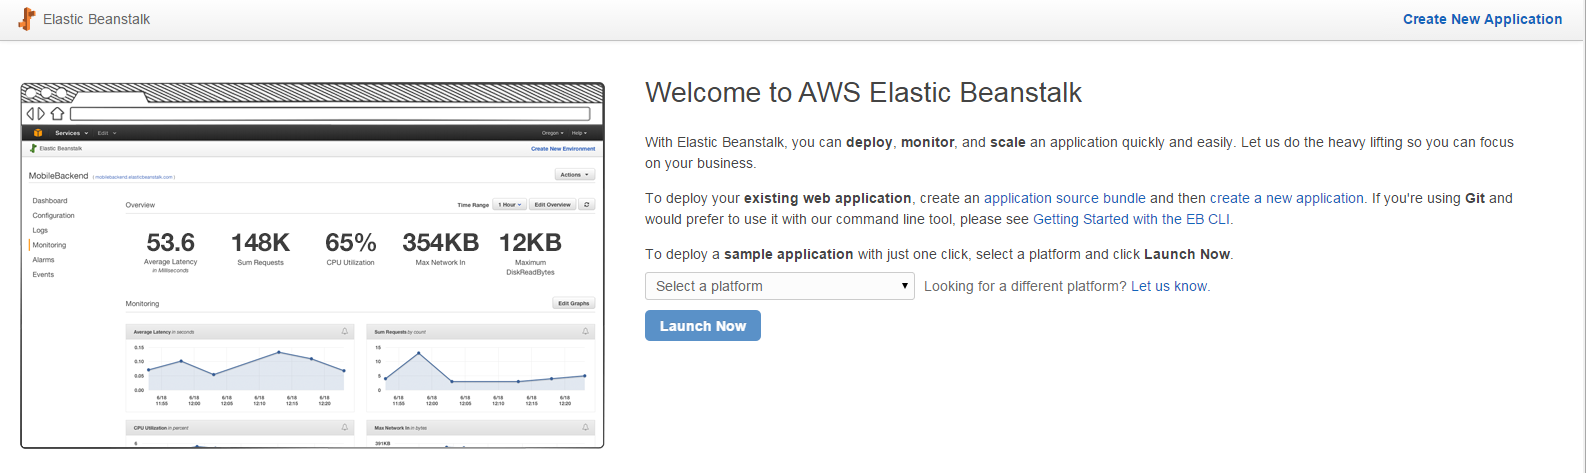
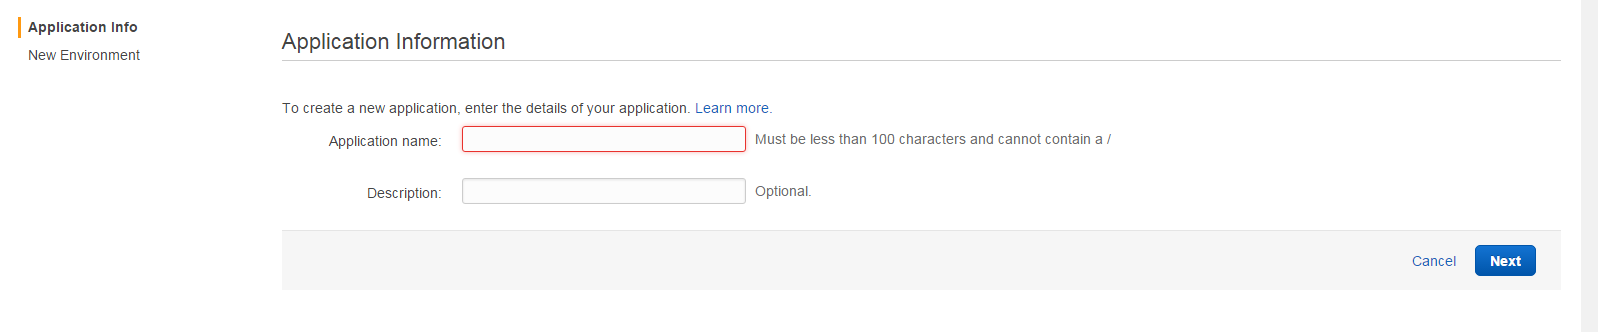
3. Create a new Application
In the top-right of the console, select Create New Application and provide an identifying name for it. You can optionally provide a short description for the application. Click Next.
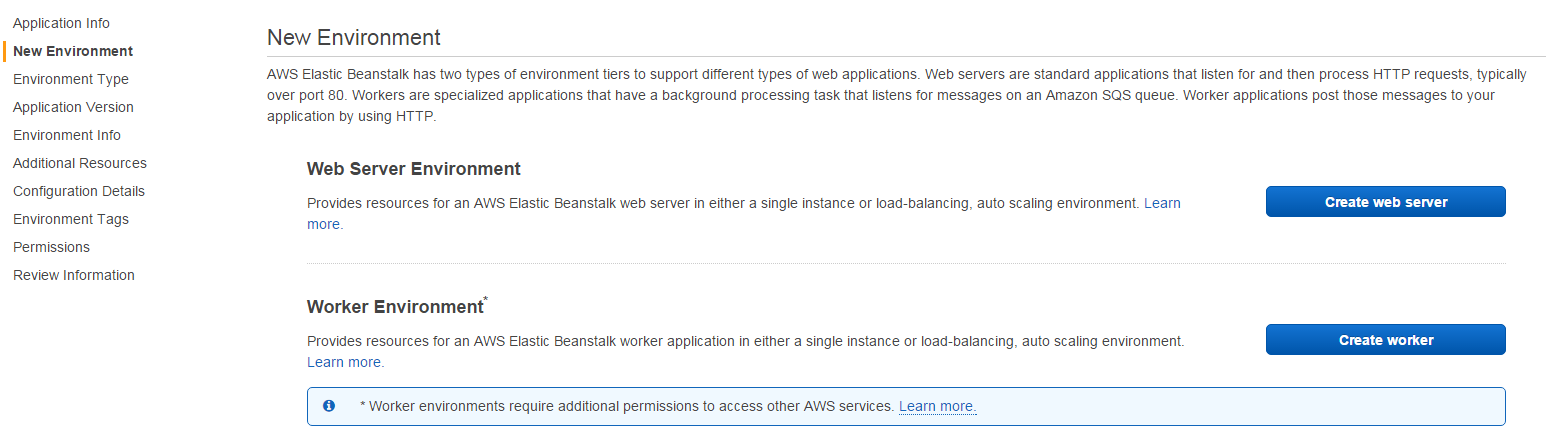
4. Create a new Environment
The next several steps differ depending on your desired AWS application configuration. Typically, a Bullhorn Starter Kit is deployed as a web server, which is the configuration described here.
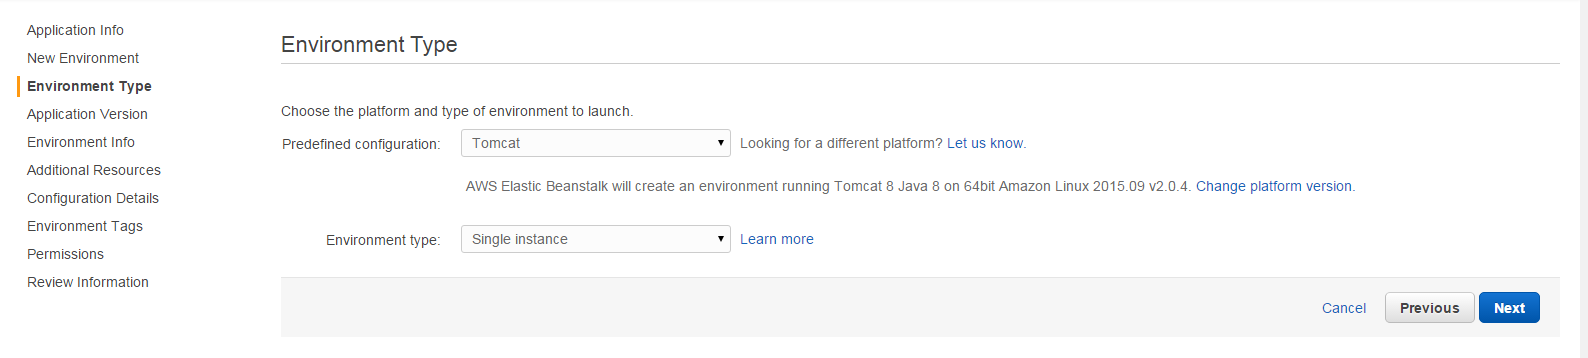
On the next page there are two options Create web server and Create worker. Choose Create web server. The next page contains two dropdowns. For Predefined configuration, choose Preconfigured > Tomcat, and for Evnrionment type, we want Single instance. Click Next.
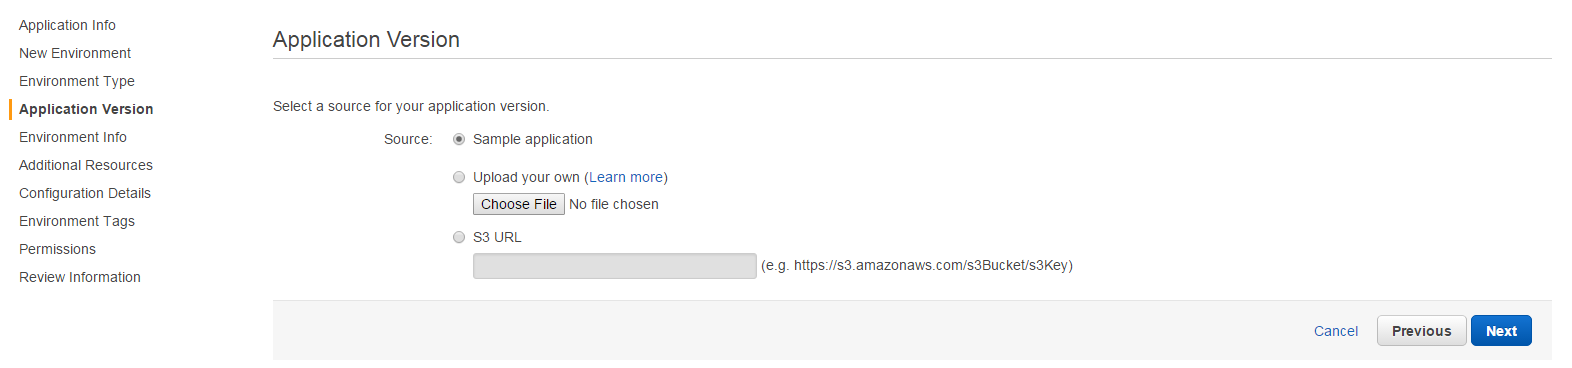
Next, you see the Application Version page. The best practice is to start the environment with the sample application and then deploy your own WAR after the environment successfully boots up. Leave everything as is on the Application Version page and click Next.
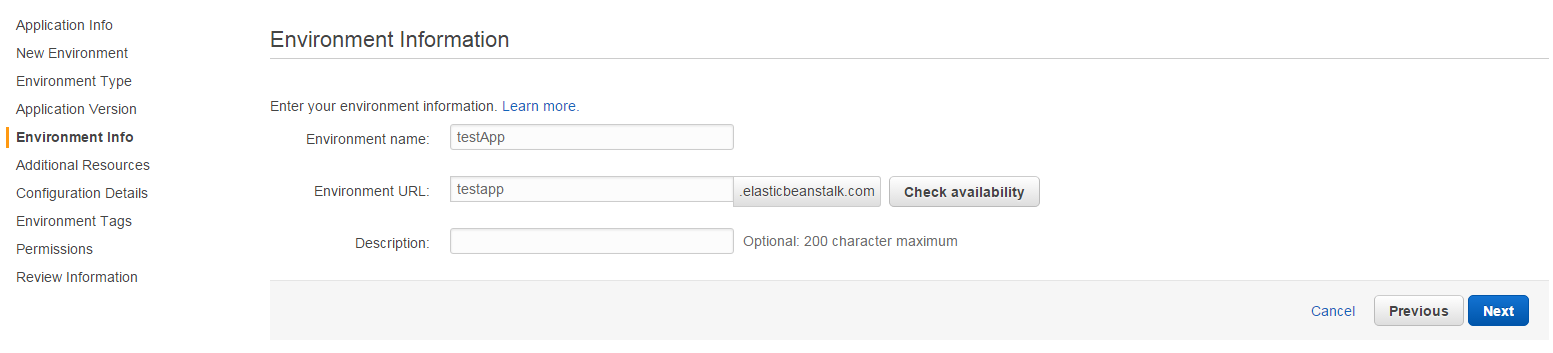
Next, provide an environment name and assign it an elasticbeanstalk URL. The best practice is to just remove the suffix -env from the default value for both the environment name and URL. Keep in mind the environment URL is the URL at which you access your app, and (if you use a DNS) what you should point to from the DNS provider. You can also provide an optional description for the environment.
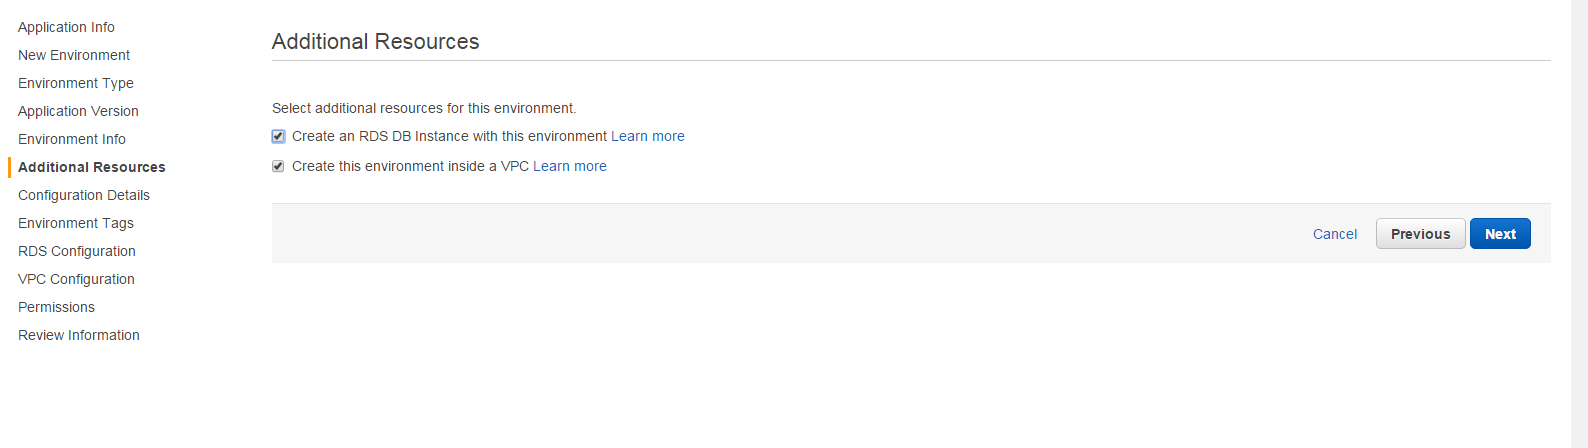
On the next page you are presented with options for additional resources. The best practice here is to create the environment within a VPC, although it is possible to configure the application without one. Continue as if we are going to use one by checking Create this environment inside a VPC and clicking Next.
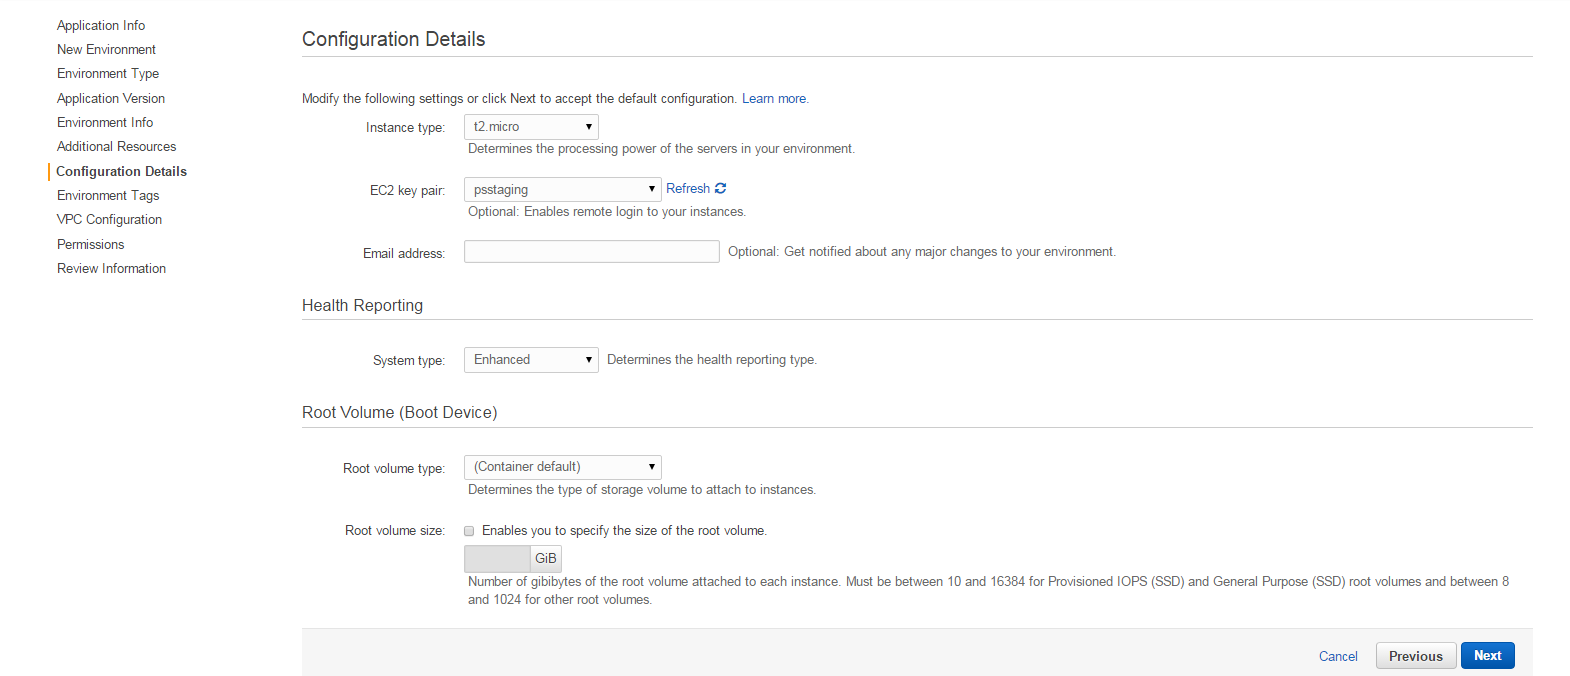
The next page provides options for various aspects of the application/environment configuration. Most fields are optional, and the only ones that must be addressed are Instance type and EC2 key pair. The other options typically offer additional functionality, and default to sensible values. For Instance type, select the type of hardware the application will run on. Options and explanations of the different sizes can be found here. For a typical starter-kit application running a handful of standard customizations, t2.micro is a solid starting place (a smaller general-purpose machine). In the EC2 key pair dropdown, select a key pair that gives more remote access to your machine. This page gives an overview of EC2 key pairs and describes how to create one.
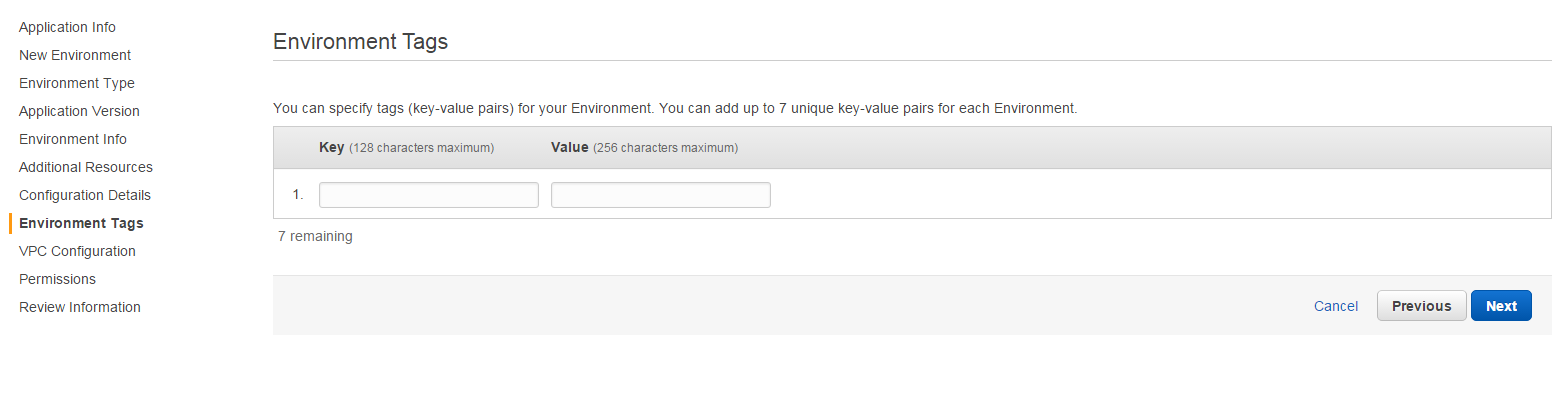
Clicking Next displays the Environment Tags page which allows us to set up key-value pairs for our Environment. You do not need any by default, so click Next.
You are presented with the VPC configuration page, where you choose what VPC, Subnet, and VPC Security Group you want to configure your application with. You can find more information about setting up these AWS objects here. Once you choose an appropriate VPC, Subnet, and the correct Security group, make sure that Associate Public IP Address is checked below the VPC dropdown.

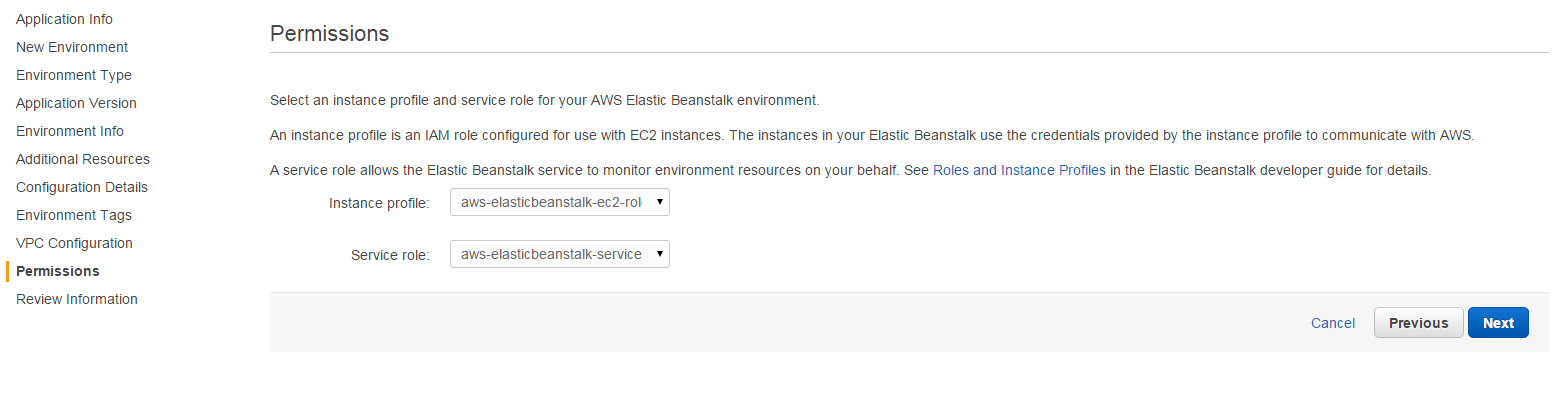
After you click Next again, you are nearing the end of the configuration. The Permissions page is displayed. Here you must select an Instance profile, which is an AWS IAM role for use with Elastic Beanstalk. You also select a Service role, which again is an AWS role used for monitoring. Check out this page for more information on AWS EC2 roles.
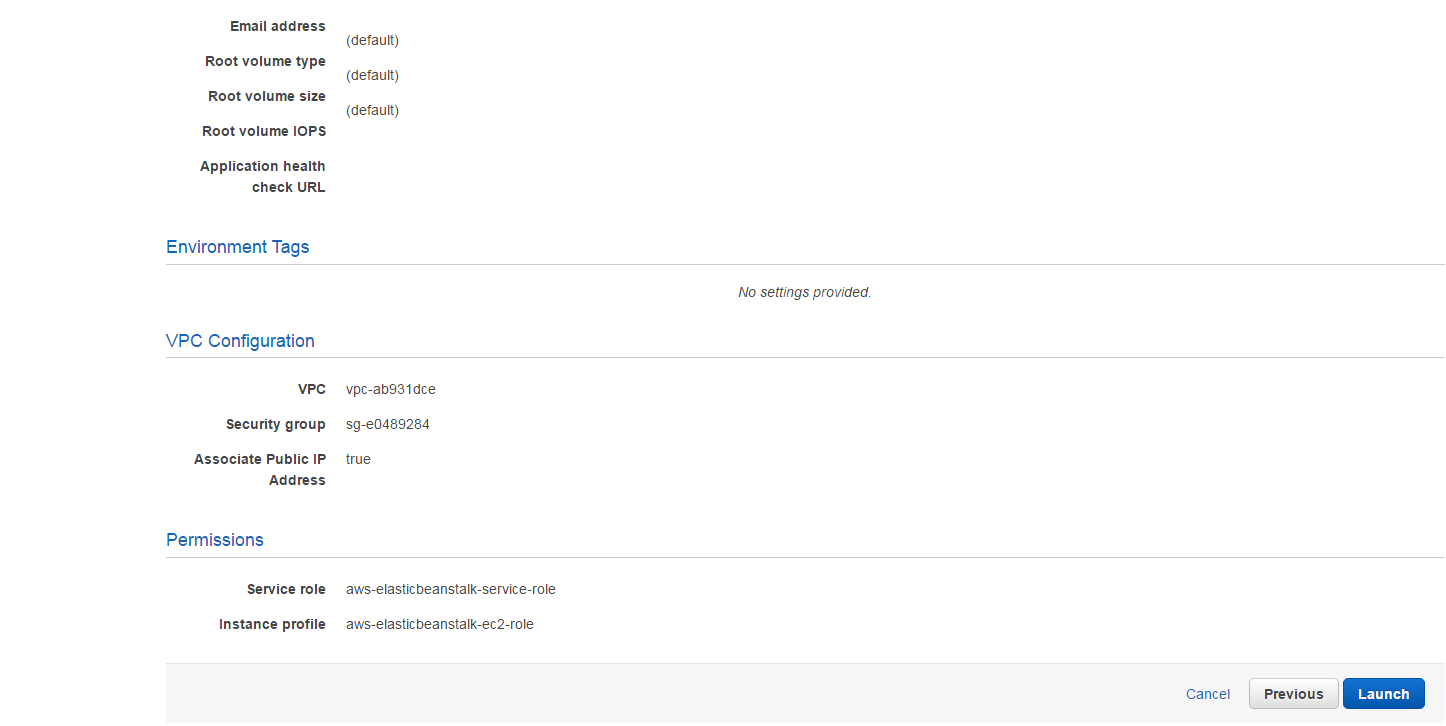
After clicking Next, you can review all of the selected configuration items. After confirming everything looks good, click Launch.
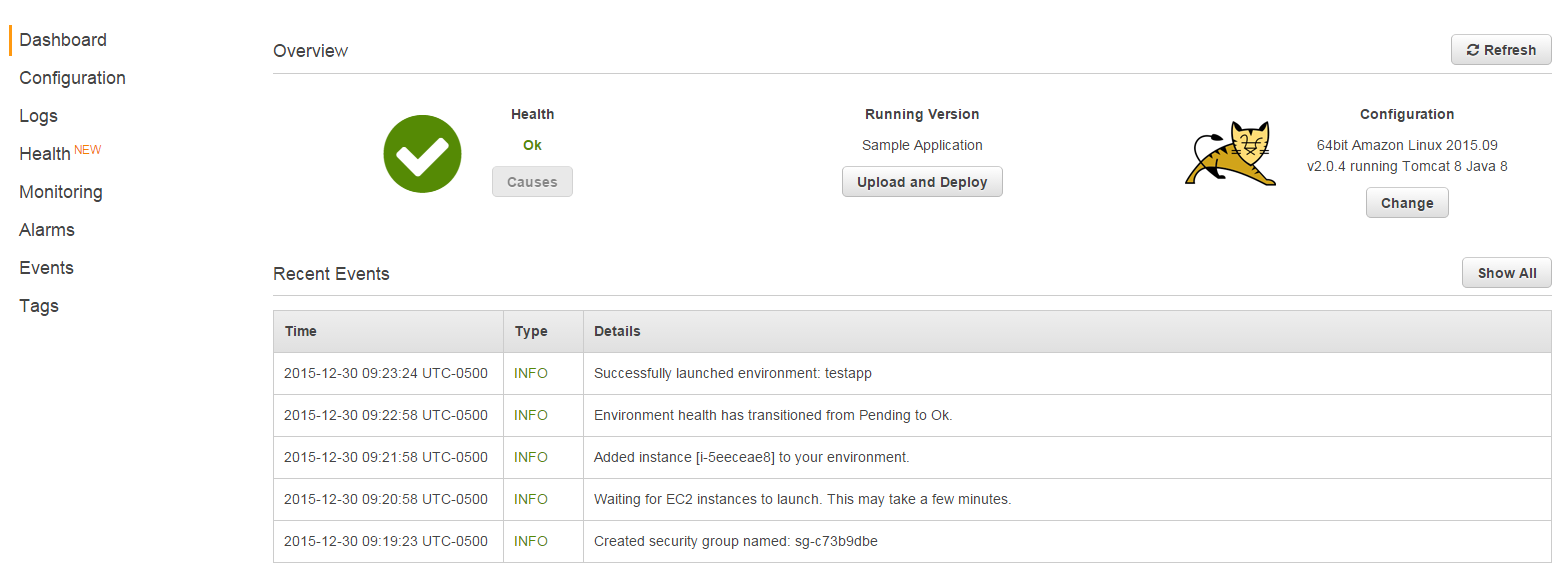
You should see the environment overview dashboard, which will start going through the steps necessary to spin up the instance. As steps are completed, you will see notifications appear and the Health of the application change. Once the Health is green and says Ok (and looks roughly like the below screen shot), you can deploy your application WAR file.
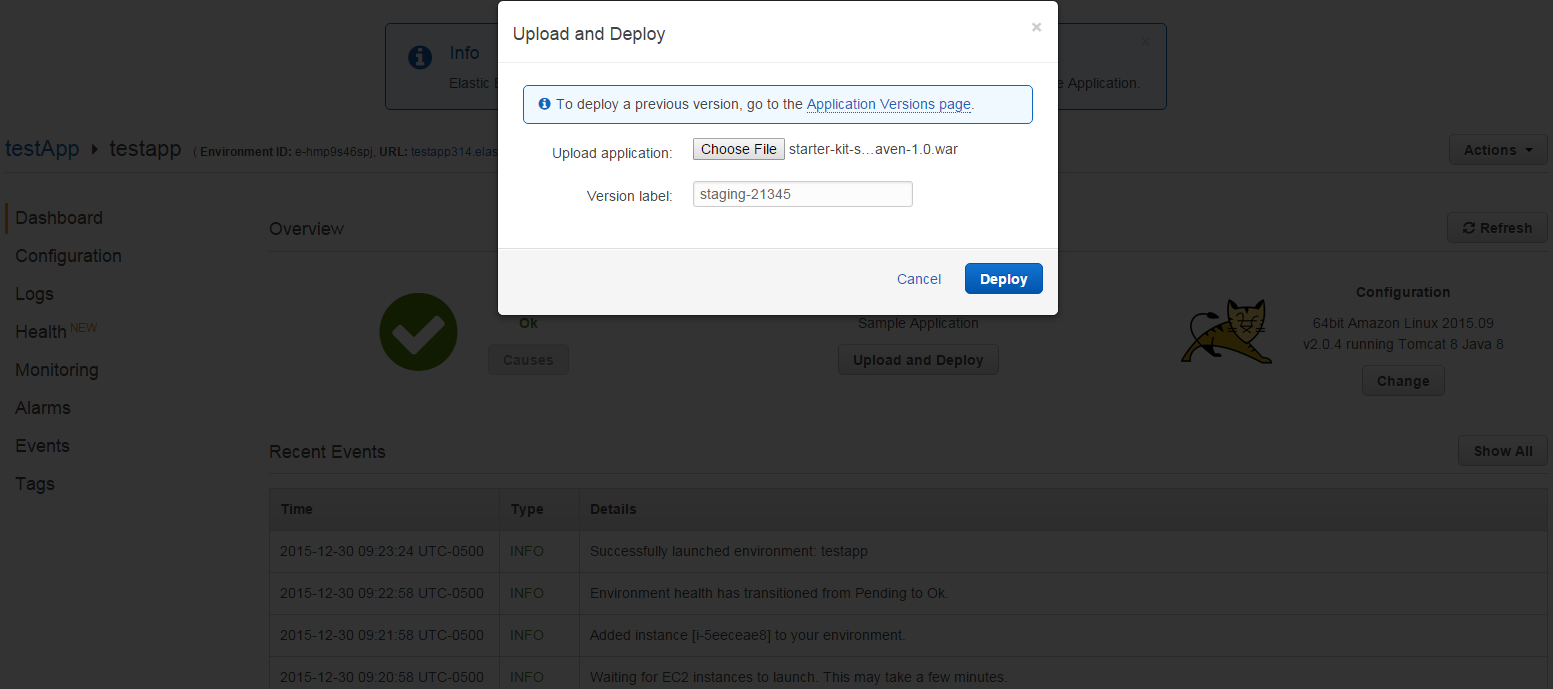
Click the Upload and Deploy button in the center in the screen. A dialog is displayed where you can upload the WAR file as well as choose a Version label for this deploy. The Version label has to be unique accross all deploys. For example, every deploy for application X must have a unique label. The best practice is to use the name of the Maven profile along with the revision number of the commit being deployed, separated by a dash (for example, staging-23212).
After the console finishes updating the status of your environment and you see the green Ok again, you are ready to start accessing your application via the environment URL provided in a previous step. You can also configure a DNS to point to that environment URL for a custom domain.