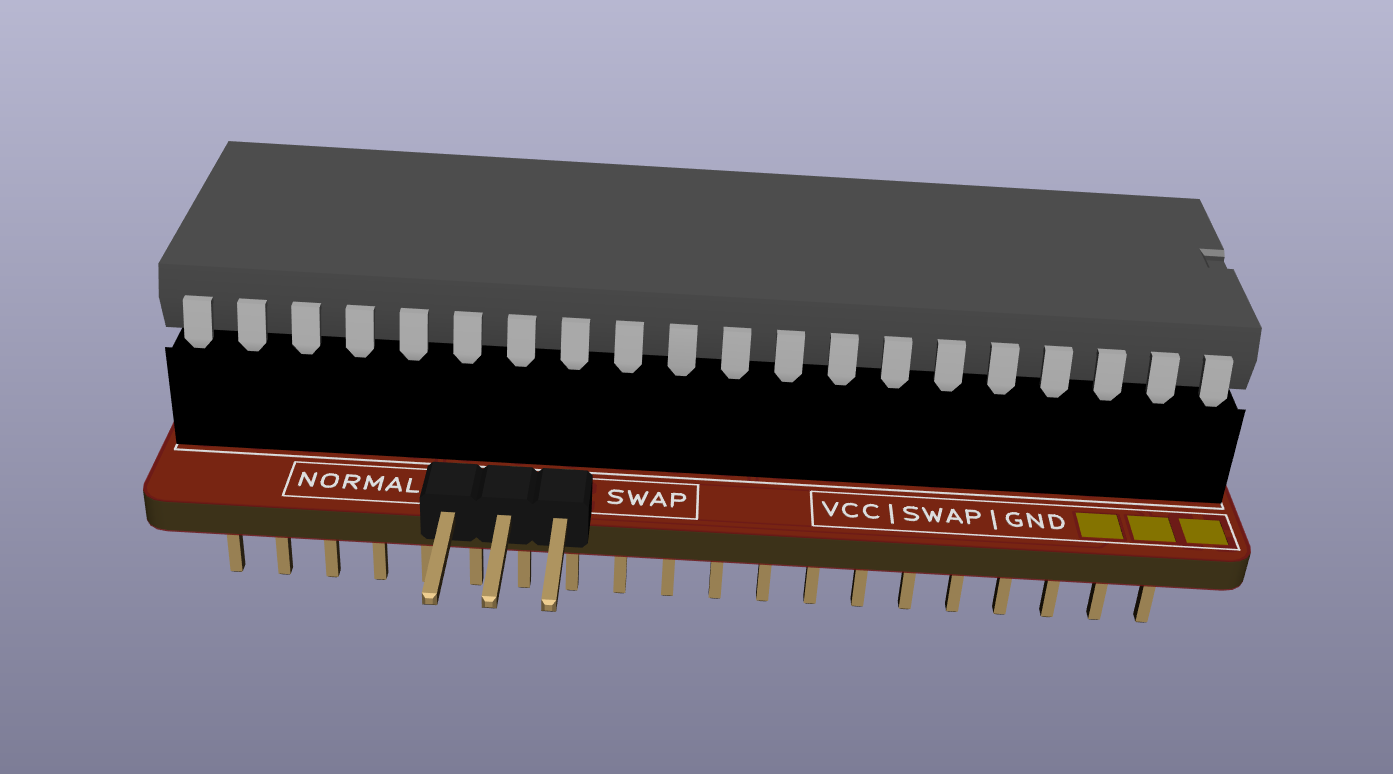
OpenAmigaDriveSwitcher is an Open Hardware adapter that can make the first external floppy disk drive (DF1:) on an Amiga 500/500+ appear in place of the internal drive (DF0:). It also works on an Amiga 2000, however DF1: is still an internal drive on this computer.
OpenAmigaDriveSwitcher turns out really handy for people using a Gotek floppy drive emulator who don't want to mount it internally. In fact, this requires some case modding, both for fitting the drive and for making it useable, as having a display on the side of the Amiga is quite uncomfortable. Connecting the Gotek externally will not work out of the box for most games as they assume they are running on DF0:, which was the only bootable drive back in AmigaOS 1.x times.
Keeping a Gotek drive external also allows it to be used with different computers.
OpenAmigaDriveSwitcher comes as an adapter PCB that sits between the Even CIA chip and its socket and can make the external drive appear as DF0:. However, it does not fully swap the drives, which means that when it is enabled, the internal drive just "disappears", it does NOT become DF1:.
Solder the 74LS157 chip and its decoupling capacitor first. Do not use a socket for it, as it will be sitting underneath the CIA. Before soldering, you might want to make sure that the socket for the CIA chip sits properly in its place, as everything will be quite crammed. You can bend the legs of the chip slightly to that it is offset a bit to the right, where more space is available.
Then solder the pins that will plug in the original socket.
Use a 48-pin (or 2x24-pin) socket for the CIA, and solder it last.
NOTE: You can use a 74LS257 in place of the the 157, if you have one handy. Recommended logic families are LS and HCT, but HC might work as well.
Installation of the adapter is straightforward: carefully replace your EVEN CIA chip with the adapter and plug the CIA on it. Just make sure to respect the orientation.
Currently, the device has been tested and found working on A500, A500+ and A2000. In all cases, when the device is installed, you will still be able to place the metal shield (if applicable) and close the case properly.
To control OpenAmigaDriveSwitcher you have several choices. The simplest solution is to use a SPDT switch, which can either be installed into the back of the case by drilling a small hole or be left wandering in the trapdoor slot, at the user's preference (at least on A500s). It can either be connected to the header pins or soldered to the available pads, they are equivalent.
But the real strength of OpenAmigaDriveSwitcher is that it can be driven with a logic signal, since it uses a 74157 to switch the required lines. This means you can avoid drilling a hole in your precious case and rather use some electronic means to generate the switch signal.
For instance, the signal can come from an OpenAmigaMouseTrigger detecting mouse presses when the Amiga is powered on: you just turn on your Amiga while holding LMB and DF1: becomes DF0:.
Another possibility is to wire a microcontroller to the keyboard lines and detect a particular keypress, such as the reset combo. A simple sketch to be loaded on an Arduino for this purpose is provided: you keep the reset combo pressed for two seconds and DF1: becomes DF0:, you don't even need to power off your Amiga!
I'm sure you can come up with more ideas :).
The OpenAmigaDriveSwitcher documentation, including the design itself, is copyright © SukkoPera 2018.
OpenAmigaDriveSwitcher is Open Hardware licensed under the CERN OHL v. 1.2.
You may redistribute and modify this documentation under the terms of the CERN OHL v.1.2. This documentation is distributed as is and WITHOUT ANY EXPRESS OR IMPLIED WARRANTIES whatsoever with respect to its functionality, operability or use, including, without limitation, any implied warranties OF MERCHANTABILITY, SATISFACTORY QUALITY, FITNESS FOR A PARTICULAR PURPOSE or infringement. We expressly disclaim any liability whatsoever for any direct, indirect, consequential, incidental or special damages, including, without limitation, lost revenues, lost profits, losses resulting from business interruption or loss of data, regardless of the form of action or legal theory under which the liability may be asserted, even if advised of the possibility or likelihood of such damages.
A copy of the full license is included in file LICENSE.pdf, please refer to it for applicable conditions. In order to properly deal with its terms, please see file LICENSE_HOWTO.pdf.
The contact points for information about manufactured Products (see section 4.2) are listed in file PRODUCT.md.
Any modifications made by Licensees (see section 3.4.b) shall be recorded in file CHANGES.md.
The Documentation Location of the original project is https://github.com/SukkoPera/OpenAmigaDriveSwitcher/.
Since the project is open you are free to get the PCBs made by your preferred manufacturer, however in case you want to support the development, you can order them from PCBWay through this link:
You get cheap, professionally-made and good quality PCBs, I get some credit that will help with this and other projects. You won't even have to worry about the various PCB options, it's all pre-configured for you!
Also, if you still have to register to that site, you can use this link to get some bonus initial credit (and yield me some more).
Again, if you want to use another manufacturer, feel free to, don't feel obligated :).
If you need help or have any questions, you can join the official Telegram group.
- The fundamental method to swap the drives was learnt from this thread by user Lurch_AU of the EAB forum.

