-
Notifications
You must be signed in to change notification settings - Fork 34
Alloy and TouchDB Tutorial
The TouchBooksAlloy sample app shows how easy it is to build a cross-platform, sync-enabled
application with Alloy and TiTouchDB. The full source code for this tutorial can be found
in the samples directory here.
This tutorial is suitable for intermediate-level Titanium developers and assumes that you can build an app and deploy it to a device for testing. Some demonstrations of the app do require a device, but all of the code can be run on the iOS simulator or Android emulator.
- App Design
- Project Setup
- App Initialization
- Book List Window
- Book List View Functions
- Book List Model
- Populating the Book List
- Pulling Changes From a CouchDB Server
- Book Details Window
- Pushing Changes To a CouchDB Server
- Resolving Conflicting Changes
- Adding New Books
In this tutorial, we will be building a mobile app that stores a list of books and synchronizes the book list among multiple devices. The app has two windows: one containing a table view with a list of books grouped by author or publication date, and another that allows the user to create a new book entry or edit an existing entry. Each entry will be stored in TouchDB as a JSON document. Documents in TouchDB are schemaless; it is up to us to determine and enforce the structure of what we are storing. Here's how we're defining a "book" document for this tutorial:
{
   "_id": "978-1449379681",
   "title": "CouchDB: The Definitive Guide",
   "author": "J. Chris Anderson",
   "published": [2010,9],
   "modelname": "book"
}
This is obviously a simplification of the metadata about a book -- for example, the structure implies
that a book only has one author -- but it will do for the tutorial. One item to note is that the
"published" property is expressed as an array containing the year, month, and day of publication. JSON
doesn't have an intrinsic type of dates, and most of the time I would recommend storing dates in
UNIX timestamp format (the number of seconds since the epoch). Timestamps are easy to convert to
JavaScript Date objects and are not relative to any time zone like a calendar date and time.
In our app, however, we are more interested in the calendar than the exact time because most
books provide publication dates like "2010" or "November 1997". By using an array,
we can store the parts of the date that we have and ignore the ones we don't. It is
also worth mentioning that we will be using the ISBN number of the book as its unique identifier
(the _id field). This will be important later when we start synchronizing data from multiple
devices and resolving conflicting edits.
Follow the instructions on the Alloy project site
to install Alloy, create a new app, and apply the Alloy structure to your new app. Once you have
your app set up, build and run in the iOS simulator using titanium build -p iphone or in the Android
emulator using titanium build -p android to ensure that your environment is working.
In addition to the general Alloy setup, we will need to install the TiTouchDB modules for iOS and
Android and the alloy-ti_touchdb persistence adapter so Alloy can use TouchDB as a backing database.
Open the Home page of this wiki and get
the latest version of the module ZIP files appropriate to your platform. Place these files in the
base directory of your project (the same directory as your app and Resources folders); they will
be unpacked automatically the next time the project is built. Edit tiapp.xml and add the following
lines to the <modules/> section:
<module platform="iphone">com.obscure.titouchdb</module>
<module platform="android">com.obscure.titouchdb</module>
To install the persistence adapter, download and install the persistence adapter according to the instructions in that section of the project.
App Initialization ------------------One of the first things we want to do when the app is launched is to make sure we have an existing
TouchDB database for storing books. In alloy, the app/alloy.js file is used to perform pre-UI
initialization like this. Create that file in Studio and add the following code:
var titouchdb = require('com.obscure.titouchdb'),
    manager = titouchdb.databaseManager,
    db = manager.getDatabase(Alloy.CFG.books_db_name);
This code loads up the TiTouchDB module and makes sure that the database named "books" has been
created. You can see that we're being good citizens and are using the Alloy configuration
system (Alloy.CFG) to specify the name of our database. Edit app/config.json and add
the database name to the "global" section as follows:
"global": {
  "books_db_name": "books"
},
We will be adding configuration parameters to this file as the project progresses.
Later on in this tutorial, we're going add some code to app/alloy.js which will load up
the views that we will be using to fetch data. For now,
let's get started on some UI.
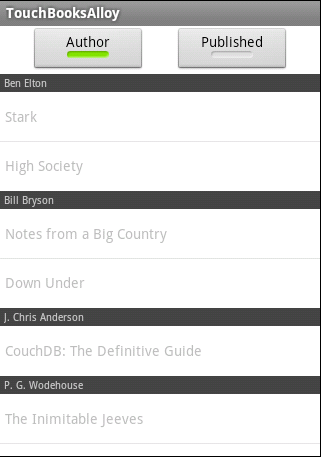
The Book List is the first window that the user will see when the app starts. It will consist of a sectioned table view listing all of the books in the database and a table header containing a control to switch between two grouping and sorting methods, author and by publication year.
Alloy has already created a placeholder view in the app named "index". We're going to edit the
generated files to create the book list window, starting with the view file. Open the file named
app/views/index.xml in Titanium Studio and replace the generated contents with the following markup:
<Alloy>
  <Window id="main" platform="ios">
    <NavigationGroup id="nav">
      <Require src="book_list"/>
    </NavigationGroup>
  </Window>
  <Require id="main" src="book_list" platform="android"/>
</Alloy>
In this view, we create a root window with a navigation controller for iOS, which itself contains the
book list window. For Android, we simply import the book list window. By adding the platform
attributes to the respective XML elements, we are instructing the Alloy build process to include
the correct markup on the platform being built.
Open the app/styles/index.tss file and replace the contents with the following styles:
"#main": {
  backgroundColor: 'white'
}
Edit app/controllers/index.js and replace the contents with the following code:
if (OS_IOS) {
  $.main.open();
}
else if (OS_ANDROID) {
  $.main.getView().open();
}
Ok, why did we have to add that getView() call for Android? Whenever you use <Require/>
in an Alloy view file, the resulting object is the controller class, not the view class, so
you have to get the controller's view and open it. For iOS, the <Require/> is inside a
NavigationGroup object, and it appears in this case that Alloy knows how to handle a required
view inside another view. My advice is to just go with the flow on this one.
Next, we need to build the book_list view that we required in the index view. Run
alloy generate view book_list from the command line to create the XML and style files.
Open app/view/book_list.xml and replace the contents with the following:
<Alloy>
  <Window id="win" class="booklist" title="Books" onOpen="loadBookList">
    <View id="header" platform="ios">
      <TabbedBar index="0" onClick="changeGrouping">
        <Labels>
          <Label>Author</Label>
          <Label>Published</Label>
        </Labels>
      </TabbedBar>
    </View>
    <View id="header" platform="android">
      <Switch id="authorSwitch" titleOn="Author" titleOff="Author" value="true" onClick="changeGrouping"/>
      <Switch id="publishedSwitch" titleOn="Published" titleOff="Published" onClick="changeGrouping"/>
    </View>
    <TableView id="tableView"/>
  </Window>
</Alloy>
In this window, we define a
header view to hold the table grouping controls and the table view itself (we don't use the headerView
property of TableView due to this bug). Once again,
we're using the platform attribute to show a tabbed bar for iOS and a list of switches for Android.
Notice that both switches on Android and the tabbed bar are calling the changeGrouping() function
in our controller, however, so a single function will handle both UI types.
There are a few styles that we need to apply to the view in order to get everything laid out the way
we want. Open app/styles/book_list.tss and replace the contents with the following styles:
".booklist": {
  layout: 'vertical',
  backgroundColor: 'white'
},

"#header": {
  height: '48dp',
  backgroundColor: 'white',
},

"#header[platform=android]": {
  layout: "horizontal"
},

"TableView": {
  height: Ti.UI.Fill
},

"TabbedBar[platform=ios]": {
  bottom: '6dp',
  height: Ti.UI.SIZE,
  width: Ti.UI.SIZE,
  style: Ti.UI.iPhone.SystemButtonStyle.BAR,
},

"Switch[platform=android]": {
  left: '10dp',
  style: Ti.UI.Android.SWITCH_STYLE_TOGGLEBUTTON
}
Now that we have the book list window defined and styled, let's create a controller and implement
the two event handler functions from the view XML. Create a file named app/controller/book_list.js
and add the following code:
function loadBookList(e) {
  // TODO
}

function changeGrouping(e) {
  // TODO
}
Right now, there isn't much to look at. Once we have defined our models, we can implement
loadBookList() and changeGrouping(). This is enough code to build and run the app,
however; in a Terminal window, cd to the project directory and run alloy run (iOS)
or alloy run . android (Android). If you are testing on Android, open a new Terminal window and run titanium emulator --platform=android in the project directory to start the emulator (see TIMOB-10072 for a workaround if the emulator won't run).
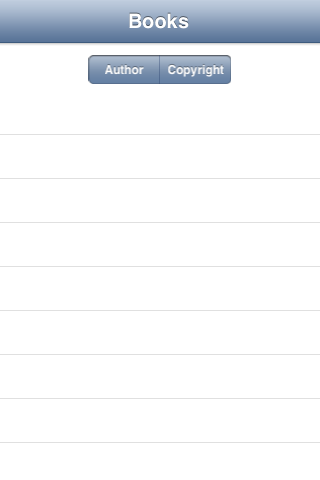
Here's what you should see:

We're going to head back into database-land now and set up the Alloy models which will provide the data for the book list window. If you haven't done so already, take a look at "Working with Models and Collections" on the Alloy web site for an introduction to using the persistence objects. Alloy ships with persistence adapters to store objects to a properties file, SQLite, or HTML5 LocalStorage. The TouchDB persistence adapter that we installed during the project setup gives us the additional ability to store objects in a local TouchDB database. This adapter maps a Model object in Alloy to a document in TouchDB and a Collection to a TouchDB view. You don't have to know anything about the TouchDB API to work with persistent documents in Alloy, but you do have to be able to create TouchDB views for the persistence adapter to use to fetch collections of model objects.
A TouchDB view is an ordered list of rows that is generated by running all of the documents in the database through a map function. The map function may output one or more rows, each of which consist of a key, a value, and (optionally) the source document used to generate the row. When a view is queried, the rows are returned in the lexicographic order of their keys. Views are automatically updated as source documents are added, modified, and removed. For the book list window, we are going to create two views that correspond to the two sorting options we built into the UI: sort by author and sort by publication year. I find that the easiest way to write view functions is to prototype them in CouchDB running on my Mac (download from the CouchDB site) to make sure they work as expected, then copy them into the app. If you aren't familiar with CouchDB and Futon, the web based admin tool, check out the Tour chapter in the CouchDB Guide. For this tutorial, I'm just going to show the view functions so we can concentrate on the app code:
// books by author map function
function(doc) {
  if (doc.author) {
    emit(doc.author, null);
  }
}

// books by publication year map function
function(doc) {
  if (doc.published && doc.published.length > 0) {
    emit(doc.published[0], null);
  }
}
Our map functions are emitting the document value that we want to sort by as the key
and null as the value since we will be using the entire source document to populate
the objects in our collection.
Views are defined in TouchDB by registering map and reduce functions with a design document. Fortunately, you don't need to know how to do that, because the TiTouchDB persistence adapter takes care of registering views for your Collections, as we will see in the following section.
Book List Model ---------------Now that we know how to write our view functions that fetch collection data, let's create the
Alloy model files. Run alloy generate model Book titouchdb, which will create a new
file named app/models/Book.js. Edit that file and update the configuration to match
the following:
config: {
  adapter: {
    type: "titouchdb",
    dbname: "books", // no Alloy.CFG here?
    collection_name: "books",
    views: {
        by_author: { map: "function(doc) { if (doc.author) { emit(doc.author, null); } }" },
        by_published: { map: "function(doc) { if (doc.published && doc.published.length > 0) { emit(doc.published[0], null); } }" }
    },
    default_query_options: {
      prefetch: true
    }
  }
},
Here's what each of these configuration options means:
-
type (required) the persistence adapter name, must be
titouchdb - dbname (required) the name of the TouchDB database where this model is stored. I would have expected to be able to use Alloy.CFG.book_db_name, but it didn't work. Sad.
- collectionName (required) the name of the design document that contains the views that are used to create Collections.
-
views (required) the definitions of the views in the TouchDB database that will correspond
to Collections. Each view definition is an object with the following properties:
-
namethe name of the view -
mapthe map function of the view -
reducean optional reduce function for the view
-
-
default_query_options (optional) any options that we want to use when we access the view. In
this case, we are passing
prefetch: trueto instruct TouchDB to return the full source document with each view row.
Next, we need to tell Backbone how to map a row consisting of a key, value, and optional document
into a Model object. Edit the extendCollection function as follows:
  extendCollection: function(Collection) {
    _.extend(Collection.prototype, {
      map_row: function(Model, row) {
        var result = new Model(row.documentProperties);
        // add custom properties here, if any
        return result;
      }
    });
    return Collection;
  }
The map_row function takes the source document properties from the provided view row and
uses it to create a new instance of the type that is passed in the Model parameter, which will
be a model type appropriate to the collection. Note that the documentProperties property of the row will be null if we didn't set prefetch to true in the view options above.
That about wraps up the TouchDB-specific part of the tutorial! From now on, we'll be working with the Backbone model objects just like you would if you were using one of the built-in persistence adapters.
Populating the Book List ------------------------Open app/controllers/book_list.js and add the following code to create the books Collection
and populate the table view:
var currentView = 'by_author';
var books = Alloy.createCollection("Book");
books.on('fetch', function(e) {
  $.tableView.refresh(books);
});

$.tableView.refresh = function(collection) {
  var data = [];
  collection.each(function(book) {
    var row = Ti.UI.createTableViewRow({
      title: book.get('title')
    });
    data.push(row);
  });
  this.setData(data);
};

function loadBookList(e) {
  books.fetch({ view: currentView });
}

function changeGrouping(e) {
  // TODO
}
In this file, we are creating the collection of book model objects by calling
Alloy.createCollection(). The collection starts off empty; we need to call the fetch()
method to request that Backbone fetch the collection objects. This call is asynchronous, so
we set up an event listener on the collection that runs when the fetch event is received. This
listener calls a method that populates the table view's rows.
Now let's implement the changeGrouping() function so we can switch between the two views:
function changeGrouping(e) {
  if (OS_ANDROID) {
    if (e.source.id === 'authorSwitch') {
      if (e.source.value) {
        currentView = 'by_author';
      }
      $.publishedSwitch.value = !e.source.value;
    }
    else if (e.source.id === 'publishedSwitch') {
      if (e.source.value) {
        currentView = 'by_published';
      }
      $.authorSwitch.value = !e.source.value;
    }
  }
  else if (OS_IOS) {
    switch (e.index) {
      case 0:
        currentView = 'by_author';
        break;
      case 1:
        currentView = 'by_published';
        break;
    }
  }
  loadBookList();
}
Leaving aside the code that deals with the platform-specific controls and switch states, the main
point of this function is to change the value of currentView and call loadBookList() to re-fetch
the collection and trigger an update of the table rows.
These rows are kind of boring, though. Let's create a new view for a custom table row that shows
the title of the book and a cover image, if any. Run alloy generate controller book_list_row and
edit views/book_list_row.xml, replacing the contents with this markup:
<Alloy>
  <TableViewRow id="tableViewRow" className="bookListRow">
    <ImageView id="cover"/>
    <Label id="title"/>
  </TableViewRow>
</Alloy>
Replace the styles for this view in styles/book_list_row.tss with the following:
"TableViewRow": {
  height: Ti.UI.SIZE,
},

"#cover": {
  top: "8dp",
  left: "8dp",
  bottom: "8dp",
  width: '48dp',
  height: Ti.UI.SIZE
},

"#title": {
  top: "8dp",
  left: "64dp",
  bottom: "8dp",
  right: "8dp",
  textAlign: "left",
  width: Ti.UI.SIZE,
  height: Ti.UI.SIZE,
  font: {
    fontSize: "18dp",
    fontWeight: "bold"
  }
}
The controller file, controllers/book_list_row.js, should contain the following JavaScript:
var book = arguments && arguments[0] || {};

$.title.text = book.get('title');

var att = book.attachmentNamed('cover.png');
var cover = att ? att.content : '/images/text_page.png';
$.cover.image = cover;

$.tableViewRow.addEventListener('click', function(e) {
  Ti.App.fireEvent('books:edit_book', {
    book_id: book.id
  });
});
So where did the attachmentNamed() function come from? The TiTouchDB sync adapter automatically adds the following methods to all Model objects:
-
attachmentNamed(name): fetch the attachment with the provided name as a Ti.Blob -
addAttachment(name, contentType, content): save an attachment with the specified name and content type. Thecontentparameter is a Ti.Blob. -
removeAttachment(name): delete the attachment. -
attachmentNames(): get a list of attachment names (returns an array of strings)
If you add or remove an attachment from a model using one of these method, you should re-fetch the model object.
We haven't implemented the table view sections yet, so let's do that in the refresh() method
of controllers/book_list.js:
$.tableView.refresh = function(collection) {
  var data = [];
  var section = null;
  collection.each(function(book) {
    var groupProperty;
    if (currentView === 'by_author') {
      groupProperty = book.get('author');
    }
    else if (currentView === 'by_published') {
      groupProperty = book.get('published')[0];
    }

    if (!section || section.headerTitle !== groupProperty) {
      if (section) {
        data.push(section);
      }
      section = Ti.UI.createTableViewSection({
        headerTitle: groupProperty
      });
    }

    var row = Alloy.createController('book_list_row', book);
    section.add(row.getView());
  });
  data.push(section); // last section

  this.setData(data);
};
Our table view row is now nicely encapsulated in its own Alloy files and even takes care of it's own click event.
Now we're at the point where we need some data. Let's grab some from the cloud...
Pulling Changes From a CouchDB Server -------------------------------------So far you probably haven't seen anything that particularly distinguishes TouchDB persistence from the built in SQL or properties persistence. That all changes in this section, in which we will add code to enable syncing documents from a CouchDB server.
First, we need a CouchDB server that can be accessed from the Internet. Check out the
list of hosting providers on the
CouchDB wiki for the latest information about where you can sign up for a hosted CouchDB instance.
For this tutorial, I created a new IrisCouch server instance
named touchbooks.iriscouch.com. Open Futon,
the built-in CouchDB admin tool, by going to the /_utils URI on your server, e.g.
http://touchbooks.iriscouch.com/_utils, log in, and create a new database named
"touchbooksalloy".
Next, we're going to add code to the app/alloy.js file which sets up continuous
replication from the server to the app. We will be adding replication from the app to
the server later on in the tutorial when we have support for editing books in the
app. Edit app/alloy.js and add the following code:
var pull = db.createPullReplication(Alloy.CFG.remote_couchdb_server);
pull.continuous = true;
pull.addEventListener('status', function(e) {
  if (pull.status == server.REPLICATION_MODE_IDLE) {
    Ti.App.fireEvent('books:update_from_server');
  }
});
pull.start();
Add the remote CouchDB server URL to app/config.json:
"global": {
  "books_db_name": "books",
  "remote_couchdb_server": "http://touchbooks.iriscouch.com/touchbooksalloy"
}, IMPORTANT: use your own server hostname and database name, not mine! I periodically mess with my test database, so your app will behave strangely if you're replicating with the above URL instead of your own, private db.
The replication progress listener fires an app event when the number of completed replications
increases. Add the following code to app/controllers/book_list.js to listen for that
event and reload the list of books:
Ti.App.addEventListener('books:update_from_server', function(e) {
  loadBookList();
});
Run the app and arrange your desktop so you can see the simulator window and your browser window with the Futon site open. In Futon, click on "Overview", then "touchbooksalloy" to view the documents in that database. Add a new document with the following data:
{
   "_id": "978-1449379681",
   "title": "CouchDB: The Definitive Guide",
   "author": "J. Chris Anderson",
   "published": [2010,9],
   "modelname": "book"
}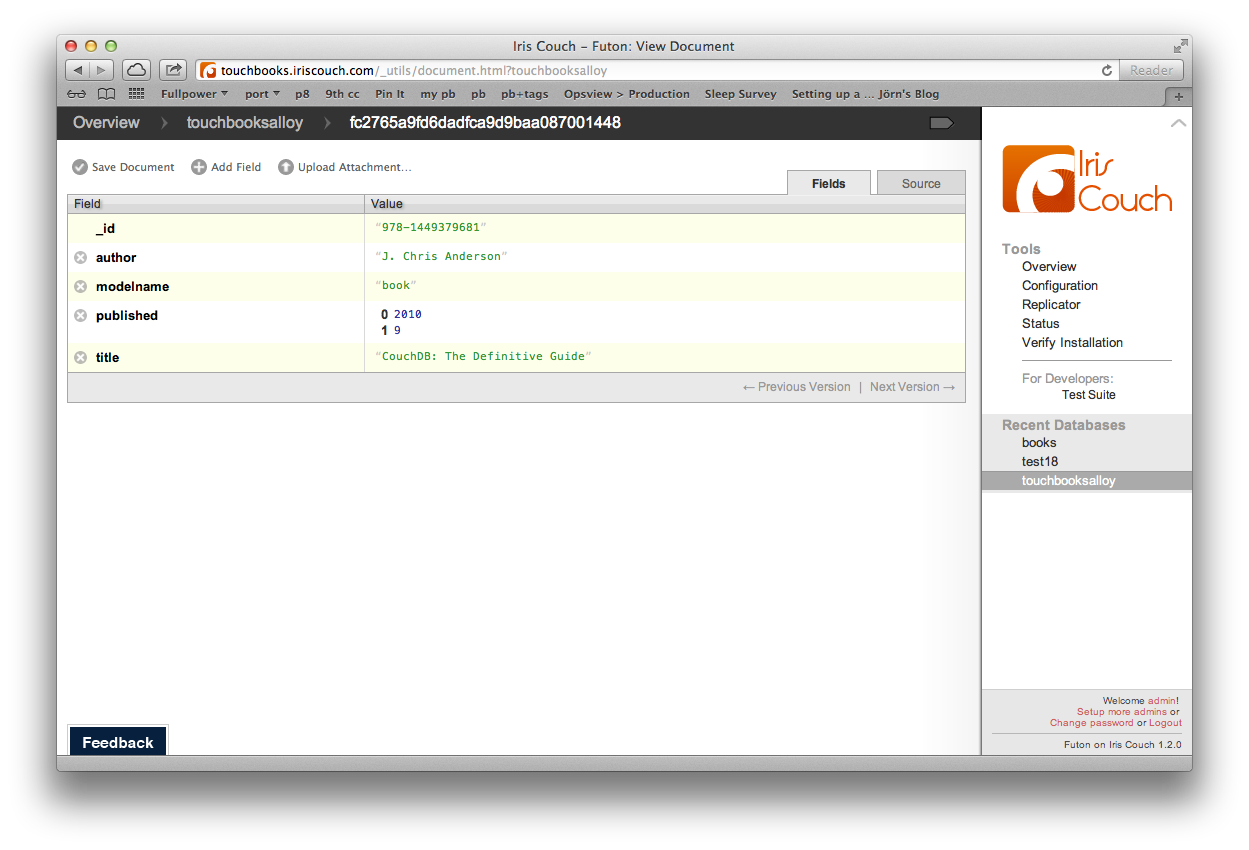
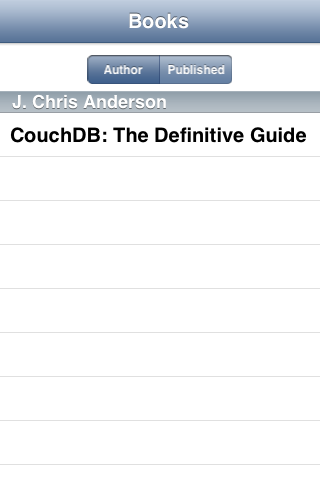
Click on the "Save Document" link at the top of the Futon page and watch the simulator. You should see the new book appear within a few seconds:
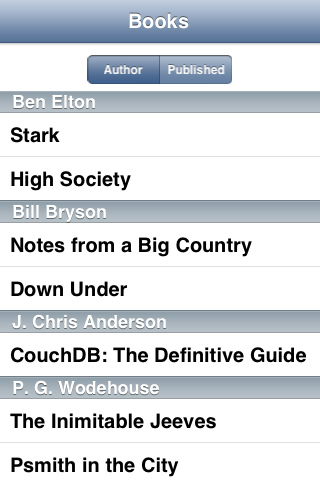
Pick up a couple of books from your real world bookshelf and add them to the database as book documents using Futon. Remember to use the ISBN number as the value of the "_id" attribute -- this will be important later when we sync multiple devices to the same server database. Once you have a couple of documents in the server, try modifying the title of a document and deleting a document using Futon. All of your additions, changes, and deletions will be replicated to the app (if you're on iOS; Android users see the disclaimer above).
Replication is a huge topic, so I suggest the following reading:
- "CouchDB: The Definitive Guide" has a chapter covering replication
- The TouchDB wiki chapter on replication describes how the underlying TouchDB library handles replicating with CouchDB servers.
- The TiTouchDB documentation lists the functions that you call to manage replications and the options for replication instances.
These sites will help you choose the type of replication (continuous vs. one-shot, pull and push) will work best for your application.
Moving right along, we are next going to add a window to the app for editing existing book
objects. Create a new view by running alloy generate controller edit_book. This will create
app/views/edit_book.xml, app/views/edit_book.tss, and app/controllers/edit_book.js.
Edit the XML file and replace the contents with the following markup:
<Alloy>
  <Window id="win">
    <ScrollView>
      <Label class="label">ISBN</Label>
      <TextField class="value" id="isbn"/>
      <Label class="label">Title</Label>
      <TextField class="value" id="title"/>
      <Label class="label">Author</Label>
      <TextField class="value" id="author"/>
      <Label class="label">Published</Label>
      <Picker id="published" onChange="changePublished"/>
      <Button id="save" onClick="saveChanges">Save</Button>
    </ScrollView>
  </Window>
</Alloy>
Edit app/styles/edit_book.tss and replace the contents with the following styles:
"Window": {
  backgroundColor: "white",
},

"ScrollView": {
  layout: "vertical"
},

"TextField": {
  height: Ti.UI.SIZE,
  borderStyle: Ti.UI.INPUT_BORDERSTYLE_ROUNDED
},

"Label": {
  height: Ti.UI.SIZE
},

".label": {
  left: "2%",
  right: "2%",
  top: "10dp",
  textAlign: 'left',
  font: {
    fontWeight: "bold"
  }
},

".value": {
  left: "2%",
  right: "2%",
  top: "6dp",
},

"#published": {
  top: "6dp",
  type: Ti.UI.PICKER_TYPE_DATE
},

"#save": {
  left: "2%",
  right: "2%",
  top: "6dp",
  bottom: "20dp",
  height: "32dp",
  color: 'white',
  backgroundColor: '#0c0',
  borderRadius: 8,
  font: {
    fontWeight: "bold"
  }
},

"#save[platform=ios]": {
  style: Ti.UI.iPhone.SystemButtonStyle.PLAIN,
  backgroundGradient: {
    type: 'linear',
    colors:[{color:'#0f0',position:0.0},{color:'#0c0',position:0.50},{color:'#090',position:1.0}]
  },
}
Edit app/controllers/edit_book.js and add the following code:
var book = Alloy.createModel('Book');

book.on('fetch', function(obj) {
  $.isbn.value = book.id;
  $.title.value = book.get('title');
  $.author.value = book.get('author');

  var published = book.get('published') || [];
  var publishedDate = new Date();
  publishedDate.setFullYear(published.length > 0 ? published[0] : 1970);
  publishedDate.setMonth(published.length > 1 ? published[1] - 1 : 0);
  publishedDate.setDate(published.length > 2 ? published[2] : 1);
  $.published.value = publishedDate;
});

book.on('update', function() {
  Ti.App.fireEvent('books:book_changed', { book_id: book.id });
  alert(String.format('updated "%s"', book.get('title')));
});

exports.set_book_id = function(id) {
  book.id = id;
  $.isbn.touchEnabled = false;
  $.isbn.borderStyle = Ti.UI.INPUT_BORDERSTYLE_NONE;
  $.isbn.blur();
  book.fetch();
};

function changePublished(e) {
  book.set('published', [e.value.getFullYear(), e.value.getMonth() + 1, e.value.getDate()]);
}

function saveChanges(e) {
  book.id = $.isbn.value;
  book.set('title', $.title.value);
  book.set('author', $.author.value);
  book.save();
}
We are firing an app event named books:book_changed after a book object is created or updated.
The book list controller will reload the table view when it receives this event. Add the following
code to book_list.js:
Ti.App.addEventListener('books:book_changed', function(e) {
  loadBookList();
});
It is a little inefficient to reload the entire table when only one item has changed. We can't simply update the labels in the existing row in the table view when we receive the change event, however, because the new values of the book fields might affect ordering and sectioning.
Now let's add an event handler to the book list table view rows that fires an app event to open the edit book window:
var row = Ti.UI.createTableViewRow({
  book_id: book.id,
  title: book.get('title')
});
row.addEventListener('click', function(e) {
  Ti.App.fireEvent('books:edit_book', {
    book_id: e.source.book_id
  });
});
section.add(row);
Why are we passing the book identifier instead of the entire book object? While I was initially
developing this code, I found that Ti.App.fireEvent() stripped functions from the object
before it was delivered to the event listeners. This behavior turned my nice Model object into a
plain dictionary of keys and values. I had to re-fetch the model in order to get the save()
function, so it made sense to just pass the object ID. In a non-trivial app, I'd probably use
postal.js for message passing, which passes full objects
between publisher and subscriber objects.
The last part of the edit window is adding the following code to app/controllers/index.js,
which opens the edit book window in response to the books:edit_book app event:
Ti.App.addEventListener('books:edit_book', function(e) {
  var editBookController = Alloy.createController("edit_book");
  if (e.book_id) {
    editBookController.set_book_id(e.book_id);
  }
  if (OS_IOS) {
    $.nav.open(editBookController.getView());
  }
  else if (OS_ANDROID) {
    editBookController.getView().open();
  }
});
Run the app and touch one of the table rows on the book list page to see the edit book window:
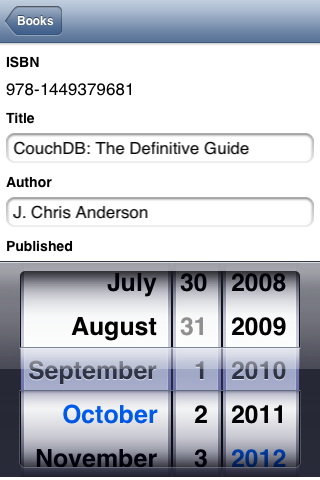
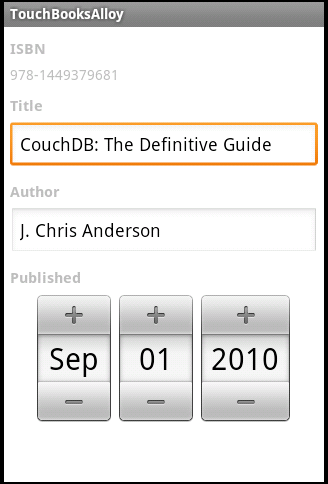
Change the books title, author, or publication date and touch the "save" button, then use the back button to return to the book list window. You should see your changes reflected in the book list table view.
Pushing Changes To a CouchDB Server -------------------------------------Syncing our local database changes back to the CouchDB server using push replication is even easier
than the pull replication we set up in the earlier section. Add the following code to
app/alloy.js:
var push = db.createPushReplication(Alloy.CFG.remote_couchdb_server);
push.continuous = true;
push.start();
Push replications also have progress events, but we don't need to update the app when the server
is updated so we aren't listening for them. Run this code and make a change to a book document in
the app, then load that document in Futon to see your changes. Even cooler: make changes to a book
in the iOS simulator and watch those changes appear in the Android emulator a few seconds later!
One of the compelling features of TouchDB is that the local database is always accessible regardless of network connectivity. Changes that are made when the network is not available will be sent to the server once network connectivity is restored. Let's try this out to see how it works.
- Install the TouchBooksAlloy app to your iOS device.
- Launch the app and get one or more book documents synced from your CouchDB server.
- Open the Settings app and place your device in Airplane Mode.
- Go back to TouchBooksAlloy and make one or more changes to existing documents.
- Open Futon on your CouchDB server and verify that the modifications have not been made on the server.
- Force-quit the TouchBooksAlloy app and relaunch to confirm that the local modifications are persistent.
- Turn off Airplane Mode and go back to the TouchBooksAlloy app. After a few moments, verify that your local changes were replicated to the server.
coming soon
Adding New Books ----------------We use the edit book window to create a new book as well. On Android, we will put the "add" button
in the header of the book list window. Edit app/views/book_list.xml and insert the following
markup after publishedSwitch:
<Button id="addButton" onClick="addBook">Add</Button>For iOS, we will put a system "add" button in the navigation header. Edit app/controllers/book_list.js
and add the following code:
function addBook(e) {
  Ti.App.fireEvent('books:edit_book');
}

if (OS_IOS) {
  var addButton = Ti.UI.createButton({
    systemButton: Ti.UI.iPhone.SystemButton.ADD
  });
  addButton.addEventListener('click', addBook);
  $.win.rightNavButton = addButton;
}
Both the Android and iOS buttons call addBook(), which simply triggers the edit event without
providing a book ID.
- Attachments: every document can contain opaque (non-indexable) attachments. For this demo, it would be interesting to add a cover image to each book document as an attachment.
- Web-based apps: The CouchDB server can host web applications as well as documents, which makes it relatively easy to provide your users with a web interface to their data. Tools for building CouchDB-based application include couchapp and Kanso.
- Peer-to-peer: TouchDB includes an HTTP listener that implements the Couch REST interface. That listener (when it becomes part of TiTouchDB) could be used for peer-to-peer replication when a central server cannot be reached. Jan Lehnhardt is particularly fond of this idea, and when you listen to his talk on the subject you will understand why.