- 4.8 Using Quota Groups
- Btrfs for mere mortals: inode allocation | Marcos’ Blog
- btrfs-man5(5) — BTRFS documentation
- btrfs-quota(8) - Linux manual page
- darkling/btrfs-usage: Web-app to estimate usable space in different btrfs RAID configurations
- digint/btrbk: Tool for creating snapshots and remote backups of btrfs subvolumes
- digint/btrbk: Tool for creating snapshots and remote backups of btrfs subvolumes
- Examining btrfs, Linux’s perpetually half-finished filesystem | Ars Technica
- kilobyte/compsize: btrfs: find compression type/ratio on a file or set of files
- maharmstone/btrfs: WinBtrfs - an open-source btrfs driver for Windows
- Oracle® Linux 8 Managing Local File Systems - Chapter 3 Managing the Btrfs File System
- OS Chroot 101: covering btrfs subvolumes - Fedora Magazine
- Solene’% : BTRFS deduplication using bees
- Solene’% : My BTRFS cheatsheet
- teejee2008/timeshift: System restore tool for Linux. Creates filesystem snapshots using rsync+hardlinks, or BTRFS snapshots. Supports scheduled snapshots, multiple backup levels, and exclude filters. Snapshots can be restored while system is running or from Live CD/USB.
- Ubuntu Desktop 20.04: installation guide with btrfs-luks-RAID1 full disk encryption including /boot and auto-apt snapshots with Timeshift | Willi Mutschler
[root@web15:~]# btrfs qgroup limit -e 15G /home/u230390

[root@web15:~]# btrfs qgroup show --sync --raw -reF /home/u230390
qgroupid         rfer         excl     max_rfer     max_excl
--------         ----         ----     --------     --------
0/8089    13159251968  13159251968  16106127360         none
Change quota from excl to ref.
for dir in /home/*; do sudo btrfs qgroup show -reF --raw $dir | awk '{if($5=="none" && $4!="none"){print $4}}' | xargs -I {} sudo btrfs qgroup limit -e {} $dir && sudo btrfs qgroup limit none $dir ; done- Shrink btrfs Partition without destroying my system? : linux4noobs
btrfs filesystem resize -32G /
As shown in my previous article about the NILFS file system, continuous snapshots are great and practical as they can save you losing data accidentally between two backups jobs.

Today, I'll demonstrate how to do something quite similar using BTRFS and regular snapshots.

In the configuration, I'll show the code for NixOS using the tool btrbk to handle snapshots retention correctly.

Snapshots are not backups! It is important to understand this. If your storage is damaged or the file system get corrupted, or the device stolen, you will lose your data. Backups are archives of your data that are on another device, and which can be used when the original device is lost/destroyed/corrupted. However, snapshots are superfast and cheap, and can be used to recover accidentally deleted files.

btrbk official website
NixOS configuration §

The program btrbk is simple, it requires a configuration file /etc/btrbk.conf defining which volume you want to snapshot regularly, where to make them accessible and how long you want to keep them.

In the following example, we will keep the snapshots for 2 days, and create them every 10 minutes. A SystemD service will be scheduled using a timer in order run btrbk run which handle snapshot creation and pruning. Snapshots will be made available under /.snapshots/.

  environment.etc = {
    "btrbk.conf".text = ''
      snapshot_preserve_min   2d
      volume /
        snapshot_dir .snapshots
        subvolume home
    '';
  };

  systemd.services.btrfs-snapshot = {
    startAt = "*:0/10";
    enable = true;
    path = with pkgs; [btrbk];
    serviceConfig.Type = "oneshot";
    script = ''
      mkdir -p /.snapshots
      btrbk run
    '';
  };

Rebuild your system, you should now have systemd units btrfs-snapshot.service and btrfs-snapshot.timer available.

As the configuration file will be at the standard location, you can use btrbk as root to manually list or prune your snapshots in case you need to, like immediately reclaiming disk space.
Using NixOS module §

After publishing this blog post, I realized a NixOS module existed to simplify the setup and provide more features. Here is the code used to replicate the behavior of the code above.

{
  services.btrbk.instances."btrbk" = {
    onCalendar = "*:0/10";
    settings = {
      snapshot_preserve_min = "2d";
      volume."/" = {
        subvolume = "/home";
        snapshot_dir = ".snapshots";
      };
    };
  };
}

You can find more settings for this module in the man page configuration.nix.
Going further §

btrbk is a powerful tool, as not only you can create snapshots with it, but it can stream them on a remote system with optional encryption. It can also manage offline backups on a removable media and a few other non-simple cases. It's really worth taking a look.

This blog is powered by cl-yag!
2014-12-28 · 733 words · 4 minute read
[[https://cowboyprogrammer.org/tags/linux][When I decided I needed more disk space for media and virtual machine (VM) images, I decided to throw some more money at the problem and get three 3TB hard drives and run BTRFS in RAID5. It’s still somewhat experimental, but has proven very solid for me.
RAID5 means that one drive can completely fail, but all the data is still intact. All one has to do is insert a new drive and the drive will be reconstructed. While RAID5 protects against a complete drive failure, it does nothing to prevent a single bit to be flipped to due cosmic rays or electricity spikes.
BTRFS is a new filesystem for Linux which does what ZFS does for BSD. The two important features which it offers over previous systems is: copy-on-write (COW), and bitrot protection. See, when running RAID with BTRFS, if a single bit is flipped, BTRFS will detect it when you try to read the file and correct it (if running in RAID so there’s redundancy). COW means you can take snapshots of the entire drive instantly without using extra space. Space will only be required when stuff change and diverge from your snapshots.
See Arstechnica for why BTRFS is da shit for your next drive or system.
What I did not do at the time was encrypt the drives. Linux Voice #11 had a very nice article on encryption so I thought I’d set it up. And because I’m using RAID5, it is actually possible for me to encrypt my drives using dm-crypt/LUKS in-place, while the whole shebang is mounted, readable and usable :)
Some initial mistakes meant I had to actually reboot the system, so I thought I’d write down how to do it correctly. So to summarize, the goal is to convert three disks to three encrypted disks. BTRFS will be moved from using the drives directly, to using the LUKS-mapped.
Sadly, we need to unmount the volume to be able to “remove” the drive. This needs to be done so the system can understand that the drive has “vanished”. It will only stay unmounted for about a minute though.
sudo umount /path/to/vol
This is assuming you have configured your fstab with all the details. For example, with something like this (ALWAYS USE UUID!!)
# BTRFS Systems UUID="ac21dd50-e6ee-4a9e-abcd-459cba0e6913" /mnt/btrfs btrfs
defaults 0 0
Note that no modification of the fstab will be necessary if you have used UUID.
Pick one of the drives to encrypt. Here it’s /dev/sdc :
sudo cryptsetup luksFormat -v /dev/sdc
To use it, we have to open the drive. You can pick any name you want:
sudo cryptsetup luksOpen /dev/sdc DRIVENAME
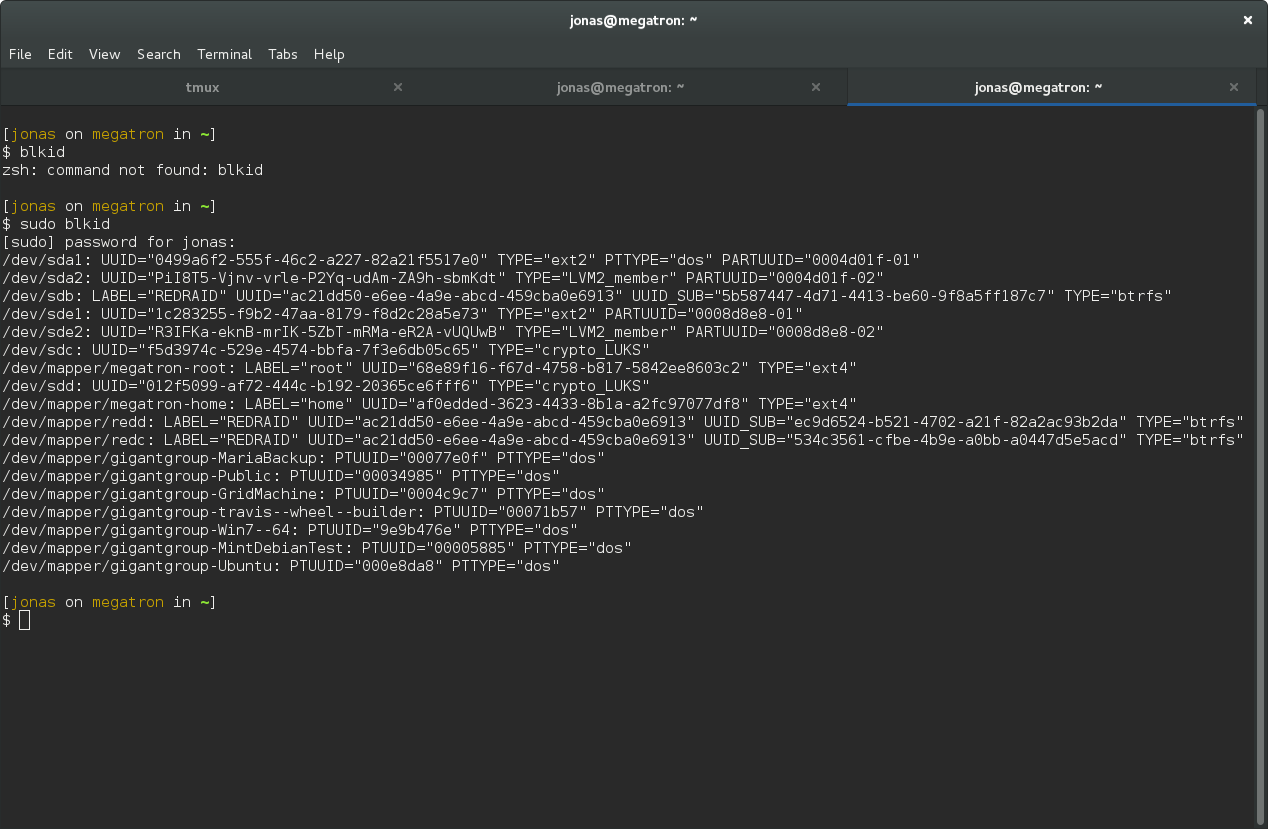
To make this happen on boot, find the new UUID of /dev/sdc with blkid :
sudo blkid
So for me, the drive has a the following UUID:
f5d3974c-529e-4574-bbfa-7f3e6db05c65. Add the following line to
/etc/crypttab with your desired drive name and your UUID (without any
quotes):
DRIVENAME UUID=your-uuid-without-quotes none luks
Now the system will ask for your password on boot.
First we have to remount the raid system. This will fail because there is a missing drive, unless we add the option degraded .
sudo mount -o degraded /path/to/vol
There will be some complaints about missing drives and such, which is exactly what we expect. Now, just add the new drive:
sudo btrfs device add /dev/mapper/DRIVENAME /path/to/vol
The final step is to remove the old drive. We can use the special name missing to remove it:
sudo btrfs device delete missing /path/to/vol
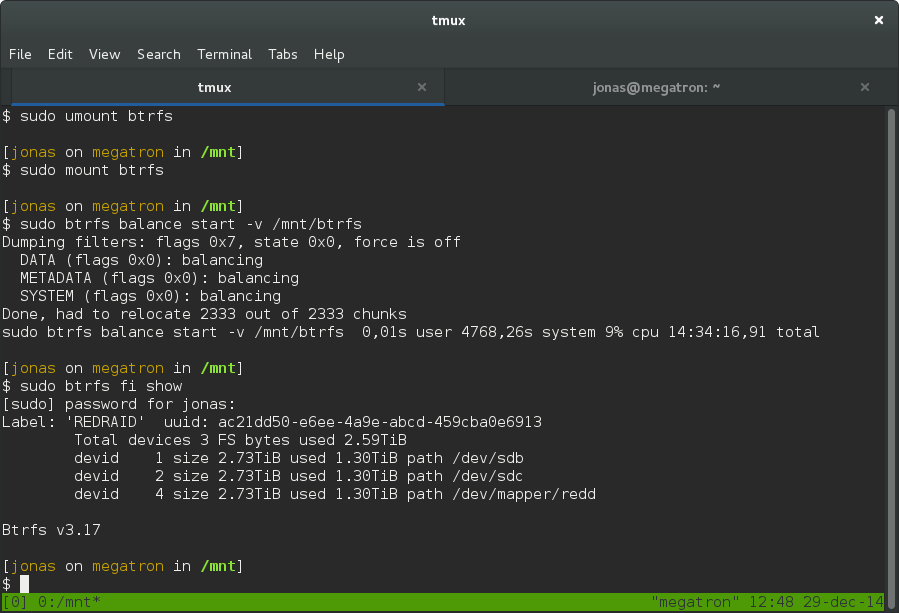
This can take a really long time, and by long I mean ~15 hours if you have a terrabyte of data. But, you can still use the drive during this process so just be patient.
For me it took 14 hours 34 minutes. The reason for the delay is because the delete command will force the system to rebuild the missing drive on your new encrypted volume.
Just unmount the raid, encrypt the drive, add it back and delete the
missing. Repeat for all drives in your array. Once the last drive is done,
unmount the array and remount it without the -o degraded option. Now you
have an encrypted RAID array.

