
This User Manual contains all essential information for the end-user to make full use of ShellAnything application. This manual includes a description of the system functionalities and capabilities with examples divided in the following sections:
- Post Installation
- Configuration Files
- Properties
- Plugins
- Use Cases
- Other
- Troubleshooting
The following instructions define how to activate or disable the Shell Extension after installation.
Note: Starting from version 0.8.0, the registration/unregistration of the shell extension is done automatically when installing/uninstalling.
To register the shell extension, execute the following commands:
-
Open a command prompt with administrative privileges.
- Click on the
Start Menu. - Select
All Programs,Accessories. - Right-click on
Command Promptshortcut and selectRun as administrator.
- Click on the
-
Navigate to ShellAnything installation directory. Enter the command:
cd /d <insert-installation-directory-here>, replacing<insert-installation-directory-here>by the actual installation directory. For instance,cd /d C:\Program Files\ShellAnything. -
Register the shell extension with the command:
regsvr32 sa.shellextension.dll -
The following confirmation message should displayed:
[Window Title]
RegSvr32

[Content]
DllRegisterServer in sa.shellextension.dll succeeded.

[OK]
Refer to the following post for details: How to Register a DLL File in Windows
To stop or temporary disable using the shell extension, you must unregister the extension from the system.
Note that prior to uninstall the application, the shell extension must first be unregistered from the system. Omitting to unregister the shell extension from the system will fail the uninstall process or not fully remove the shell extension from the system.
To unregister the shell extension, execute the following commands:
-
Open a command prompt with administrative privileges.
- Click on the
Start Menu. - Select
All Programs,Accessories. - Right-click on
Command Promptshortcut and selectRun as administrator.
- Click on the
-
Navigate to ShellAnything installation directory. Enter the command:
cd /d <insert-installation-directory-here>, replacing<insert-installation-directory-here>by the actual installation directory. For instance,cd /d C:\Program Files\ShellAnything. -
Register the shell extension with the following command:
regsvr32 /u sa.shellextension.dll -
The following confirmation message should displayed:
[Window Title]
RegSvr32

[Content]
DllUnregisterServer in sa.shellextension.dll succeeded.

[OK]
The power of ShellAnything comes from the ability to define dynamic content from xml files. To add additional menu options to Windows Explorer context menu, one must define the desired menus (and their expected behavior) in a Configuration File.
A configuration file contains the definition of all <menu> elements to be displayed on a context menu. Configuration file are written in xml file format and must be encoded in utf-8 format.
When a user right-click on a file in Windows Explorer, the application will load all available configuration files and display their content into the displayed context menu.
The list of Configuration Files is unique for each users of the system. The files are stored in C:\Users\%USERNAME%\ShellAnything directory where %USERNAME% is your current Windows session username. Note that Windows Explorer also support copy & pasting C:\Users\%USERNAME%\ShellAnything into an address bar to quickly jump to the directory.
The application support multiple configuration files at the same time. One can add new files in the configuration directory and the system will automatically detect and load them.
When a configuration file is deleted, the application automatically detect the missing file and properly unload the associated menus which stop displaying their content.
To temporary disable a configuration file, one can simply change the file extension from xml to txt. Change the file extension back to xml to re-enable the file.
The following xml file shows the minimum requirement of a Configuration File:
<?xml version="1.0" encoding="utf-8"?>
<root>
  <shell>
    <!-- insert menu definitions here -->
  </shell>
</root>
Note that this sample file does not define any menus.
A <menu> element in a Configuration File defines a menu item that is displayed on a context menu. A <menu> element must be inserted under the <shell> element.
The <menu> element have two attributes.
The name attribute is the actual text that will be displayed on the context menu. For instance, the following menu element will display Test 1-2-3 when you right-click a file or directory:
<menu name="Test 1-2-3">
</menu>
Menu names supports keyboard mnemonics, see the Mnemonics / keyboard shortcuts section for details.
The separator attribute allows one to define an horizontal separator between menu options. To define an horizontal separator, one must set the separator attributes to one of the following values: true, yes, on or horizontal. For example, the following creates a separator between menu foo and bar :
<menu name="foo" />
<menu separator="true" />
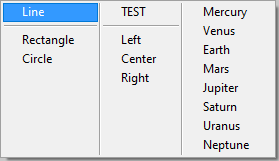
<menu name="bar" />ShellAnything also support creating vertical (or column) separators. When using such a separator, Windows renders the popup menu with multiple columns. The menus following a column separator are rendered in a new column. For example, look at this image to see a multi-column menu. To define a vertical separator, one must set the separator attributes to value vertical or column. For example, the following creates a two column menu :
<menu name="Left" />
<menu name="logical" />
<menu name="analytical" />
<menu name="objective" />
<menu separator="column" />
<menu name="Right" />
<menu name="intuitive" />
<menu name="creativity" />
<menu name="subjective" />The maxlength attribute allows one to define a maximum length of a menu name. This allows one to limit the width of the menu and prevent system (or at least, File Explorer) stability issues.
If a menu name expands to a string longer than maxlength characters, the name is truncated to exactly maxlength characters.
The length validation is applied to the expanded value of the name attribute.
If maxlength attribute is not specified, the value 250 is used. If the menu name expands to a string longer than 250 characters, the name is trimmed to 250 characters and a trailing "..." is added at the end to indicate that menu name reached the maximum value supported by ShellAnything. The trailing "..." is not added if maxlength is set to a value different than 250.
To set a maximum length, one must set the maxlength attributes to a value between 1 and 250.
For example, the following limits a menu name to 40 characters :
<menu name="${super_long_property}" maxlength="40" />A Configuration File can have multiple menu element.
To insert a sub menu, define a <menu> element under another <menu> element. For instance, to create a Operations top menu with a Connect, Update and Restart sub menus, the following xml should be used:
<menu name="Operations">
  <menu name="Connect">
  </menu>
  <menu name="Update">
  </menu>
  <menu name="Restart">
  </menu>
</menu>The <visibility> and <validity> elements act as filters for menus. They affect a menu's visibility and validity status respectively allowing one to set a menu visible or invisible, enabled or disabled.
The <visibility> and <validity> elements must be added under a <menu> element.
Each <visibility> and <validity> element must be validated against multiple criteria defined by the attributes below. If the validation is successful, the menu will be set visible or enabled. If the validation fails then the associated menu is set invisible or disabled.
If multiple attributes are specified for a single <visibility> or <validity> element, all attributes must be evaluated for the validation to be successful. The logical and operator is used with each attribute.
Multiple <visibility> or <validity> elements can be added under a <menu> element. The logical or operator is used with each element of the same type. This allows combining elements to achieve more complex validation. See Combining multiple <visibility> and <validity> elements for details.
The <visibility> and <validity> elements have the following attributes:
The class attribute validates a menu based on type (class) of the selected files. The attribute can be used to quickly filter a menu based on the user selection. It covers most filtering use cases:
- Filter for files only.
- Filter for directories only.
- Filter by file extensions.
If class attribute is specified, the classes of the files selected by the user must match for the validation to be successful. To specify multiple classes, one must separate each class with the ; character. If multiple classes are specified, at least one class must match for the validation to be successful.
If multiple files are selected, each file must match at least one allowed class for the validation to be successful.
If class attribute is not specified, then the validation is successful.
The class attribute supported values are explained in the following table:
| Values | Meaning |
|---|---|
| .<ext> | Validates a menu if the selected file extension matches the file extension <ext> . Replace <ext> by your desired file extension value. |
| file | Validates a menu if the user has only selected files. |
| directory | Validates a menu if the user has only selected folders or directories. |
| drive | Validates a menu if the selected file is located on a drive. |
| drive:removable | Validates a menu if the selected file is located on a removable drive. |
| drive:fixed | Validates a menu if the selected file is located on a fixed drive. |
| drive:network | Validates a menu if the selected file is located on a network drive or a network path. |
| drive:optical | Validates a menu if the selected file is located on an optical drive. |
| drive:ramdisk | Validates a menu if the selected file is located on a ramdisk drive. |
For example, the following set a menu visible only when the user right-click on files:
<visibility class="file" />The maxfiles and maxfolders attributes validates a menu based on the number of files and folders selected by the user.
If the number of selected files is equals or lower than the value specified by maxfiles attribute, the validation is successful. Otherwise, the validation fails.
If the number of selected directories is equals or lower than the value specified by maxfolders attribute, the validation is successful. Otherwise, the validation fails.
If maxfiles and maxfolders attributes are not specified, then the validation is successful.
Typical use of the maxfiles and maxfolders attributes is the following:
- Set
maxfilesto value '0' to force a folder-only menu. - Set
maxfoldersto value '0' to force a file-only menu. - Set
maxfilesto value '0' andmaxfoldersto value '1' to enable a menu only when a single folder is selected. - Set
maxfilesto value '1' andmaxfoldersto value '0' to enable a menu only when a single file is selected.
For example, the following set a menu visible only when the user right-click on a single file:
<visibility maxfiles="1" maxfolders="0" />The fileextensions attribute validates a menu based on the file's extension selected by the user.
If fileextensions attribute is specified, the file's extension selected by the user must match for the validation to be successful. To specify multiple file extensions, one must separate each extension with the ; character. If multiple file extensions are specified, at least one extension must match for the validation to be successful.
If multiple files are selected, each file must match at least one allowed file extension for the validation to be successful.
If fileextensions attribute is not specified, then the validation is successful.
For example, the following set a menu visible only when the user right-click on a single executable file:
<visibility maxfiles="1" maxfolders="0" fileextensions="com;exe;bat;cmd" />The pattern attribute validates a menu based on a wildcard pattern matching algorithm. The wildcard pattern can include special characters such as * and ? where
*Matches any string of zero or more characters.?Matches any single character.
If pattern attribute is specified, the files selected by the user must match the wildcard pattern for the validation to be successful. To specify multiple patterns, one must separate each pattern value with the ; character. If multiple patterns are specified, at least one pattern must match for the validation to be successful.
If multiple files are selected, each file must match at least one pattern for the validation to be successful.
If pattern attribute is not specified, then the validation is successful.
For example, the following set a menu visible only when the user right-click on JPEG image files which filenames start by `IMG``:
<visibility pattern="*\IMG*.jpg" />The following table show useful pattern examples:
| Pattern | Meaning |
|---|---|
| *\e*.??? | Matches filenames beginning with the letter e. |
| *e.??? | Matches filenames ending with the letter e. |
| *vacations* | Matches files that have the word vacations in their path. |
| *2019* | Matches files that have the year 2019 in the filename or directory path. |
| *\DCIM\* | Matches the files located in a Digital Camera Images directory. |
| C:\Program Files\*; C:\Program Files (x86)\* |
Matches files that are located in C:\Program Files or C:\Program Files (x86) directories. |
| ${env.USERPROFILE}\Downloads; ${env.USERPROFILE}\Desktop |
Matches files that are located in the user's Downloads or Desktop directories. |
| D:\* | Matches files located on the D: drive. |
| *\IMG_????.JPG; *\DSC_????.JPG |
Matches Canon or Nikon image files. |
Note:
The pattern attribute should not be used for matching files by file extension. The fileextensions attribute should be used instead.
The exists attribute validates a menu if the specified file or directory exists.
If exists attribute is set, the application will search for the file. If the file or directory exists on the system, the validation is successful. To specify multiple files/directories, one must separate each value with the ; character. If multiple values are specified, all values must exists on the system for the validation to be successful.
If exists attribute is not specified, then the validation is successful.
For example, the following set a menu visible only when Microsoft Word 2016 is installed on the system:
<visibility exists="C:\Program Files (x86)\Microsoft Office\Office16\WINWORD.EXE" />The properties attribute validates a menu if the specified property is not empty.
If properties attribute is set, the application will look for the specified property. If the property is not empty, the validation is successful. To specify multiple properties, one must separate each property with the ; character. If multiple properties are specified, all properties must be not empty for the validation to be successful.
If properties attribute is not specified, then the validation is successful.
For example, the following set a menu visible when process.started property is not empty:
<visibility properties="process.started" />See properties section for how to define custom properties.
The exprtk attribute validates a menu based on a string expression algorithm. The expression must be specified as a mathematical expression and the result must evaluates to true or false such as 4 == 5 or 10 > 3.
If exprtk attribute is specified, the expression must evaluates to true for the validation to be successful. The exprtk attribute does not support multiple expressions but logical and and or operators can be use to group expressions.
If exprtk attribute is not specified, then the validation is successful.
The attribute supports the following operators:
- Basic operators:
+,-,*,/,%,^ - Equalities & Inequalities:
=,==,<>,!=,<,<=,>,>= - Logic operators:
and,not,or,xor,true,false - String operators:
in,like,ilike, []
Strings may be comprised of any combination of letters, digits special characters including (~!@#$%^&*()[]|=+ ,./?<>;:"_) or hexadecimal escaped sequences (eg: \0x30) and must be enclosed with single-quotes.
eg: 'Frankly my dear, \0x49 do n0t give a damn!'
The exprtk attribute allows advanced menu validation. The following table show useful expression examples:
| Use cases | Expression | Meaning |
|---|---|---|
| Test a property for a numeric value | ${value} == 6 | Evaluates to true when property value is set to numeric value 6. |
| Test a property for a string value. | '${name}' == 'John' | Evaluates to true when property name is set to string value John. |
| Set a menu visible based on how many file are selected | ${selection.count} == 3 | Evaluates to true when user clicked on exactly 3 elements. |
| Set a menu visible based on a state machine | '${myapp.state}' == 'PAUSED' | Evaluates to true when application's state is PAUSED. |
| Set a menu invisible when it was selected 3 times. | ${myapp.runs} <= 2 | Evaluates to true when property myapp.runs is lower or equals to 2. |
| Set a menu visible by filename length. | '${selection.filename}'[] == 9 | Evaluates to true when user clicked on a file whose filename (including file extension) is exactly 9 characters. |
Combine expressions with and and or logic. |
${foo} == 2 or ${bar} >= 5 | Evaluates to true when property foo is set to 2 orwhen property bar is set to a value greater or equal to 5. |
| Set a menu visible if user selection contains a specific string. | 'abc' in '${selection.path}' | Evaluates to true when user clicked on a file that contains the string abc. |
| Set a menu visible if user selection matches a string pattern. | '${selection.path}' ilike '*.exe' | Evaluates to true when user clicked on a file with exe extension. |
Note:
The exprtk attribute uses the exprtk library to parse the expression. For more details and supported expressions, see the exprtk documentation on the official github page or the library website.
The istrue attribute validates a menu if the specified value evaluates to true.
If istrue attribute is set, the application will evaluate the given value. If the value evaluates to true, the validation is successful. To specify multiple values, one must separate each value with the ; character. If multiple values are specified, all values must evaluates to true for the validation to be successful.
If istrue attribute is not specified, then the validation is successful.
For example, the following set a menu visible only when the property initialized evaluates to true:
<visibility istrue="${initialized}" />The following values evaluates to true : true, yes, ok, on and 1. The evaluation is case insensitive. All other values does not evaluates to true and will fail the validation.
For systems that are not configured in English, your system may use another value for true. For such system, ShellAnything has defined property system.true which allows one to set the property to the same value as Yes but in your system native language.
For example, you can set property system.true to 是的, sí, हां, sim, да, はい, oui or ja.
The isfalse attribute validates a menu if the specified value evaluates to false.
If isfalse attribute is set, the application will evaluate the given value. If the value evaluates to false, the validation is successful. To specify multiple values, one must separate each value with the ; character. If multiple values are specified, all values must evaluates to false for the validation to be successful.
If isfalse attribute is not specified, then the validation is successful.
For example, the following set a menu visible only when the property initialized evaluates to false:
<visibility isfalse="${initialized}" />The following values evaluates to false : false, no, fail, off and 0. The evaluation is case insensitive. All other values does not evaluates to false and will fail the validation.
For systems that are not configured in English, your system may use another value for false. For such system, ShellAnything has defined property system.false which allows one to set the property to the same value as No but in your system native language.
For example, you can set property system.false to 不, नहीं, não, нет, いいえ, non or Nein.
The isempty attribute validates a menu if the specified text is empty. The attribute does not support multiple values.
If isempty attribute is not specified, then the validation is successful. If a text value is specified, the resulting expansion must be empty for the validation to be successful.
For example, the following set a menu visible only when the property first_selected is empty:
<visibility isempty="${first_selection}" />The keyboard attribute validates a menu if the specified keyboard modifier (key) is pressed. A keyboard modifier is any of the following text values: CTRL, ALT, SHIFT. These values are not case sensitive.
If the keyboard attribute is set, the application will look if the matching keyboard key is pressed. If there is a match between the value and the modifier state, the validation is successful. To specify multiple modifier, one must separate each property with the ; character. If multiple modifier are specified, all modifier must match the keyboard state for the validation to be successful.
If keyboard attribute is not specified, then the validation is successful.
For example, the following set a menu visible only when the keyboard shift modifier is pressed:
<visibility keyboard="shift" />Note:
You can also filter menus based on keyboard modifier states using keyboard.ctrl, keyboard.alt or keyboard.shift properties. See live properties for details.
The inverse attribute inverts the logic of one or multiple attributes. For example, to inverse the meaning of the maxfiles attribute, set inverse attribute to the value maxfiles.
To specify multiple inverted attributes, one must separate each attribute names with the ; character. To invert all possible attributes, use the value 'all'.
If inverse attribute is not specified, then the validation is successful.
The meaning of each inversed attribute in explained in the following table:
| Attributes | Meaning | |
|---|---|---|
| class | Validates a menu if the selected file or directory does not match the class of the selected files. If multiple classes are specified, no classes must match the selected files for the validation to be successful. |
|
| maxfiles | Defines a minimum number of selected files. Validates a menu if more than x files are selected. If 'maxfiles` is set to 5, more than 5 files must be selected for the validation to be successful. |
|
| maxfolders | Defines a minimum number of selected folder. Validates a menu if more than x folders are selected. If 'maxfolders` is set to 3, more than 3 directories must be selected for the validation to be successful. |
|
| fileextensions | Validates a menu if the given file's extension does not match the file extension selected by the user. If multiple file extensions are specified, no extension must match the selected files for the validation to be successful. |
|
| pattern | Validates a menu if the selected file or directory does not match the wildcard pattern matching algorithm. If multiple patterns are specified, no pattern must match the selected files for the validation to be successful. |
|
| exists | Validates a menu if the selected file or directory does not exists. If multiple files/directories are specified, all values must not exists on the system for the validation to be successful. |
|
| properties | Validates a menu if the specified property is empty or not defined. If multiple properties are specified, all properties must be empty or not defined for the validation to be successful. |
|
| exprtk | Validates a menu if the given string expression does not evaluates to logical true. If multiple expressions are specified, no expression must evaluate to logical true for the validation to be successful. |
|
| istrue | Validates a menu if the given value does not evaluates to logical true. If multiple values are specified, no value must evaluate to logical true for the validation to be successful. |
|
| isfalse | Validates a menu if the given value does not evaluates to logical false. If multiple values are specified, no value must evaluate to logical false for the validation to be successful. |
|
| isempty | Validates a menu if the given text is not empty. If the attribute is not specified, then the validation is successful. Otherwise, if text is specified, the expanded value must not be empty. | |
| keyboard | Validates a menu if the specified keyboard modifier is not pressed. If multiple modifiers are specified, all modifiers must not match the keyboard state for the validation to be successful. |
Typical use case of the inverse attribute is about filtering out known file extensions.
For examples:
- A
split filemenu accept only a single file. When executed, it split the selected filefoo.datinto multiple files of which the first "part" has the file extension001. For example,foo.dat.001,foo.dat.002,foo.dat.003andfoo.dat.004.
- A
join filesmenu accept all files that matchesfileextensions="001"
To prevent the split file menu to be displayed when user selects a *.001 file (we don't need to split a file twice), the menu should also not accept files that matches fileextensions="001".
In the end, the split file menu validity should be:
- accept only a single file.
- accept files which file extension is not
001.
The validity element should look like this:
<validity maxfiles="1" maxfolders="0" fileextensions="001" inverse="fileextensions" />A Compress File menu which main action compresses the selected files should not be available when one (or more) of the selected files is already compressed.
The validity element should look like this:
<validity maxfolders="0" fileextensions="zip;7z;bz2;gz;gzip;rar;tar" inverse="fileextensions" /><validity maxfiles="1" maxfolders="0" inverse="maxfiles" />, valid when more than one file is selected.<validity properties="process.started" inverse="properties" />, valid when a process is not started (assuming the propertyprocess.startedis set when the process is started.<validity exists="${env.USERPROFILE}\config.ini" inverse="exists" />, valid only when the user's configuration file is not yet created.
Multiple <visibility> or <validity> elements can be added under a <menu> element. The logical or operator is used with each element of the same type. In other words, <visibility> elements are evaluated together and so are <validity> elements. This feature allows combining elements to achieve more complex validation.
For example, the following set a menu visible if only a single file is selected or if only a single directory is selected:
<visibility maxfiles="1" maxfolders="0" />
<visibility maxfiles="0" maxfolders="1" />
The following set a menu visible if the property notepad++.found is set or if the file C:\Windows\System32\notepad.exe exists:
<visibility properties="notepad++.found" />
<visibility exists="C:\Windows\System32\notepad.exe" />
The following set a menu visible if the selected filenames begin with IMG, DSC, CSC or GP:
<visibility pattern="*\IMG*.???" />
<visibility pattern="*\DSC*.???" />
<visibility pattern="*\CSC*.???" />
<visibility pattern="*\GP*.???" />The <icon> element allows one to assign icon to menus. The <icon> element must be added under a <menu> element.
The <icon> elements have the following attributes:
The path attribute defines the file path of an icon file or library. The path must be defined in absolute form. The path attribute supports the following icon file format: ico, dll, ocx and cpl.
For example, the following sets a menu with the Home icon (first icon of ieframe.dll library) :
<icon path="c:\windows\system32\ieframe.dll" />The index attribute defines the index of an icon inside an icon library. The index is 0-based. The index is optional for ico file format. If the index is not specified, the value 0 is used.
For example, the following sets a menu with the Empty Recycle Bin icon :
<icon path="C:\windows\system32\imageres.dll" index="50" />The fileextension attribute defines the icon of a menu based on the system's default icon for the given file extension. The fileextension is optional and have priority over the path and index attributes.
For example, the following sets a menu with the Text File icon :
<icon fileextension="txt" />The fileextension attribute supports dynamic properties and allows one to define an icon based on the user selection.
For instance, the following icon definition uses the same icon as the clicked file:
<icon fileextension="${selection.filename.extension}" />Hint: you can use Windows own icons to assign your <icon> with familiar Windows icons. The following links shows a visual representation and the index of each icons:
- Windows 7 icons in shell32.dll
- Windows 7 icons in imageres.dll
- Windows 8 icons in shell32.dll
- Windows 8 icons in imageres.dll
- Windows 10 icons in shell32.dll
- Windows 10 icons in imageres.dll
The <actions> element contains the list of actions to execute when a user clicks on a menu option. Note that <actions> element does not define the actions to execute. The specific definition of each action must be inserted as children of the <actions> element.
The <actions> element must be added under a <menu> element.
The <actions> elements does not support any attributes.
The application support multiple types of actions. The list of each specific action supported by the application is defined below:
The <exec> element is used to launch an application. The <exec> element must be added under the <actions> element.
The <exec> elements have the following attributes:
The path attribute defines the path of the executable to launch. The path may be specified in absolute or relative form. The system will verify that the file exists before launching the executable.
For example, the following launch the Windows Calculator:
<exec path="C:\Windows\System32\calc.exe" />The arguments attribute defines the launching command line parameters sent to the application specified in the path attribute. The attribute is optional.
For example, the following launch notepad.exe and open the License.txt document :
<exec path="C:\Windows\notepad.exe" arguments="C:\Program Files\7-Zip\License.txt" />The basedir attribute defines the directory to use as current directory when launching the application specified in the path attribute. The attribute is optional.
For example, the following launch notepad.exe and open the License.txt document from 7-Zip installation directory :
<exec path="C:\Windows\notepad.exe" basedir="C:\Program Files\7-Zip" arguments="License.txt" />The wait attribute tell the system to wait for the process to complete and exit before executing the next action. The attribute must be set to true, yes, ok, on or 1 to enable the feature. See property system.true to allows for more values. The attribute is optional.
For example, the following launch cmd.exe and list files and directories recursively. When all files are printed, the file foobar.txt is opened in notepad :
<exec path="cmd.exe" wait="true" arguments="/C dir /s /b C:\*.*" />
<exec path="C:\Windows\notepad.exe" arguments="foobar.txt" />
Note:
It is recommanded to use the wait attribute with the timeout attribute. Without a timeout value, ShellAnything will wait indefinitely until the launched process exits. This can result in system instability. If the launced process freezes, pauses or never exists, it will lock ShellAnything and File Explorer.
When combined with other elements, the wait attribute allows advanced use case.
For example :
Base a following action on the result of the first :
<!--
Search recursively for directories under C:\ which contains the word ` and ` and store matches in file `%TEMP%\matches.txt`.
Tell ShellAnything to wait until the search is complete before proceeding to the next action. -->
<exec path="cmd.exe" wait="true" arguments="/C dir /ad /s /b C:\*.* | findstr /C:" and ">"${env.TEMP}\matches.txt"" />
<!-- When the search is complete, open the result list in notepad. -->
<exec path="C:\Windows\notepad.exe" arguments=""${env.TEMP}\matches.txt"" />The timeout attribute defines the maximum time to wait in seconds with the wait attribute. If the running process fails to exit before the timeout value, a warning is logged and the next actions of the menu are not executed. The value must be numerical. The attribute is optional.
For example, the following launch cmd.exe and list files and directories recursively in C:\. The list of files are stored in file ${env.TEMP}\files_in_c_drive.txt. For stability reason, if the listing takes more than 60 seconds, ShellAnything stops waiting for cmd.exe to exit and resume normal operation :
<exec path="cmd.exe" wait="true" timeout="60" arguments="/C dir /a /s /b C:\*.*>"${env.TEMP}\files_in_c_drive.txt"" />The verb attribute defines special directives on how to execute a file or launching the application. For example, the verb open or edit allows the user to open a document using the associated application. The attribute is optional.
Verbs are specific to a file type but some are supported by multiple types. Commonly available verbs include:
| Verb | Description |
|---|---|
| edit | Launches an editor and opens the document for editing. |
| find | Initiates a search starting from the executed directory. |
| open | Launches an application. If this file is not an executable file, its associated application is launched. |
| Prints the document file. | |
| properties | Displays the object's properties. |
| runas | Launches an application as Administrator. User Account Control (UAC) will prompt the user for consent to run the application elevated or enter the credentials of an administrator account used to run the application. |
For example, the following launches notepad.exe and open the text file C:\Windows\System32\drivers\etc\hosts which can only be modified with elevated privileges (as an Administrator) :
<exec path="C:\Windows\notepad.exe" arguments="C:\Windows\System32\drivers\etc\hosts" verb="runas" />To get extended information about verbs, see the following Microsoft documentation article: ShellExecute and ShellExecuteEx, Object Verbs.
The <open> element is used to open a document by the default associated application. The <open> element must be added under the <actions> element.
The <open> elements have the following attributes:
The path attribute defines the path of the document to open. The path must be specified in absolute form. The system will verify that the file exists before opening the document. The application will execute the open action (as if the user had right-clicked on the document ans selected open command).
For example, the following opens the default JPEG viewer to view following image:
<open path="C:\Windows\Web\Wallpaper\Landscapes\img7.jpg" />The <clipboard> element is used to change the value of the Windows Clipboard to a new value. The <clipboard> element must be added under the <actions> element.
Note: To read or reference the clipboard content, see Live properties section.
The <clipboard> elements have the following attributes:
The value attribute defines the new text value of the clipboard.
For example, the following sets the clipboard to the value The quick brown fox jumps over the lazy dog. :
<clipboard value="The quick brown fox jumps over the lazy dog." />The <prompt> element is used to ask the user a question. The answer to the question is stored in properties and encoded in utf-8 format. The <prompt> element must be added under the <actions> element.
The <prompt> elements have the following attributes:
The title attribute defines the text value of the question displayed in the prompt message.
For example, the following ask the user a question :
<prompt title="What is your name?" />The name attribute defines the name of the property to set with the value of the answer.
For example, the following sets the property `myprogram.user.fullname' with the prompt answer :
<prompt name="myprogram.user.fullname" />The default attribute defines the default value of the answer. The attribute is optional.
For example, the following sets the value Hugh Jass as default value to the question What is your name? :
<prompt name="myprogram.user.fullname" title="What is your name?" default="Hugh Jass" />The type attribute defines the type of the prompt. The attribute is optional.
The following table shows the attribute supported values:
| Values | Description |
|---|---|
| empty | The prompt ask for a question and expect a text answer. |
| yesno | The prompt ask for a question and expect a <yes> or <no> answer. |
| ok | The prompt display the question and wait for the user to press OK. |
For example, the following ask the question Enable verbose output? and sets verbose property to /verbose or /normal based on the the user response:
<prompt type="yesno" name="verbose" title="Enable verbose output mode?" valueyes="/verbose" valueno="/normal" />The valueyes attribute defines the value of the property when the user select "yes" as the answer. The attribute is optional and only valid if type attribute is set to yesno.
For example, the following sets verbose property to /verbose when if the user response is "yes":
<prompt type="yesno" name="verbose" title="Enable verbose output mode?" valueyes="/verbose" valueno="/normal" />The valueno attribute defines the value of the property when the user select "no" as the answer. The attribute is optional and only valid if type attribute is set to yesno.
For example, the following sets verbose property to /normal when if the user response is "no":
<prompt type="yesno" name="verbose" title="Enable verbose output mode?" valueyes="/verbose" valueno="/normal" />The <message> element is used to display a message to the user. The <message> element must be added under the <actions> element.
The <message> elements have the following attributes:
The title attribute defines the text of the message displayed to the user.
For example, the following show a confirmation message to the user before opening a file :
<message title="Opening document ${selection.path}. Press OK to continue." />The caption attribute defines the caption of the window that displays the message.
For example, the following show a status message to the user :
<message caption="Status" title="The Operation Completed Successfully." />The icon attribute defines the type of icon for the message. The attribute is optional.
If the icon attribute is not specified, an information icon is displayed.
The following table shows the attribute supported values:
| Values | Description |
|---|---|
| Asterisk | Show an icon consisting of a lowercase letter i in a circle. |
| Exclamation | Show an icon with an exclamation point in a triangle with a yellow background. |
| Hand | Show an icon consisting of a white X in a circle with a red background. |
| Information | Show an icon consisting of a lowercase letter i in a circle (default option). |
| Warning | Show an icon consisting of an exclamation point in a triangle with a yellow background. |
| None | No icon is displayed. |
For example, the following show a warning message :
<message caption="Message to user" title="Do not press the X button before the download is completed." icon="warning" />The <property> element is used to set a property to a specific value. The modified property can be used with the <visibility> and <validity> elements to create advanced dynamic menus. The modified property can be used to temporary store the current selection path of filename in properties for use cases with multiple file selection.
See the properties section for details.
The <property> elements have the following attributes:
The name attribute defines the name of the property to set with a new value.
For example, the following sets the property myprogram.user.name to an empty value :
<property name="myprogram.user.name" />The value attribute defines the new value of the given property.
For example, the following set the property myprogram.user.name to value Al Coholic :
<property name="myprogram.user.fullname" value="Al Coholic" />The exprtk attribute defines an expression that is evaluated to set a new value for the given property. The expression must be specified as a mathematical expression and the result must evaluates to an integer or a floating point value such as 4+9 or ${foo}+1.
The exprtk attribute can also be set to an expression that evaluates to true or false and logical and and or operators can be use to group expressions. eg: ${foo.count} > 1 and '${foo.state}'=='PAUSED'. If the exprtk expression cannot be evaluated, the action execution stop and reports an error. See the fail attribute to change this behavior.
The attribute supports the following operators:
- Basic operators:
+,-,*,/,%,^ - Equalities & Inequalities:
=,==,<>,!=,<,<=,>,>= - Logic operators:
and,not,or,xor,true,false - String operators:
in,like,ilike, []
Strings may be comprised of any combination of letters, digits special characters including (~!@#$%^&*()[]|=+ ,./?<>;:"_) or hexadecimal escaped sequences (eg: \0x30) and must be enclosed with single-quotes.
eg: 'Frankly my dear, \0x49 do n0t give a damn!'
The exprtk attribute allows advanced property evaluation. The following table show useful expression examples:
| Use cases | Expression | Meaning |
|---|---|---|
| Update a property using a generic equation | ${myvalue}^2 + 5*${myvalue} + 100 | Evaluate the quadratic equation x^2 + 5x + 100 where x is equal to the value of property myvalue. |
| Create a counter using properties. (with a default property value set) |
<property name="mycounter" exprtk="${mycounter}+1"> | The property update itself by increasing its own value by 1. Note: this only work if the property is defined to a numeric value first. |
| Create a counter using properties. (without having to initialize the property first) |
if ('${mycounter}' == '$'+'{mycounter}' or '${mycounter}' == '0') 1; else if ('${mycounter}' == '1') 2; else if ('${mycounter}' == '2') 3; else if ('${mycounter}' == '3') 4; else if ('${mycounter}' == '4') 5; else if ('${mycounter}' == '5') 6; else if ('${mycounter}' == '6') 7; else if ('${mycounter}' == '7') 8; else if ('${mycounter}' == '8') 9; else 10; |
Increase the value of property mycounter by 1 going from 1 up to 10.On the first call, the first line of the expression detects if the property is unset and set it to 1. |
| Get the length of a property value. | '${command}'[] | Set the property to the length of the command property value. |
Set a property to logical true or false. |
${foo} == 2 or ${bar} >= 5 | The property will be set to value 1 if the expression evaluates to true and set to 0 if the expression evaluates to false. |
Note:
The exprtk attribute uses the exprtk library to parse the expression. For more details and supported expressions, see the exprtk documentation on the official github page or the library website.
The file attribute defines the path of a file who's content is used as a new value for the property. If the given file path does not exists or can not be read, the action execution stop and reports an error. See the fail attribute to change this behavior.
For example, the following sets the property myprogram.config to the content of an application ini file :
<property name="myprogram.config.content" file="c:\myprogram\config.ini" />When combined with other elements, the file attribute allows advanced use case and property manipulation.
For example :
Copy and paste text files :
<menu name="File content">
  <menu name="Copy as text">
    <visibility maxfiles="1" maxfolders="0" />
    <actions>
      <!-- Store the file's content and file name as properties -->
      <property name="copypaste.file.content" file="${selection.path}" />
      <property name="copypaste.file.name" value="${selection.filename}" />
    </actions>
  </menu>
  <menu name="Paste">
    <visibility properties="copypaste.file.content" />
    <actions>
      <!-- Generate a file from properties -->
      <file path="${selection.path}\${copypaste.file.name}.copy.txt" encoding="utf8">${copypaste.file.content}</file>
      <property name="copypaste.file.content" value="" />
    </actions>
  </menu>
</menu>
Capture execution output :
<menu name="Capture exec output">
<actions>
<exec path="cmd.exe" wait="true" arguments="/C dir /b "${application.directory}"> "${env.TEMP}\command_output.txt"" />
<property name="files" file="${env.TEMP}\command_output.txt" />
</actions>
</menu>Note:
To specifiy how much to read from the file, see the filesize attribute. By default, a maximum of 10 KB can be read from a file. To read more than that, one must manually specify the filesize attribute.
The filesize attribute defines the how many bytes the file attribute should read from the file. The special value 0 can be use to read the whole file with no limit. If the given value is not valid, the action execution stop and reports an error. See the fail attribute to change this behavior.
For example, the following sets the property myprogram.bigfile.header by reading the first 10 bytes of a data file :
<property name="myprogram.bigfile.header" file="${temp}bigfile.dat" filesize="10" />Note: If not specified, a maximum of 10 KB can be read from a file.
The registrykey attribute defines the path to a Windows Registry Key or Registry Value that is used to set a new value for the property. If the given file path does not exists or can not be read, the action execution stop and reports an error. See the fail attribute to change this behavior.
For example, the following sets the property apps.7zip.dir to the installation directory of 7-zip :
<property name="apps.7zip.dir" registrykey="HKEY_LOCAL_MACHINE\SOFTWARE\7-Zip\Path64" />This method allows to create generic configuration file that can be used by everyone.
For example :
Open video files with VLC :
<?xml version="1.0" encoding="utf-8"?>
<root>
  <shell>
    <default>
      <!-- Detect VLC executable path and install directory from the registry -->
      <!-- The property `apps.vlc.exe` is set only if the path in Windows Registry is found. -->
      <property name="apps.vlc.exe" registrykey="HKEY_LOCAL_MACHINE\SOFTWARE\VideoLAN\VLC" />
      <property name="apps.vlc.dir" registrykey="HKEY_LOCAL_MACHINE\SOFTWARE\VideoLAN\VLC\InstallDir" />
    </default>

    <menu name="Open with VLC">
      <icon path="${apps.vlc.exe}" index="0" />
      <!-- Show the menu only if VLC is installed on the system (found in the registry). -->
      <visibility properties="apps.vlc.exe" maxfiles="1" maxfolders="0" fileextensions="mp4;mkv" />
      <actions>
        <exec path="${apps.vlc.exe}" arguments="${selection.path}" />
      </actions>
    </menu>
  </shell>
</root>The searchpath attribute allows searching for a file name using the PATH environment variable. The attribute defines a file name (including the file extension) to search in the PATH directories. If the file name is found in multiple PATH directories, the first match is used to set the property. If the file name is not found in a PATH directory, the action execution stop and reports an error. See the fail attribute to change this behavior.
For example, the following sets the property python.exe.path to the location of the python interpreter :
<property name="python.exe.path" searchpath="python.exe" />This feature allow people to detect software that are available on the system. For example, software that are "portable" do not require installation and cannot be easily detected from the registry or other means. Other software installs in a non standards directory (outside of as C:\Program Files\). To be easily available on the system, some add their executable directory to the PATH environment variable.
For example, python executable is not always installed in the same directory. For example, the executable for version 3.10.0 installed in directory C:\Users\MyUserName\AppData\Local\Programs\Python\Python310\python.exe. The issue is that you cannot predict the directory Python310 to be identical for all users. The installer properly configures the PATH environment variable to so that python.exe can be found on the system.
This method allows to create generic configuration file that can be used by everyone.
For example :
Run python script :
<?xml version="1.0" encoding="utf-8"?>
<root>
<shell>
<default>
<!-- Detect PYTHON executable from PATH environment variable. -->
<!-- The property `python.exe.path` is set only if `python.exe` can be found
in the directories listed in PATH environment variable. -->
<property name="python.exe.path" searchpath="python.exe" />
<property name="cmd.exe.path" searchpath="cmd.exe" />
</default>
<menu name="Run python with arguments">
<icon path="${python.exe.path}" index="0" />
<!-- Show the menu only if PYTHON is found in PATH environment variable -->
<visibility properties="python.exe.path" maxfiles="1" maxfolders="0" fileextensions="py" />
<actions>
<prompt name="python.args" title="Entrer the desired command line arguments" />
<file path="${env.USERPROFILE}\temp_python_with_args.bat" encoding="utf8">@"${python.exe.path}" "${selection.path}" ${python.args}</file>
<exec path="${cmd.exe.path}" basedir="${selection.dir}" arguments="/K call ^"${env.USERPROFILE}\temp_python_with_args.bat"" />
</actions>
</menu>
</shell>
</root>The random attribute defines a pattern that is used to generate a random value for the given property. The pattern must be specified as a sequence of symbol character. If the random pattern contains unknown characters or cannot be evaluated, the action execution stop and reports an error. See the fail attribute to change this behavior.
The attribute supports the following pattern characters:
| Value | Description |
|---|---|
# |
Matches a numeric digit between 0 and 9 where ### would generate values between 0 and 999. For example 42. |
0 |
Matches a numeric digit between 0 and 9 where 000 would generate values between 0 and 999. The generated value has leading zeroes to match the pattern's length. For example, 042. |
a |
Matches a lowercase alphabetic letter between a and z where aaaa would generate a random word of 4 lowercase letters. For example, igrm. |
A |
Matches a lowercase alphabetic letter between a and z where AAAA would generate a random word of 4 lowercase letters. For example, MAED. |
z or Z |
Matches an alphanumeric character including lowercase and uppercase letters or digits 0 to 9 where ZZZzzz would generate a string of characters containing numbers or English letters. For example, KXvh6Z. |
* |
Matches any alphanumeric character or symbol, including lowercase and uppercase letters, numbers 0 through 9 or a symbols character. A symbol character is one of the following characters: !#$()+,-.;= @[]_{}~. The symbol characters are compatible with file systems and can be used as random file names. A pattern like ****** would generate a string of 6 characters containing random letters, numbers or symbols. For example Pjl_(kF7. |
The random attribute allows easy generation of temporary file or variables.
For example :
Generate a temporary file name for a task :
<actions>
  <property name="temp.file.name" random="****************************" />
  <property name="temp.file.path" random="${env.TEMP}\${temp.file.name}.tmp" />
</actions>
Note:
- To specify custom minimum and/or maximum values, see the
randomminandrandommaxattributes. Pattern of multiple#or0characters are evaluated in sequence. - The longest sequence is 10 characters which represent an unsigned 32 bit value with a maximum value of 4,294,967,295. In other words, the pattern
##########can not generates values between 4,294,967,296 up to 9,999,999,999. - You can also generate random values in a specific format using live properties. See live properties for details.
The randommin attribute defines the minimum value that random attribute can produce. The random pattern must be all numeric (filled with # or 0 pattern characters) for the attribute to be used. If the given value is not valid, the action execution stop and reports an error. See the fail attribute to change this behavior.
For advanced examples, see examples with randommax attribute.
The randommin attribute defines the minimum value that random attribute can produce. The random pattern must be all numeric (filled with # or 0 pattern characters) for the attribute to be used. If the given value is not valid, the action execution stop and reports an error. See the fail attribute to change this behavior.
When combined, randommin and randommax attributes allows advanced use case and random property manipulation.
For example :
Generate a values with specific boundaries :
<actions>
  <property name="my_dice_roll" random="#" randommin="1" randommax="6" />
  <property name="my_coin_flip" random="#" randommin="0" randommax="1" />
  <property name="my_play_card" random="##" randommin="1" randommax="52" />
</actions>
Generates a random number between 100 and 999 in order to secure a 3 digits number :
<property name="3_digits_number" random="###" randomnin="100" />Pick a random string from a fixed list :
<actions>
  <!-- Define properties to store the names of each playing cards. -->
  <property name="cards.names.01" value="Ace of Diamonds" />
  <property name="cards.names.02" value="Two of Diamonds" />
  <property name="cards.names.03" value="Theee of Diamonds" />
  <property name="cards.names.04" value="Four of Diamonds" />
  <property name="cards.names.05" value="Five of Diamonds" />
  <property name="cards.names.06" value="Six of Diamonds" />
  <property name="cards.names.07" value="Seven of Diamonds" />
  <property name="cards.names.08" value="Eight of Diamonds" />
  <property name="cards.names.09" value="Nine of Diamonds" />
  <property name="cards.names.10" value="Ten of Diamonds" />
  <property name="cards.names.11" value="Jack of Diamonds" />
  <property name="cards.names.12" value="Queen of Diamonds" />
  <property name="cards.names.13" value="King of Diamonds" />

  <property name="cards.names.14" value="Ace of Clubs" />
  <property name="cards.names.15" value="Two of Clubs" />
  <property name="cards.names.16" value="Theee of Clubs" />
  <property name="cards.names.17" value="Four of Clubs" />
  <property name="cards.names.18" value="Five of Clubs" />
  <property name="cards.names.19" value="Six of Clubs" />
  <property name="cards.names.20" value="Seven of Clubs" />
  <property name="cards.names.21" value="Eight of Clubs" />
  <property name="cards.names.22" value="Nine of Clubs" />
  <property name="cards.names.23" value="Ten of Clubs" />
  <property name="cards.names.24" value="Jack of Clubs" />
  <property name="cards.names.25" value="Queen of Clubs" />
  <property name="cards.names.26" value="King of Clubs" />

  <property name="cards.names.27" value="Ace of Hearts" />
  <property name="cards.names.28" value="Two of Hearts" />
  <property name="cards.names.29" value="Theee of Hearts" />
  <property name="cards.names.30" value="Four of Hearts" />
  <property name="cards.names.31" value="Five of Hearts" />
  <property name="cards.names.32" value="Six of Hearts" />
  <property name="cards.names.33" value="Seven of Hearts" />
  <property name="cards.names.34" value="Eight of Hearts" />
  <property name="cards.names.35" value="Nine of Hearts" />
  <property name="cards.names.36" value="Ten of Hearts" />
  <property name="cards.names.37" value="Jack of Hearts" />
  <property name="cards.names.38" value="Queen of Hearts" />
  <property name="cards.names.39" value="King of Hearts" />

  <property name="cards.names.40" value="Ace of Spades" />
  <property name="cards.names.41" value="Two of Spades" />
  <property name="cards.names.42" value="Theee of Spades" />
  <property name="cards.names.43" value="Four of Spades" />
  <property name="cards.names.44" value="Five of Spades" />
  <property name="cards.names.45" value="Six of Spades" />
  <property name="cards.names.46" value="Seven of Spades" />
  <property name="cards.names.47" value="Eight of Spades" />
  <property name="cards.names.48" value="Nine of Spades" />
  <property name="cards.names.49" value="Ten of Spades" />
  <property name="cards.names.50" value="Jack of Spades" />
  <property name="cards.names.51" value="Queen of Spades" />
  <property name="cards.names.52" value="King of Spades" />

  <property name="cards.names.53" value="Red Joker" />
  <property name="cards.names.54" value="Black Joker" />


  <!-- Pick a random card from a 52 cards game -->
  <property name="my_card.index" random="00" randommin="1" randommax="52" />

  <!-- Convert numeric card index to a card name -->
  <property name="my_card" value="${cards.names.${my_card.index}}" />
</actions>The fail attribute controls the behavior of the action when the property is not directly set from the value attribute. This applies to the following attributes: exprtk, file, registrykey, searchpath and random. The attribute must be set to a value that evaluates to true or false. See istrue attribute or isfalse attribute logic for details.
By default, if a value cannot be resolved from these attributes (invalid exprtk expression, file not found, registry key not found, filename not in PATH), an error is reported and the execution of the following actions is interrupted. By setting the fail attribute to a value that evaluates to false, the same warning is logged but the execution of the following actions continue.
For example, the following action will not fail if the file is not found :
<property name="foo" fail="no" file="c:\this_file_does_not_exist.txt" />The fail attribute allows all actions to set its property. Without this attribute, the <property> actions must be ordered from the least expected to fail to the most expected to fail.
For example :
Always set all values in default properties section :
<default>
  <!-- Do not skip setting property `workspace.dir` if Python or 7-zip
       is not installed on the system -->
  <property fail="no" name="python.exe.path" searchpath="python.exe" />
  <property fail="no" name="sevenzip.dir" registry="HKEY_LOCAL_MACHINE\SOFTWARE\7-Zip\Path64" />
  <property name="workspace.dir" value="C:\my_workspace" />
</default>
Notes:
- By default, the attribute is set to
truefor compatibility with legacy Configuration Files. - Without this attribute, the <property> actions must be ordered from the least expected to fail to the most expected to fail.
- If the property value cannot be resolved and
failattribute is set tofalse, the target property is not modified.
The <file> element is used to create a text file on disk. The content of the file is specified between the opening and closing tags of the <file> element. The <file> element supports dynamic properties and can be used to create default configuration files or create support files for the menu.
The <file> elements have the following attributes:
The path attribute defines the path of the file. The path must be defined in absolute form.
For example, the following action creates a new configuration file named config.ini in the user's HOME directory :
<file path="${env.USERPROFILE}\config.ini">[user]
username=${env.USERNAME}
language=en

[environment]
java=${env.JAVA_HOME}\bin\java.exe
working_dir=${selection.path}

[database]
server=192.168.0.1
port=1562</file>The encoding attribute defines the encoding of the text file. The encoding attribute supports the following values: utf-8, ansi and unicode. The default value for the encoding is utf-8.
For example, the following action creates a new text file encoded in ANSI format, named selection.txt in the user's HOME directory :
<file path="${env.USERPROFILE}\selection.txt" encoding="ansi">${selection.path}</file>The <stop> element is used to stop the action execution sequence when a validation fails. The <stop> element supports dynamic properties and can be used to validate user entered data. The <stop> element must be added under the <actions> element.
The <stop> elements have the same attributes as the <visibility> or <validity> elements. Namely, one can stop the action execution sequence using properties, exprtk, istrue, isfalse and inverse attributes.
For example, the following actions ask for an answer to a question and stop the action execution progress if the user answer No :
<prompt type="yesno" name="continue" title="Are you sure you want to continue with the operation?"
        valueyes="true" valueno="false" />
<stop isfalse="${continue}" />
<exec path="..." />A <default> element in a Configuration File defines the default settings of a configuration file. A <default> element must be inserted under the <shell> element.
The <default> element have no attributes.
For example, an empty default section in a configuration file looks like this:
<?xml version="1.0" encoding="utf-8"?>
<root>
  <shell>
    <default>
    </default>
  </shell>
</root>
The default settings supported by the application is the following:
- Properties. See default properties section for details.
The ShellAnything application supports an advanced property system which allows one to assing values to custom named variables. The property system of ShellAnything plays a big role in implementing dynamic content for Windows Explorer's context menu.
Properties must conform to the following rules:
- Properties only support string values.
- Property names are case sensitive and cannot contain spaces.
- Property lists must be separated by
;character.
The application supports multiple way to set a property to a custom value:
- With the <prompt> action element, one can set a property to the user's prompt answer.
- With the <property> action element, one can set a property to the user's desired value.
Property expansion allows you to insert variable content in a string value, menu name, icon path, custom action, and so on.
The syntax of a property expansion is as follows: ${name-of-property} where name-of-property is the actual name of a property.
The name of a property is case sensitive.
For instance, the following would create a menu "send file by email" with the actual file name in the menu name:
<menu name="Send file '${my_filename}' by email.">
Example #1:
Properties can be used to store temporary values (for instance, based on the selection). For example, a menu can save the clicked file path to a property so that another menu can later refer to it. The typical use case is when comparing files: the first menu "select first file" and save the path to a property and the second menu "select second file" and launches the compare application with the two files. The implementation of such menus would be like this:
  <menu name="Select first file">
    <actions>
      <property name="compare.first.selection.path" value="${selection.path}" />
    </actions>
  </menu>
  <menu name="Compare with first file">
    <actions>
      <!--Store this file into a property for convenience reason.-->
      <property name="compare.second.selection.path" value="${selection.path}" />

      <!-- run application that compares file "${compare.first.selection.path}" with "${compare.second.selection.path}" -->
    </actions>
  </menu>
This example uses selection-based properties. See the associated section below for details.
Example #2:
Properties can be used with the <visibility> and <validity> elements to create advanced dynamic menus. For instance, if one wants to implement 2 menus (called 'A' and 'B') and only show menu 'B' after having clicked on menu 'A', one would be able to implement the desired functionality like the following:
  <menu name="A">
    <actions>
      <property name="menu_a_clicked" value="true" />
    </actions>
  </menu>
  <menu name="B">
    <!-- This menu will be visible only after menu A is clicked -->
    <visibility properties="menu_a_clicked" />
    <actions>
      <!--Reset the property to hide menu B-->
      <property name="menu_a_clicked" value="" />
    </actions>
</menu>The list of environment variables is available through the property system.
The syntax of an environment variable property expansion is as follows: ${env.name-of-environment-variable} where name-of-environment-variable is the actual name of an environment variable.
The name of the variable is case sensitive.
For example, the following would create a menu with the current user login name:
<menu name="Configure '${env.USERNAME}' settings.">Environment variables properties are encoded in utf-8.
The application provides live properties which are defined automatically by the property system. Think of live properties as properties that are always updated in real time. Live properties can not be set manually as their value will be automatically updated when referenced by the property system. They usually map to the state of a feature of the Operating System.
The following table defines the list of live properties and their utility:
| Property | Description |
|---|---|
| clipboard | Matches the content of Windows Clipboard. |
| keyboard.ctrl | Matches the down state of keyboard CTRL modififer. The value is set to system.true or system.false properties. |
| keyboard.alt | Matches the down state of keyboard ALT modififer. The value is set to system.true or system.false properties. |
| keyboard.shift | Matches the down state of keyboard SHIFT modififer. The value is set to system.true or system.false properties. |
| date.year | Matches the current year. For example 2023. (4 digits) |
| date.month | Matches the current month of the year, from 01 to 12. (2 digits) |
| date.day | Matches the current day of the month, from 01 to 31. (2 digits) |
| date.full | Matches the current date in yyyy-mm-dd format. For example 2023-12-31. |
| date.short | Matches the current date in yyyymmdd format. For example 20231231. |
| time.hours | Matches the current hour of the day, from 00 to 23. (2 digits) |
| time.minutes | Matches the current minutes of the hour, from 00 to 59. (2 digits) |
| time.seconds | Matches the current seconds of the minute, from 00 to 59. (2 digits) |
| time.full | Matches the current time in 00-00-00 format. For example 23-59-59. |
| time.short | Matches the current date in hhmmss format. For example 235959. |
| datetime.full | Matches the current date and time in yyyy-mm-dd--00-00-00 format. For example 2023-12-31--23-59-59. |
| datetime.short | Matches the current date and time in yyyymmddhhmmss format. For example 20231231235959
|
| datetime.custom | Matches the current date and time in custom format defined by property datetime.format. Available tokens are yyyy, mm, dd, HH, MM, SS where the custom format for datetime.full property is yyyy-mm-dd--HH-MM-SS.For example set property datetime.format to value Today is ${months.names.${date.month}} ddth of yyyy. Current time is HH hours, MM minutes and SS seconds and properties months.names.01 to months.names.12 to the name of each month. If you expand property datetime.custom, you get Today is December 31th of 2023. Current time is 23 hours, 59 minutes and 59 seconds. |
| random.guid | Generate a random UUID/GUID in Version 4 format. For example AA97B177-9383-4934-8543-0F91A7A02836. |
| random.file | Generate a temporary file name. For example KXXlVh6ZhG2gLrPaHBwSFaB6cCTv5i39.tmp. |
| random.path | Generate a temporary file path in the user's temp directory. For example C:\Users\JohnDoe\AppData\Local\Temp\KXXlVh6ZhG2gLrPaHBwSFaB6cCTv5i39.tmp. |
Note:
- These properties are encoded in utf-8.
- Date and time live properties are evaluated one by one. If you expand multiple date or time properties from a single string, they will not be timed synchronized.
The application provides a list of dynamic properties. The values of these properties will change based on the user selection when a user right-click files or folders.
The following table defines the list of dynamic properties and their utility:
| Property | Description |
|---|---|
| selection.path | Matches the full path of the clicked element. |
| selection.dir | Matches the directory of the clicked element. When selecting a file, matches the directory of the clicked element. When selecting a directory, matches the path of the clicked element. |
| selection.dir.count | Matches the number of files and directories in directory selection.dir. |
| selection.dir.empty | Set to true when directory selection.dir is empty. Set to false otherwise. |
| selection.filename | Matches the filename of the clicked element. |
| selection.filename.noext | Matches the filename of the clicked element without the file extension. |
| selection.parent.path | Matches the full path of the parent element. |
| selection.parent.filename | Matches the filename of the parent element. |
| selection.filename.extension | Matches the file extension of the clicked element. |
| selection.drive.letter | Matches the drive letter of the clicked element. For example C. |
| selection.drive.path | Matches the drive path of the clicked element. For example C:\. |
| selection.count | Matches the number of clicked elements (files and directories). |
| selection.files.count | Matches the number of clicked files. |
| selection.directories.count | Matches the number of clicked directories. |
| selection.mimetype | Matches the MIME type of the selected file. See below for examples. |
| selection.description | Matches a general description of the file's content. See below for examples. |
| selection.charset | Matches the Character Set of the file. See below for examples. |
Selection-based properties are encoded in utf-8.
Notes:
Properties selection.drive.letter and selection.drive.path are empty when user select files from a network share.
Properties selection.dir.count and selection.dir.empty are empty when multiple elements are selected.
The properties selection.mimetype, selection.description and selection.mimetype are based on the content of the selected file. The properties are provided by the File and Libmagic libraries to extract information about selected files. For more details, see the documentation at github.com/Cirn09/file-windows, github.com/file/file or the official file documentation.
A MIME type is a label used to identify a type of data. It is used so software can know how to handle the data. It serves the same purpose on the Internet that file extensions do on Microsoft Windows. A MIME type is calculated from the actual content in a file.
A MIME type has two parts: a type and a subtype. They are separated by a slash character (/). For example, the MIME type for Microsoft Word files is application and the subtype is msword. Together, the complete MIME type is application/msword.
The following table shows examples values for different type of content :
| Type of content | MIME type | Character set | Description |
|---|---|---|---|
| This image in png format. | image/png | binary | PNG image data, 614 x 668, 8-bit/color RGBA, non-interlaced |
| This image in jpeg format. | image/jpeg | binary | JPEG image data, JFIF standard 1.01, resolution (DPI), density 72x72, segment length 16, progressive, precision 8, 853x480, components 3 |
| This text file | text/plain | us-ascii | ASCII text, with CRLF line terminators |
| ShellAnything's default.xml Configuration file. | text/xml | utf-8 | XML 1.0 document, UTF-8 Unicode text, with CRLF line terminators |
| ShellAnything's unit test executable. | application/x-dosexec | binary | PE32+ executable (console) x86-64, for MS Windows |
| Media Player Classic executable. | application/x-dosexec | binary | PE32 executable (GUI) Intel 80386, for MS Windows |
| An MP3 audio file | audio/mpeg | binary | MPEG ADTS, layer III, v1, 160 kbps, 44.1 kHz, Monaural |
ShellAnything's is bundle with file.exe which is an application that is able to print a file's MIME type, charset or description. Execute the following commands to get the MIME type of a given file:
- Open a Command Prompt.
- Navigate to ShellAnything's installation folder:
cd /d C:\Program Files\ShellAnything [version]\bin. - To get the file's MIME type, enter the command
file --mime-type <path_of_file>. - To get the file's encoding (charset), enter the command
file --mime-encoding <path_of_file>. - To get a general description of the content of the file, enter the command
file <path_of_file>.
Another option is to create your own Configuration and add the following menu that shows these values. For example:
  <menu name="Show MIMEtype, description and charset">
    <visibility maxfiles="1" maxfolders="0" />
    <actions>
       <message caption="MIMEType debugger" title="selection.mimetype=${selection.mimetype}${line.separator}selection.charset=${selection.charset}${line.separator}selection.description=${selection.description}" />
    </actions>
  </menu>
Press CTRL+C when the message is shown to copy the values to the clipboard.
If multiple files are selected, the application generates the same properties but combines the selected elements on multiple lines. In other words, each selected files are separated by the string \r\n (carriage return).
For example, assume the following files are selected:
- C:\Program Files (x86)\Winamp\libFLAC.dll
- C:\Program Files (x86)\Winamp\winamp.exe
- C:\Program Files (x86)\Winamp\zlib.dll
The system will generates the following property values (note the \r\n characters) :
| Property | Value |
|---|---|
| selection.path | C:\Program Files (x86)\Winamp\libFLAC.dll\r\nC:\Program Files (x86)\Winamp\winamp.exe\r\nC:\Program Files (x86)\Winamp\zlib.dll |
| selection.dir | C:\Windows\System32\r\nC:\Windows\System32\r\nC:\Windows\System32\r\n |
| selection.filename | libFLAC.dll\r\nwinamp.exe\r\nzlib.dll |
| selection.filename.noext | libFLAC\r\nwinamp\r\nzlib |
| selection.parent.path | C:\Program Files (x86)\Winamp\r\nC:\Program Files (x86)\Winamp\r\nC:\Program Files (x86)\Winamp |
| selection.parent.filename | Winamp\r\nWinamp\r\nWinamp |
| selection.filename.extension | dll\r\nexe\r\ndll |
| selection.drive.letter | C\r\nC\r\nC |
| selection.drive.path | C:\\r\nC:\\r\nC:\ |
Notes:
- Properties
selection.drive.letterandselection.drive.pathare empty when all selected files are from a network share. - Properties
selection.dir.countandselection.dir.emptyare empty when multiple files are selected. - Properties
selection.count,selection.files.countandselection.directories.countare not multi-selection-based properties. They are defined as a single value whether a single or multiple elements are selected.
If you need more flexibility when dealing with multiple files, the system defines the property selection.multi.separator that allows customizing the separator when combining multiple files.
By default, this property is set to the value \r\n (new line) when the application initialize.
The property can be modified at any time using a <property> action for changing the property when a menu is executed or with the <default> element to change the value globally (when the Configuration File is loaded).
To reset the property back to the default value, use the following <property> action:
<property name="selection.multi.separator" value="${line.separator}" />Example #1:
If an executable must get the list of selected files in a single command line (one after the other), one can set the property selection.multi.separator to " " (double quote, space, double quote) and use the string "${selection.path}" (including the double quotes) to get the required expanded value:
<actions>
<property name="selection.multi.separator" value="" "" />
<exec path="myprogram.exe" arguments=""${selection.path}"" />
<property name="selection.multi.separator" value="${line.separator}" />
</actions>Which result in the following expanded value:
"C:\Program Files (x86)\Winamp\libFLAC.dll" "C:\Program Files (x86)\Winamp\winamp.exe" "C:\Program Files (x86)\Winamp\zlib.dll"
Example #2:
Assume that you want to run a specific command on each of the selected files (for example reset the files attributes), one can set the property selection.multi.separator to ${line.separator}attrib -r -a -s -h " (including the ending double quote character) and use the string attrib -r -a -s -h "${selection.filename}" (including the double quotes) to get the following expanded value:
attrib -r -a -s -h "C:\Program Files (x86)\Winamp\libFLAC.dll"
attrib -r -a -s -h "C:\Program Files (x86)\Winamp\winamp.exe"
attrib -r -a -s -h "C:\Program Files (x86)\Winamp\zlib.dll"
The result can then be used to:
- Copy the commands to the clipboard:
<clipboard value="attrib -r -a -s -h "${selection.filename}"" />- Create a batch file which content is the commands:
<file path="${env.TEMP}\reset_attribs.bat">@echo off
attrib -r -a -s -h "${selection.filename}"
</file>The application defines a list of properties about the current runtime. The values of these properties are constant (fixed) and do not change.
The following table defines the list of fixed properties and their utility:
| Property | Description |
|---|---|
| application.path | Matches the full path of the shell extension DLL. |
| application.directory | Matches the directory of the shell extension. |
| log.directory | Matches the directory where the logs are created. |
| config.directory | Matches the directory of the configuration files. |
| home.directory | Matches the home directory of the current user. |
| path.separator | Matches the \ character. |
| line.separator | Matches the \r\n string. |
| newline | Matches the \r\n string. Same as ${line.separator}. |
Fixed properties are encoded in utf-8.
Each configuration file optionally define a list of properties to initialize when a new configuration file is loaded. This mechanism allows one to define default property for the configuration.
For example, the following would define services.wce.command.start and services.wce.command.stop properties when the configuration is loaded:
<default>
  <property name="services.wce.command.start" value="runwce /start" />
  <property name="services.wce.command.stop"  value="runwce /stop"  />
</default>ShellAnything supports plugins which can be used to extend ShellAnything with more functionality.
The support for plugins is in beta and features are limitted.
ShellAnything does not implement a plugin detection system. It cannot automatically detect and load plugin files. The reason is explained below.
Plugins do not expose multiple interfaces that can be loaded and called by ShellAnything. The application does not query plugins for features. The design is the other way around. Plugins must register their features to the system. This design is more tolerant to API changes.
Plugins must be declared manually in a Configuration file. See the Plugin declaration section for more details. As a general rule, a plugin declared in a Configuration file only impacts the current configuration. A configuration cannot reference or use the functionality of a plugin declared in another configuration. To share the functionalities of a plugin in several configurations, the plugin must be declared in each configuration. This is a limitation but it keeps each configuration independent from each other and guarantees the correct functioning of the system since the configurations can be unloaded or modified at any time while the application is running.
Plugins can communicate with ShellAnything using a C API. The API is implemented in a DLL called sa.api.dll. The include files are located in [installation directory]\include\shellanything. Files are prefixed with sa_.
The API is written in C programming language. It provides a safe Application Binary Interface (ABI) between plugins and ShellAnything. Implementing a C++ plugin framework with a safe ABI is more complicated in an open source application because all build environment are different. For such reason, a C interface with the system was considered.
Most C++ classes of the core application are mapped to a header file in the API. For example, the include file sa_selection_context.h in the API provides the same functionality as SelectionContext.h from the core. The header file sa_properties.h provides getters and setters to manipulate properties of the system.
The API is not designed for programming your own Windows Shell extensions. An external executable or module that calls the API will not be able to communicate with ShellAnything. The purpose of the API is to allow plugins to interact with ShellAnything.
All plugins are designed to have a three generic entry points. The name of these entry points are sa_plugin_initialize(), sa_plugin_terminate() and sa_plugin_register().
When a plugin is declared in a Configuration File, the system calls sa_plugin_initialize() to let the plugin initialize. If the initialization succeeds, the system calls sa_plugin_register() which allows the plugin to register all its functionality to the system through the C API. When a configuration is unloaded, the system calls sa_plugin_terminate() to let the plugin cleanup its memory.
Note that all function entry points can be called multiple times in the same session. This is because the scope of each plugin is its Configuration File. For example, if the same plugin is declared in 3 configurations, then sa_plugin_initialize(), sa_plugin_register() and sa_plugin_terminate() will be called 3 times. If a plugin implements custom conditions, it must register the attributes in all Configurations where the plugin is declared.
Plugins must be careful not to initialize a variable that has already been initialized. The same goes for terminate. If a plugin is initialized 5 times in the same session, then only the 5th sa_plugin_terminate() call should be considered the last terminate before the dll is unloaded.
The implementation of sa_plugin_register() allow a plugin to register one or mutiple services using the API.
This section explains how to implement typical plugin use cases.
The function sa_plugin_register_config_update() allow a plugin to register an update callback function. The given function is called by ShellAnything when a Configuration is updated with a new selection.
Plugins can get the selection context object that identifies selected files and directories by calling sa_plugin_config_update_get_selection_context().
Properties can be read and set with sa_properties_get_cstr() or sa_properties_set() to get the desired effect.
After the callback function is executed, ShellAnything proceeds with normal menu validation. All menu <visibility> and <validity> elements are updated. The Windows File Explorer context menu is displayed.
Typical usage for such a plugin includes the following examples:
- Set a property that reflects the availability of a resource. Use property as criteria in <visibility> and <validity> items to act as filters for menus.
- Set a property used in the
pathattribute of an <icon> element. This method allows you to define a menu icon that changes depending on the selection.
The <visibility> and <validity> elements supports a wide list of attributes to use as filters. If the existing attributes is not enough, a plugin can register its own list of visibility and validity attributes.
The function sa_plugin_register_validation_attributes() allows a plugin to register a set of custom validation attributes. The function is called by ShellAnything when a Menu is updated with a new selection.
Plugins can get the selection context object that identifies selected files and directories by calling sa_plugin_validation_get_selection_context().
Properties can be read and set with sa_properties_get_cstr() or sa_properties_set() to get the desired effect.
The list of native actions supported by ShellAnything is defined in the Actions section. If one needs more latitude than supported actions, a plugin can register a custom action.
The function sa_plugin_register_action_event() allows a plugin to register an action event callback function. The function is called when ShellAnything create, execute or destroy this custom Menu action.
Plugins can get the selection context object that identifies selected files and directories by calling sa_plugin_validation_get_selection_context().
Properties can be read and set with sa_properties_get_cstr() or sa_properties_set() to get the desired effect.
For example, assume a plugin that sends emails. The email action could be defined as the following:
<menu name="Send by email">
  <visibility maxfiles="1" maxfolders="0" />
  <actions>
    <email recipients="foobar@my_company.com" subject="${selection.filename}">
      <body>Hi! ${env.USERNAME} has sent you the file ${selection.filename}.
      This email was automatically generated by ShellAnything.
      </body>
      <attachments>
        <attachment path="${selection.path}" />
      </attachments>
    </email>
  </actions>
</menu>
When an instance of the action is created, the plugin must call sa_plugin_action_get_xml() to get the action raw xml definition as it appears in the Configuration File.
The plugin must parse the xml and save the parsing results to be referenced later when the action is executed or destroyed. ShellAnything provides functions in the API to help parsing xml content. See functions in sa_xml.h.
To save the parsed values, a plugin can :
- Persist values in a Property Store.
The plugin can call sa_plugin_action_get_property_store() which returns a unique Property Store for each action instance. A property store is a structure which stores key-value pairs. For this example the store could save the following keys (and their corresponding values) : recipients, subject, body, attachments.count, attachment.1.path.
See functions in sa_property_store.h to know how to use a Property Store.
- Persist values in a custom structure.
Plugins can also save the result of the parsed xml in a custom structure such as this:
struct email_attachment_t {
  std::string path;
};
struct email_t
{
  std::string recipients;
  std::string subject;
  std::string body;
  std::vector<email_attachment_t> attachments;
};
The plugin must allocate an instance of this structure and fill it with the parsed values. To persist the structure instance, the plugin can call sa_plugin_action_set_data() which assign a custom data pointer to the action. This custom pointer can be get by calling function sa_plugin_action_get_data() while creating, executing and destroying the action.
The documentation contains a sample plugin example called sa_plugin_demo to help with the developpement of a new plugin. The sample files are located in [installation directory]\bin\docs\sa_plugin_demo.zip.
The sa_plugin_demo example only have a single source file: sa_plugin_demo.cpp.
If CMake is installed on the system, you can execute sa_plugin_demo.bat to build and install the plugin example. The plugin builds in temporary directory %USERPROFILE%\Documents\sa_plugin_demo_build and installs in directory %USERPROFILE%\ShellAnything\plugins\sa_plugin_demo.
If CMake is not available, you need to create a project in your favorite IDE and add the single source file sa_plugin_demo.cpp to the project. Make sure your project is linking with ShellAnything's libraries and include directory.
This section explains how to declare a plugin in a Configuration File.
The <plugins> element contains the list of plugin declarations. The specific definition of each plugin must be inserted as children of the <plugins> element.
The <plugins> element must be added under a <root> element.
The <plugins> elements does not support any attributes.
For example, see the Plugin definition examples section.
The <plugin> element defines a plugin and its features.
The <plugin> element must be added under a <plugins> element.
The <plugin> element supports the following attributes:
The path attribute defines the file path of a plugin. The path must be defined in absolute form. The path attribute supports property expansion.
For example, the following defines a plugin located in the user's configuration directory :
<plugin path="${config.directory}\my_plugin.dll" ... />The description attribute defines the description a plugin. The description is mainly for keeping track of how the plugin use in a configuration and its capabilities. The attribute is optional.
The actions attribute defines the list of custom action registered by the plugin. The actions attribute does not support property expansion. The attribute is optional.
To specify multiple custom actions, one must separate each action name with the ; character.
If a plugin registers one or multiple actions, all actions must be declared in this attribute. Any registered action that is not declared will be rejected.
For example, the following defines a plugin that registers the <email>, <wavfile> and <logout> actions :
<plugin path="${config.directory}\my_plugin.dll" actions="email;wavfile;logout" />The conditions attribute defines the list of custom validation attributes registered by the plugin. The conditions attribute does not support property expansion. The attribute is optional.
To specify multiple conditions, one must separate each condition name with the ; character.
If a plugin registers one or multiple conditions, all conditions must be declared in this attribute. Any registered condition that is not declared will be rejected.
For example, the following defines a plugin that registers the weather, time and address validation attributes :
<plugin path="${config.directory}\my_plugin.dll" conditions="weather;time;address" />The following section show plugin definition examples. Note these definitions are for example purpose only. There is no real implementation of these plugins.
<?xml version="1.0" encoding="utf-8"?>
<root>
  <plugins>
    <!-- Conditions plugins -->
    <plugin path="${config.directory}\equals.dll"
            conditions="equals1;equals2"
            description="This plugin allow validating a menu if the validation attributes `equals1` and `equals2` have the same value." />

    <plugin path="${config.directory}\foobar_login_check.dll"
            conditions="foobar_login_check"
            description="This plugin allow validating a menu if current user is logged in to `foobar` network application.
                         It does not requires any special value. However, we need a way to link visibility and validity elements to this plugin.
                         To link an element with this plugin, the plugin's file name can be used as an attribute." />

    <plugin path="${config.directory}\more_independent_conditions.dll"
            conditions="weather;weekday;"
            description="This plugin defines new visibility/validity attributes.
                         This plugin allow validating multiple independent conditions. All the conditions are optional.
                         Zero, one, or all conditions can be specified in visibility and validity elements." />

    <!-- Configuration update plugins -->
    <plugin path="${config.directory}\calendar.dll"
            description="This plugin registers new properties when a user makes a new selection.
                         The following properties are defined:
                           calendar.year,
                           calendar.month,
                           calendar.day,
                           calendar.hour,
                           calendar.minute,
                           calendar.second,
                           calendar.weekday" />

    <plugin path="${config.directory}\weather.dll"
            description="This plugin registers new properties about the local weather.
                         This weather information is provided by weather.com.
                         The plugin requires the mandatory properties 'weather.location.latitude' and 'weather.location.longitude' to be set.
                         For example, to get the weather for Toronto, Ontario, Canada, the properties should be set to the following:
                           weather.location.latitude=43.6532
                           weather.location.longitude-79.3832
                         The plugin will then parse the result of https://weather.com/weather/today/l/43.6532,-79.3832 and define the following properties :
                           weather.location.name,
                           weather.temperature.value,
                           weather.temperature.units,
                           weather.temperature.description" />

    <!-- Actions plugins -->
    <plugin path="${config.directory}\email_action.dll"
            actions="email"
            description="This plugin defines an `email` action.
                         The action supports the following attributes :
                           `address` which contains the destination email address,
                           `subject` which contains the email's suject,
                         The action is expecting to have a `body` child element which is the actual email content." />

    <plugin path="${config.directory}\mp3_action.dll"
            actions="mp3playback"
            description="This plugin implement mp3 file playback as a menu action.
                         The action supports the following attributes :
                           `path` which is the path to a mp3 file." />
  </plugins>
  <shell>
    <menu name="Log off foobar">
      <visibility foobar_login_check="" />
    </menu>

    <menu name="Play party music">
      <visibility weather="sunny" />
      <actions>
        <mp3playback path="C:\Users\${env.USERNAME}\Music\party.mp3" />
      </actions>
    </menu>

    <menu name="Launch Monday applications">
      <visibility equals1="${calendar.weekday}" equals2="monday" />
    </menu>
  </shell>
</root>This section explains the official plugins that are released with ShellAnything.
This plugin declares custom actions and validation attributes to interact with external processes.
The plugin can be declared with the following:
<plugin path="${application.directory}\sa_plugin_process.dll"
        actions="terminateprocess;killprocess"
        conditions="process_filename;process_pid" />
terminateprocess action
This action ask an application to exit gracefully.
The action has the following attributes:
pid, to identify a process with a Process Id. This attribute is optional.filename, to identify a process with an Executable Filename. This attribute is optional.
One of the pid and filename attributes must be specified for the action to be valid.
For example, the following ask Notepad to exit:
<terminateprocess filename="notepad.exe" />killprocess action
This action force stop an application.
The action has the following attributes:
pid, to identify a process with a Process Identifier (pid). This attribute is optional.filename, to identify a process with an Executable Filename. This attribute is optional.
One of the pid and filename attributes must be specified for the action to be valid.
For example, the following kill Notepad:
<killprocess filename="notepad.exe" />process_filename condition
This condition validates a menu if the given value matches the Executable Filename of a running process.
The condition does not support multiple values.
For example, the following set a menu visible if Notepad is running:
<visibility process_filename="notepad.exe" />process_pid condition
This condition validates a menu if the given value matches the Process Identifier (pid) of a running process.
The condition does not support multiple values.
For example, the following set a menu visible if a process with pid 7016 is running:
<visibility process_pid="7016" />This plugin allow to query the status of a Windows Service. The plugin requires the mandatory property sa_plugin_services.names to be set.
For example, to get the service status of Microsoft Defender Antivirus Network Inspection Service, the property sa_plugin_service.names should be set to WdNisSvc.
If the service name is found, the property sa_plugin_services.WdNisSvc.status is set to the service status. The status values are: unknown, continuing, pausing, paused, running, starting, stopping and stopped.
To specify multiple service names, one must separate each value with the ; character.
The plugin can be declared with the following:
  <plugins>
    <plugin path="${application.directory}\sa_plugin_services.dll" />
  </plugins>
  <shell>
    <default>
      <!-- define the names of multiple windows services :
      WinDefend                       Microsoft Defender Antivirus Service
      Dhcp                            DHCP Client
      Dnscache                        DNS Client
      OneDrive Updater Service        OneDrive Updater Service
      wuauserv                        Windows Update
      Fax                             Fax
      msiserver                       Windows Installer
      mpssvc                          Windows Defender Firewall
      WebClient                       WebClient
      -->
      <property name="sa_plugin_services.names" value=""/>
      <property name="sa_plugin_services.names" value="WinDefend;${sa_plugin_services.names}"/>
      <property name="sa_plugin_services.names" value="Dhcp;${sa_plugin_services.names}"/>
      <property name="sa_plugin_services.names" value="Dnscache;${sa_plugin_services.names}"/>
      <property name="sa_plugin_services.names" value="OneDrive Updater Service;${sa_plugin_services.names}"/>
      <property name="sa_plugin_services.names" value="wuauserv;${sa_plugin_services.names}"/>
      <property name="sa_plugin_services.names" value="Fax;${sa_plugin_services.names}"/>
      <property name="sa_plugin_services.names" value="msiserver;${sa_plugin_services.names}"/>
      <property name="sa_plugin_services.names" value="mpssvc;${sa_plugin_services.names}"/>
      <property name="sa_plugin_services.names" value="WebClient;${sa_plugin_services.names}"/>
      <property name="sa_plugin_services.names" value="aaaa;${sa_plugin_services.names}"/>
</default>This plugin provide string manipulation actions.
The plugin can be declared with the following:
<plugin path="${application.directory}\sa_plugin_strings.dll"
        actions="substr;strreplace;strlen;struppercase;strlowercase;strfind" />
substr action
This action compute the substring of a string.
The action has the following attributes:
count, matches the length in bytes of the substring.value, matches the input value of the action.property, matches the output property of the action.offset, matches the starting offset in bytes within the value. Default to 0. This attribute is optional.
For example, the following compute the substring from alphabetical characters to get all numbers:
<substr offset="26" count="10" value="abcdefghijklmnopqrstuvwxyz0123456789" property="numbers" />strreplace action
This action replaces a value by another in a string.
The action has the following attributes:
text, matches the input value of the action.token, matches the value to replace.value, matches the replace value.property, matches the output property of the action.
For example, the following replaces Marty by George in the given text:
<strreplace text="Marty McFly" token="Marty" value="George" property="father" />strlen action
This action compute the length of a string in bytes.
The action has the following attributes:
value, matches the input value of the action.property, matches the output property of the action.
For example, the following compute the length of the given string:
<strlen value="Marty McFly" property="name.strlen" />struppercase action
This action compute the uppercase of a string.
The action has the following attributes:
value, matches the input value of the action.property, matches the output property of the action.
For example, the following compute the uppercase of the given name:
<struppercase value="George McFly" property="name.uppercase" />struppercase action
This action compute the uppercase of a string.
The action has the following attributes:
value, matches the input value of the action.property, matches the output property of the action.
For example, the following compute the uppercase of the given name:
<struppercase value="G.McFly" property="username.uppercase" />strlowercase action
This action compute the lowercase of a string.
The action has the following attributes:
value, matches the input value of the action.property, matches the output property of the action.
For example, the following compute the lowercase of the given name:
<strlowercase value="G.McFly" property="username.lowercase" />strfind action
This action finds a string within another string.
The action has the following attributes:
text, matches the input value of the action.value, matches the value to find.property, matches the output property of the action.offset, matches the starting offset in bytes within the text. Default to 0. This attribute is optional.
For example, the following searches for the second word Roads in the given text:
<strfind text="Roads? Where We're Going, We Don't Need Roads." value="Roads" offset="10" property="word.position" />This plugin declares validation attributes to validate a menu based on the current system time (local time zone). All conditions must be specified
start_time and end_time conditions
Theses conditions validate a menu if current time is between start_time and end_time.
The values should be specifed in hh:mm format.
Both conditions must be specified for the validation to be succesful. These conditions does not support multiple values.
For example, the following set a menu visible between working hours:
<visibility start_time="08:00" end_time="17:00" />WinDirStat is a disk usage statistics viewer. It is a 3rd party application that do not provide a shell extension with the installer. The application have command line support with the following syntax: windirstat.exe <folder>.
With ShellAnything, a context menu option can be easily created to allow WinDirStat integration with Windows Explorer :
<?xml version="1.0" encoding="utf-8"?>
<root>
<shell>
<menu name="WinDirStat">
<icon path="C:\Program Files (x86)\WinDirStat\windirstat.exe" index="0" />
<visibility maxfiles="0" maxfolders="1" exists="C:\Program Files (x86)\WinDirStat\windirstat.exe" />
<actions>
<exec path="C:\Program Files (x86)\WinDirStat\windirstat.exe" arguments=""${selection.path}"" />
</actions>
</menu>
</shell>
</root>Run an application that requires special parameters (a.k.a arguments) requires one to open a command prompt, navigate to the target directory, and run the command with the parameters.
ShellAnything can easily create a menu that is available only with one right-click a directory. The menu prompt the user for the arguments and run the desired application:
<?xml version="1.0" encoding="utf-8"?>
<root>
  <shell>
    <menu name="Run with parameters..." description="Run the selected executable with parameters">
      <icon path="C:\Windows\System32\shell32.dll" index="76" />
      <visibility maxfiles="1" maxfolders="0" fileextensions="com;exe;bat;cmd" />
      <actions>
        <prompt name="myarguments" title="Please enter the command line parameters" />
        <exec path="${selection.path}" arguments="${myarguments}" />
      </actions>
    </menu>
  </shell>
</root>Developers often needs to open a command prompt at the current location when navigating Windows Explorer. ShellAnything can quickly open a command prompt inside the current Windows Explorer directory:
<?xml version="1.0" encoding="utf-8"?>
<root>
  <shell>
    <menu name="Open command line here">
      <icon path="C:\Windows\System32\cmd.exe" index="0" />
      <visibility maxfiles="0" maxfolders="1" />
      <actions>
        <exec path="${env.ComSpec}" basedir="${selection.path}" />
      </actions>
    </menu>
  </shell>
</root>If an application requires multiple input files (ie: compare files), ShellAnything allows creating a menu that select the first file and then show another menu for picking the second file and launch the application.
The following xml sample can select two files for an operation :
<?xml version="1.0" encoding="utf-8"?>
<root>
  <shell>
    <menu name="Compare">
      <visibility maxfiles="1" maxfolders="0" />
      <icon path="C:\Windows\System32\dsuiext.dll" index="32" />
      <menu name="Select file '${selection.filename}'">
        <actions>
          <!-- Remember the selected file in properties. The path will be used later -->
          <property name="compare.first.selection.path"     value="${selection.path}" />
          <property name="compare.first.selection.filename" value="${selection.filename}" />
        </actions>
      </menu>
      <menu name="Compare with '${compare.first.selection.filename}' (text)">
        <icon path="C:\Windows\System32\imageres.dll" index="14" />
        <!-- Hide this menu until a choice was made in 'Select file' menu -->
        <visibility properties="compare.first.selection.filename" />
        <actions>
          <!-- Run the compare command with the following 2 files: ${compare.first.selection.path} and ${selection.path} -->

          <!--Reset the properties now that compare is complete-->
          <property name="compare.first.selection.path"     value="" />
          <property name="compare.first.selection.filename" value="" />
        </actions>
      </menu>
    </menu>
  </shell>
</root>Menu names supports keyboard mnemonics, a.k.a Access Keys, Keyboard shortcuts or Keybindings. A mnemonic indicates to the user which key to press (often in conjunction with the Alt key) to activate a menu and execute its associated actions. They provides a method of quickly navigating a menu using the only the keyboard.
To assign a specific key to a menu, add an ampersand character (&) before the character of the associated keyboard key.
For example, the following would create a menu that is activated when one presses the z key:
<menu name="Press the &z key to execute this menu" >
  <actions>
    <message title="It works!" />
  </actions>
</menu>
The & character is a special character in menu names and must be escaped to be used as a plain text character. To escape an & character, one must double the character.
For example, the following would create a menu named Smith&Co :
<menu name="Smith&&Co" />Note the use of the double & which prevents creating a keyboard shortcut with the C key.
Note: By default, mnemonics are not activated on Windows. Please read this SuperUser article to know how to activate them on Windows.
ShellAnything provides logging support for troubleshooting and debugging commands.
The logging directory is unique for each users of the system.
The log files are stored in C:\Users\%USERNAME%\ShellAnything\Logs directory where %USERNAME% matches your current login username.
For example, the user JohnSmith can find his own ShellAnything log files in directory C:\Users\JohnSmith\ShellAnything\Logs.
The log files names are generated in the following format:
name.LEVEL.date-time.pid.log.
The following table defines each field identifier in the filename format:
| Identifier | Description |
|---|---|
| name | Matches the name of the dll that generates log messages. Usually sa.shellextension.dll. |
| LEVEL | The logging level. Accepted values are ERROR, WARNING and INFO. See glog documentation for details. |
| date | The current date when the file was created in yyyymmdd format. |
| time | The current date when the file was created in hhmmss format. |
| pid | The Process Id which generates the log message. |
For example, sa.shellextension.dll.INFO.20191125-083305.9456.log is a valid log filename.
The logging library used by ShellAnything is Google's logging module (glog).
All messages logged by the application have an associated level to describe the severity of the message.
The application supports 3 differents logging levels: ERROR, WARNING and INFO. See glog documentation for details.
Each level have a dedicated log file for storing messages. For example:
sa.shellextension.dll.INFO.20191125-083305.9456.log
sa.shellextension.dll.WARNING.20191125-083701.9456.log
sa.shellextension.dll.ERROR.20191125-084152.9456.log
See Filename Format for details.
Each log file contains the messages of it's matching level but also the messages with higher severity. In other words, all logs messages are available in the INFO log file, including messages logged with WARNING and ERROR levels.
The ERROR log file contains all messages with ERROR level.
The WARNING log file contains all messages with ERROR and WARNING levels.
The INFO log file contains all messages with ERROR, WARNING and INFO levels.
Debugging log messages are only available in debug builds of the application.
The log files are kept for a maximum of 5 days. This is for security reason as the files may contains sensitive information.
On application startup, the existing log files are all validated and files older than 5 days are deleted.
To force the application restart, reboot the computer and open a new Windows Explorer or close all Windows Explorer before opening a new Window Explorer window.
There are no plan for keeping the log files for more than 5 days.
One might be puzzled as to why his menus do not display ampersand character (&) properly.
For example, if one create a menu with the name set to Smith&Co, ShellAnything will render the menu as SmithCo or "SmithCo". This is beause the & character is a special character used in keyboard mnemonics.
Because the & character is a special character in menu names, it must be escaped to be used as a plain character. To escape an & character, one must double the character.
Refer to the keyboard mnemonics section for details.
When a plugin is loaded by ShellAnything, the dll file cannot be modified, moved or deleted. If you are a plugin developper, this can be annoying. To force ShellAnything to release its hook on the file, you must unload all Configuration Files that use the plugin.
A quick way to do this is to temporary change the Configuration Files to another file extension (for example .tmp) and then force ShellAnything to update by right-clicking on any file or directory.
If you find any issues while using ShellAnything, please report your findings using the project issue page on GitHub.
Improvements to the software are also welcome and can be proposed using the same method.