- What's included
- Development 2.1 Migration 2.2 Github auth provider
- Deployment
- Blueprint Structure
- Learn More
The first step is to have an account on Geobase and create a new project.
Once you're Geobase project is created click here to create a new repository using this template. It will create a copy of this repo without the git history.
# set the database uri in your environment, you can get it from the geobase project settings page
DATABASE_URI=<your-database-uri>
psql -d $DATABASE_URI -f geobase/migrations/20240813165645_project-setup.sql- Go to the studio
- Navigate to the SQL Editor page
- Copy the contents of the setup migration file
- Click run.
See the video below for a walkthrough:
geobase-blueprint-shareable-maps-nextjs-migration.mp4
You only need to have these variables set:
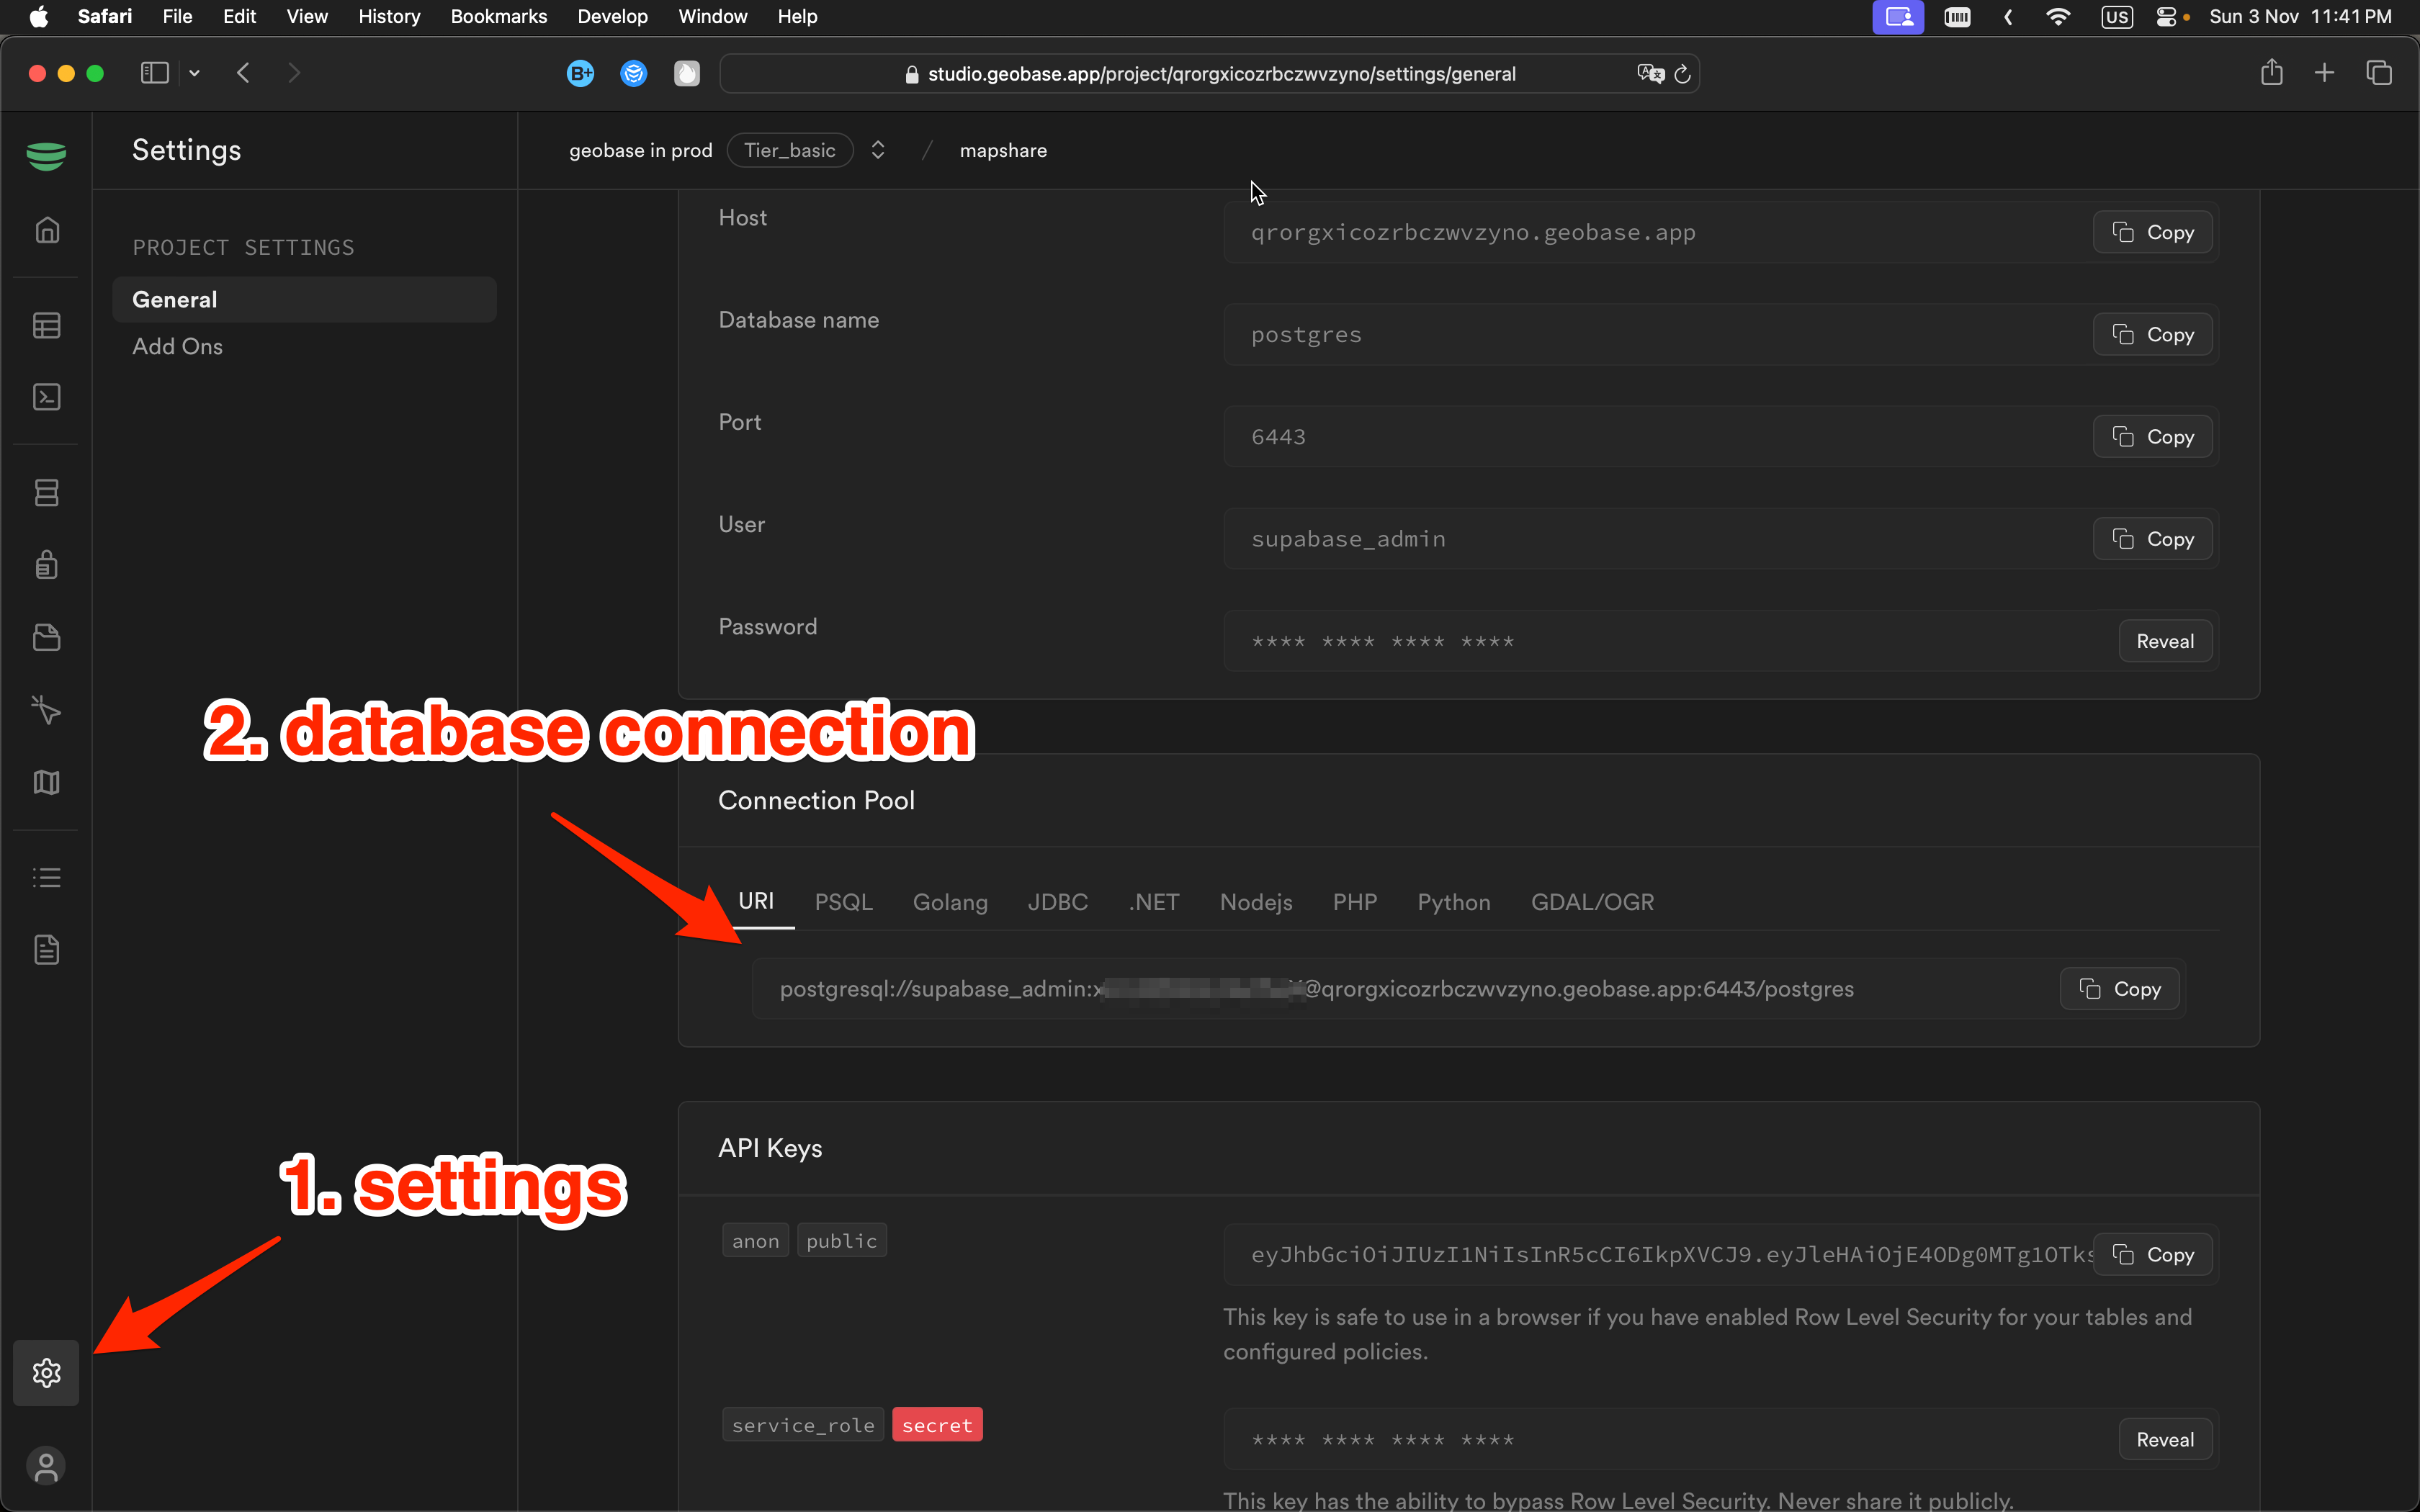
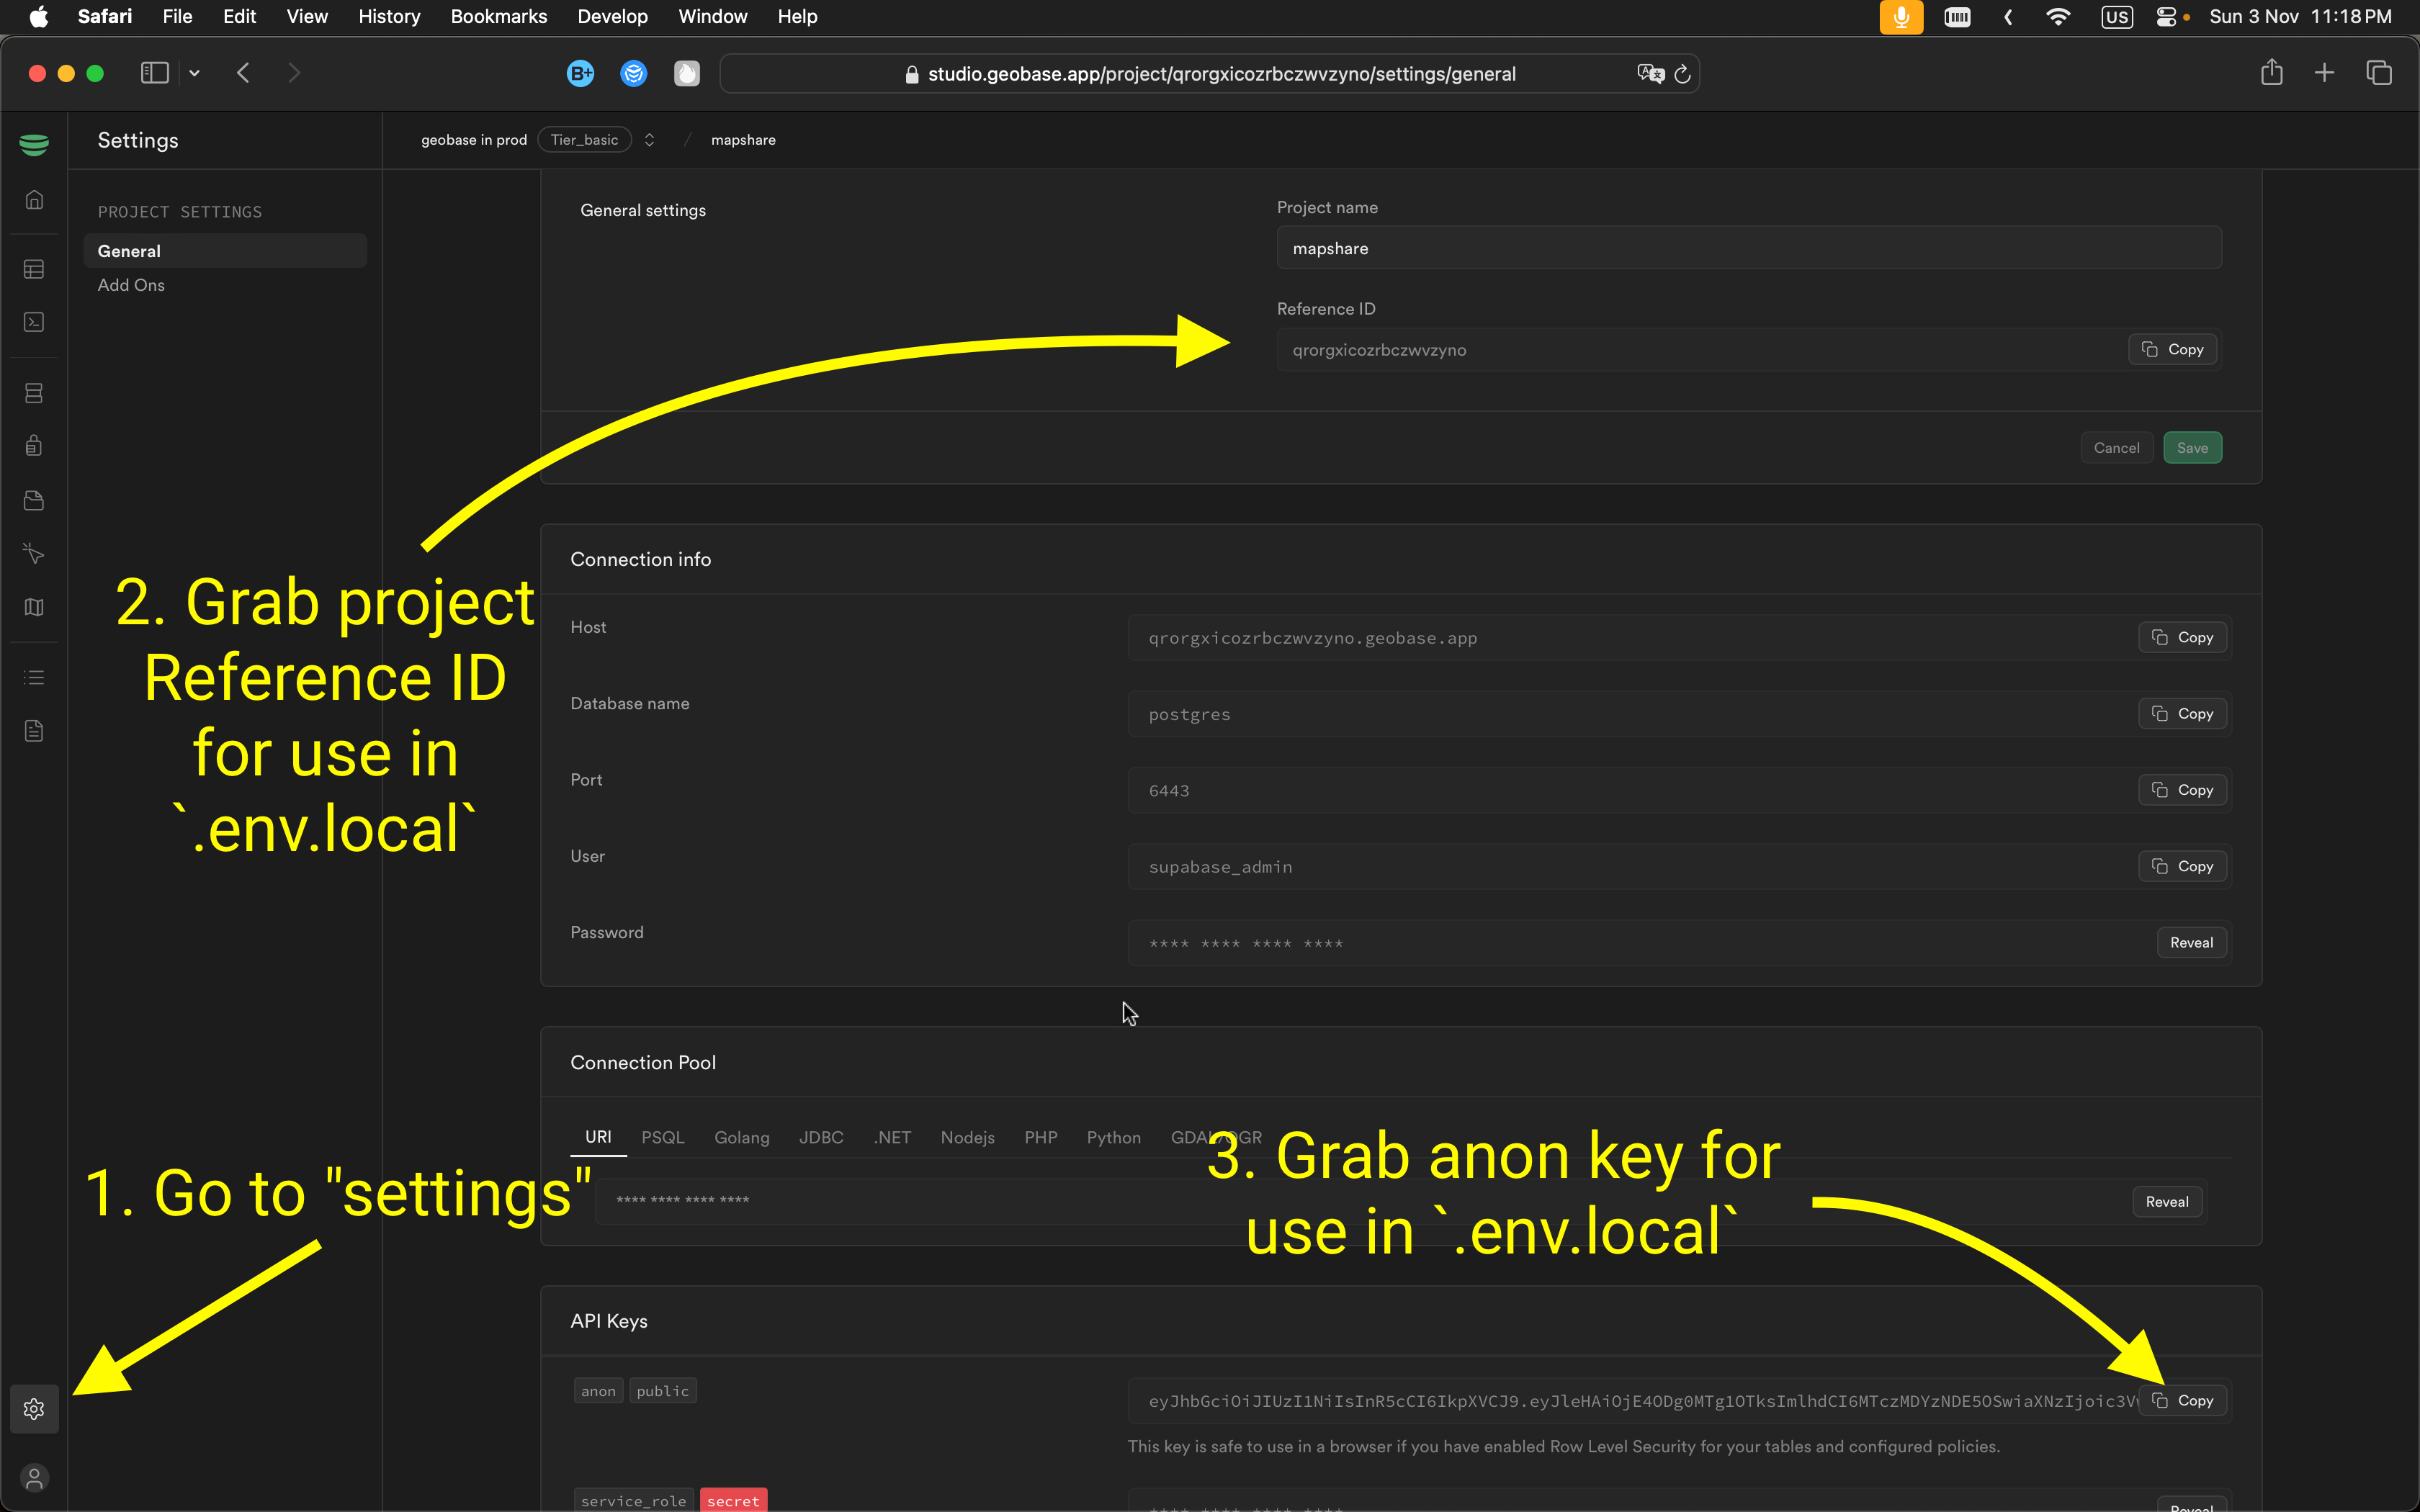
NEXT_PUBLIC_GEOBASE_URL=https://YOUR_PROJECT_REF.geobase.app
NEXT_PUBLIC_GEOBASE_ANON_KEY=YOUR_GEOBASE_PROJECT_ANON_KEY
You can find the project ref and anon key in the Geobase project settings page.
Create an .env.local file with the same contents as above.
Use nvm to set node version:
nvm use 21Install dependencies:
npm install
# or
yarn
# or
pnpm install
Run dev ideally with the experimental https flag:
npm run dev --experimental-https
# or
yarn dev --experimental-https
# or
pnpm dev --experimental-https
⚠️ Note: Without the experimental https flag (--experimental-https), you will have a slightly different dev when doing the sign up flow. Namely, the link from your email to verify your account will be go tohttps://localhost:3000/...showing you an error. You can simply ignore the error and manually navigate to the url (without https) in the browser.
Open https://localhost:3000 with your browser to see the blueprint in action.
⚠️ Note: If you are running without--experimental-httpsuse http://localhost:3000
1. In studio: Enable Github Provider: Go to the Authentication tab in the studio. Then select Providers and select Github.
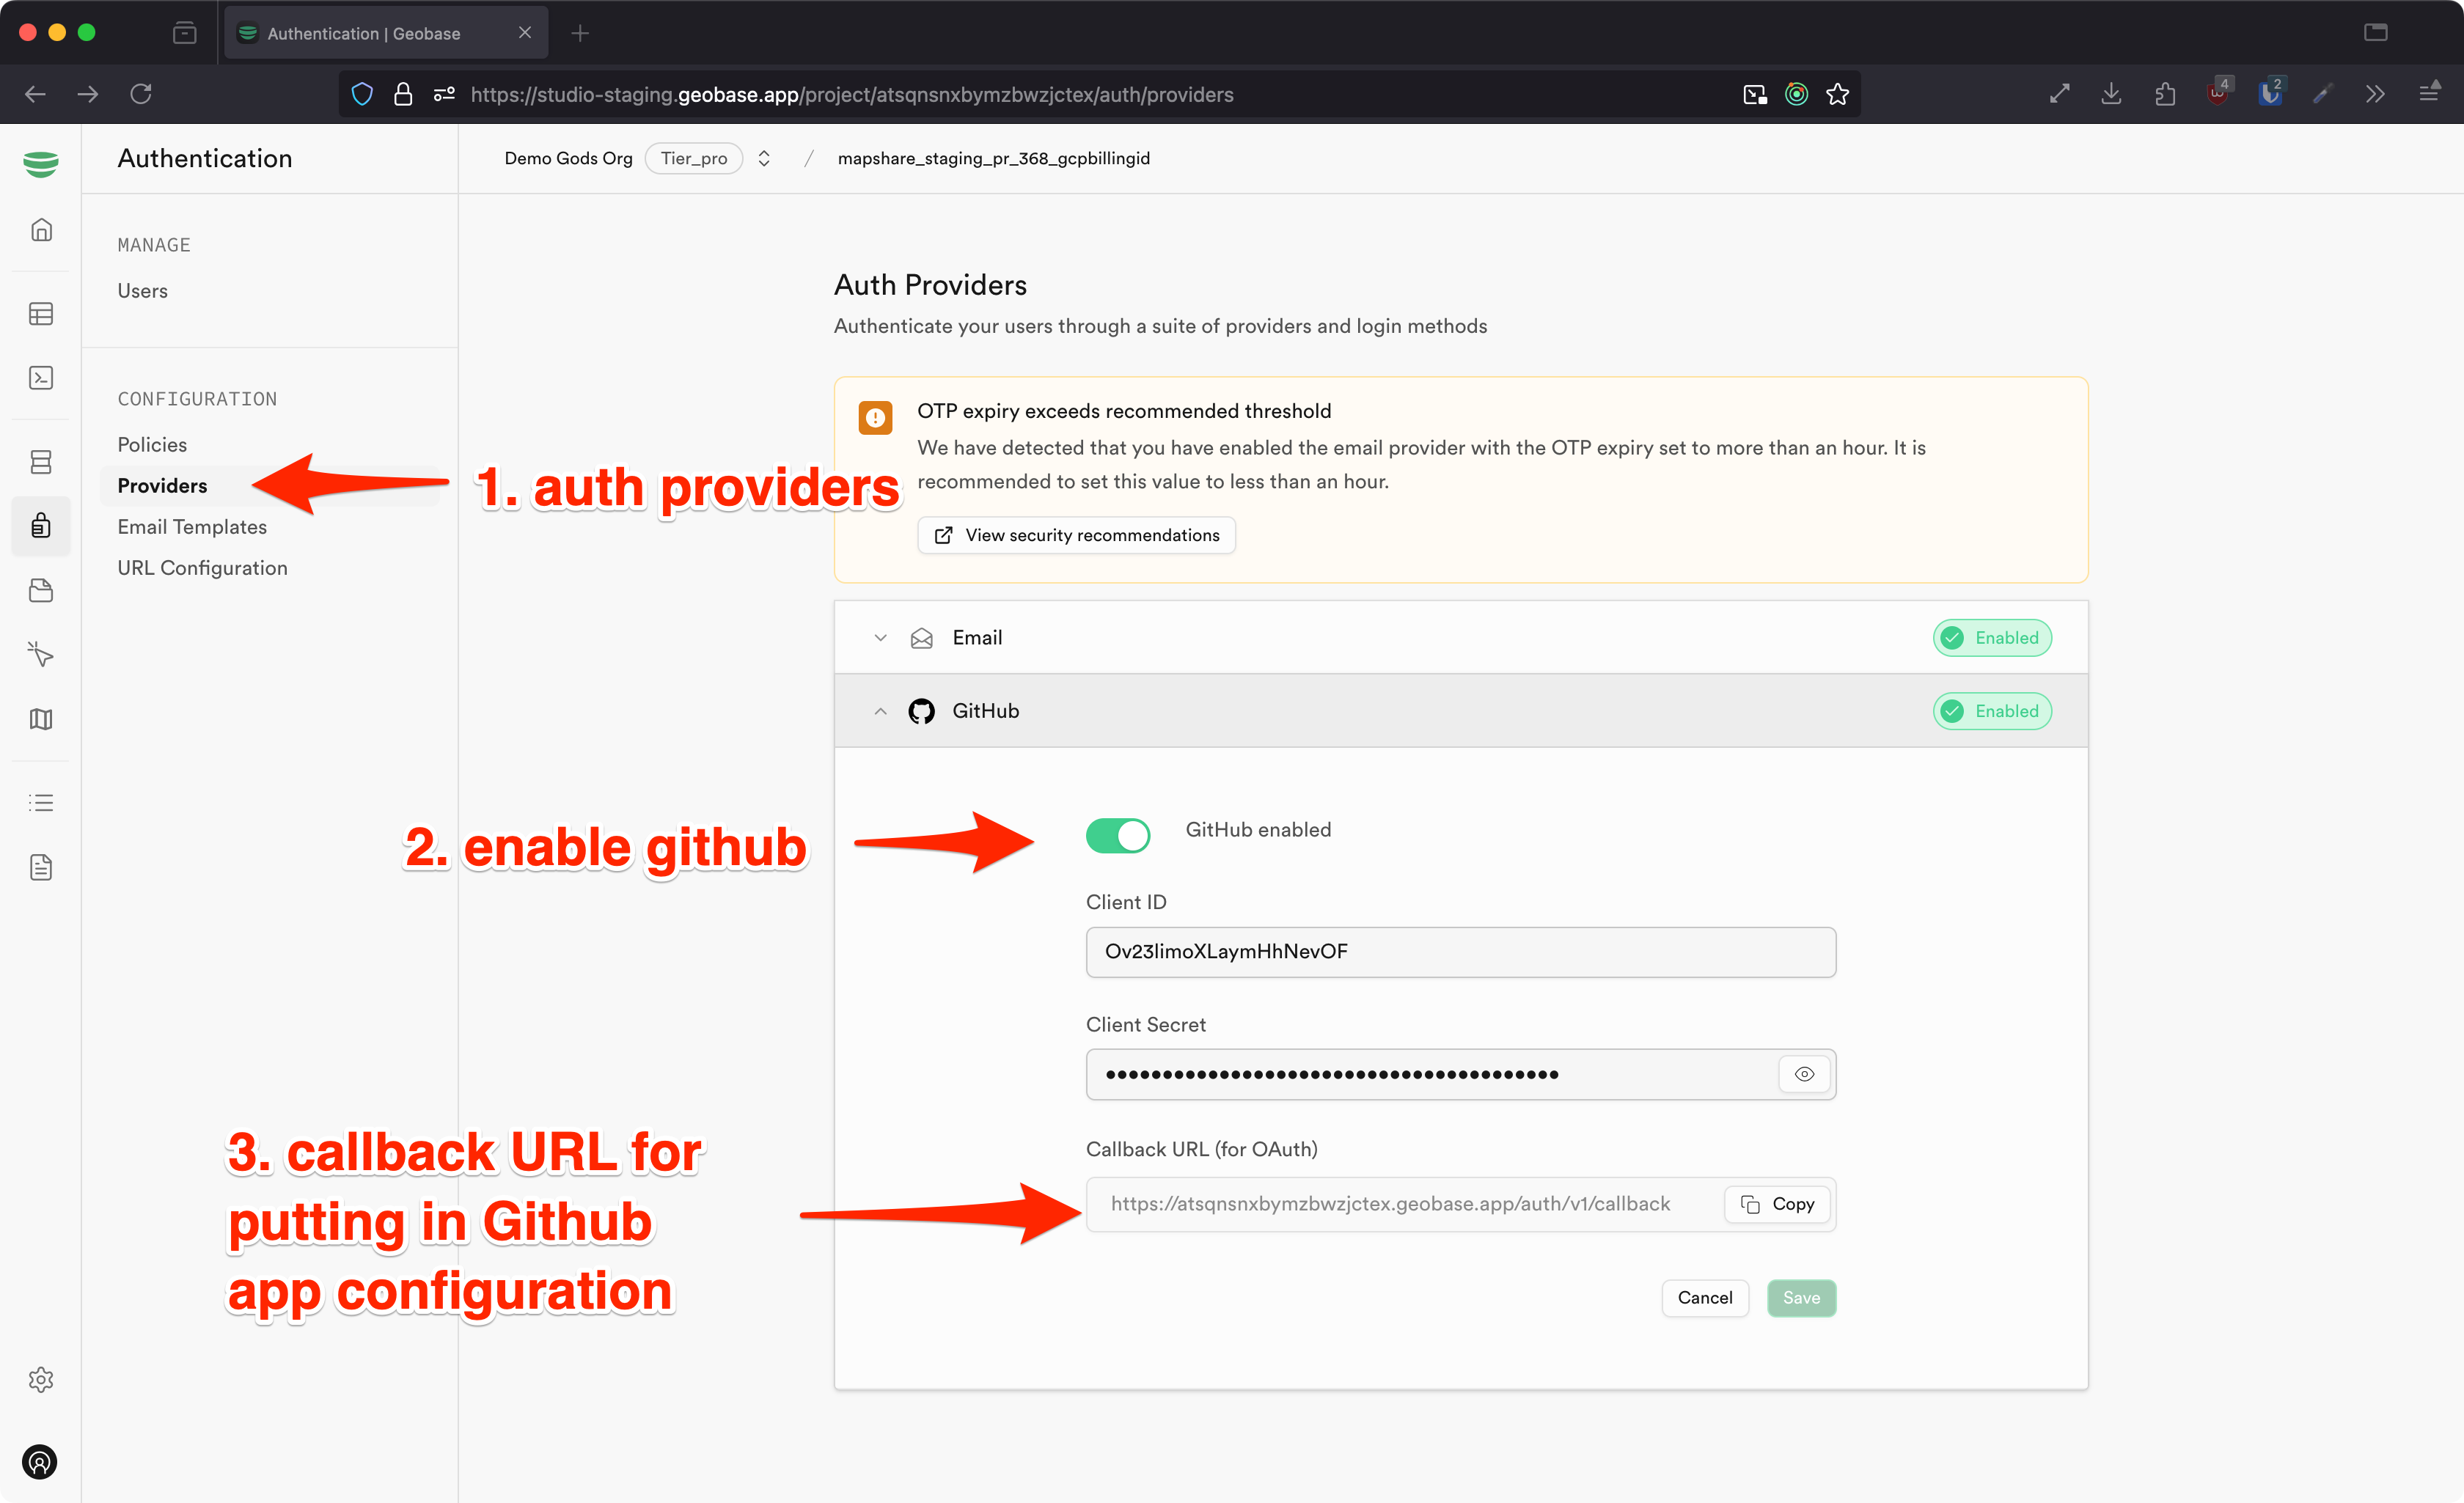
2. On Gitub: Create a Github OAuth App: Go to Github developer settings (https://github.com/settings/developers) and create a new OAuth app and set the callback url to the url in the studio auth providers tab. Also grab the client id and client secret. You will need it for the next step.
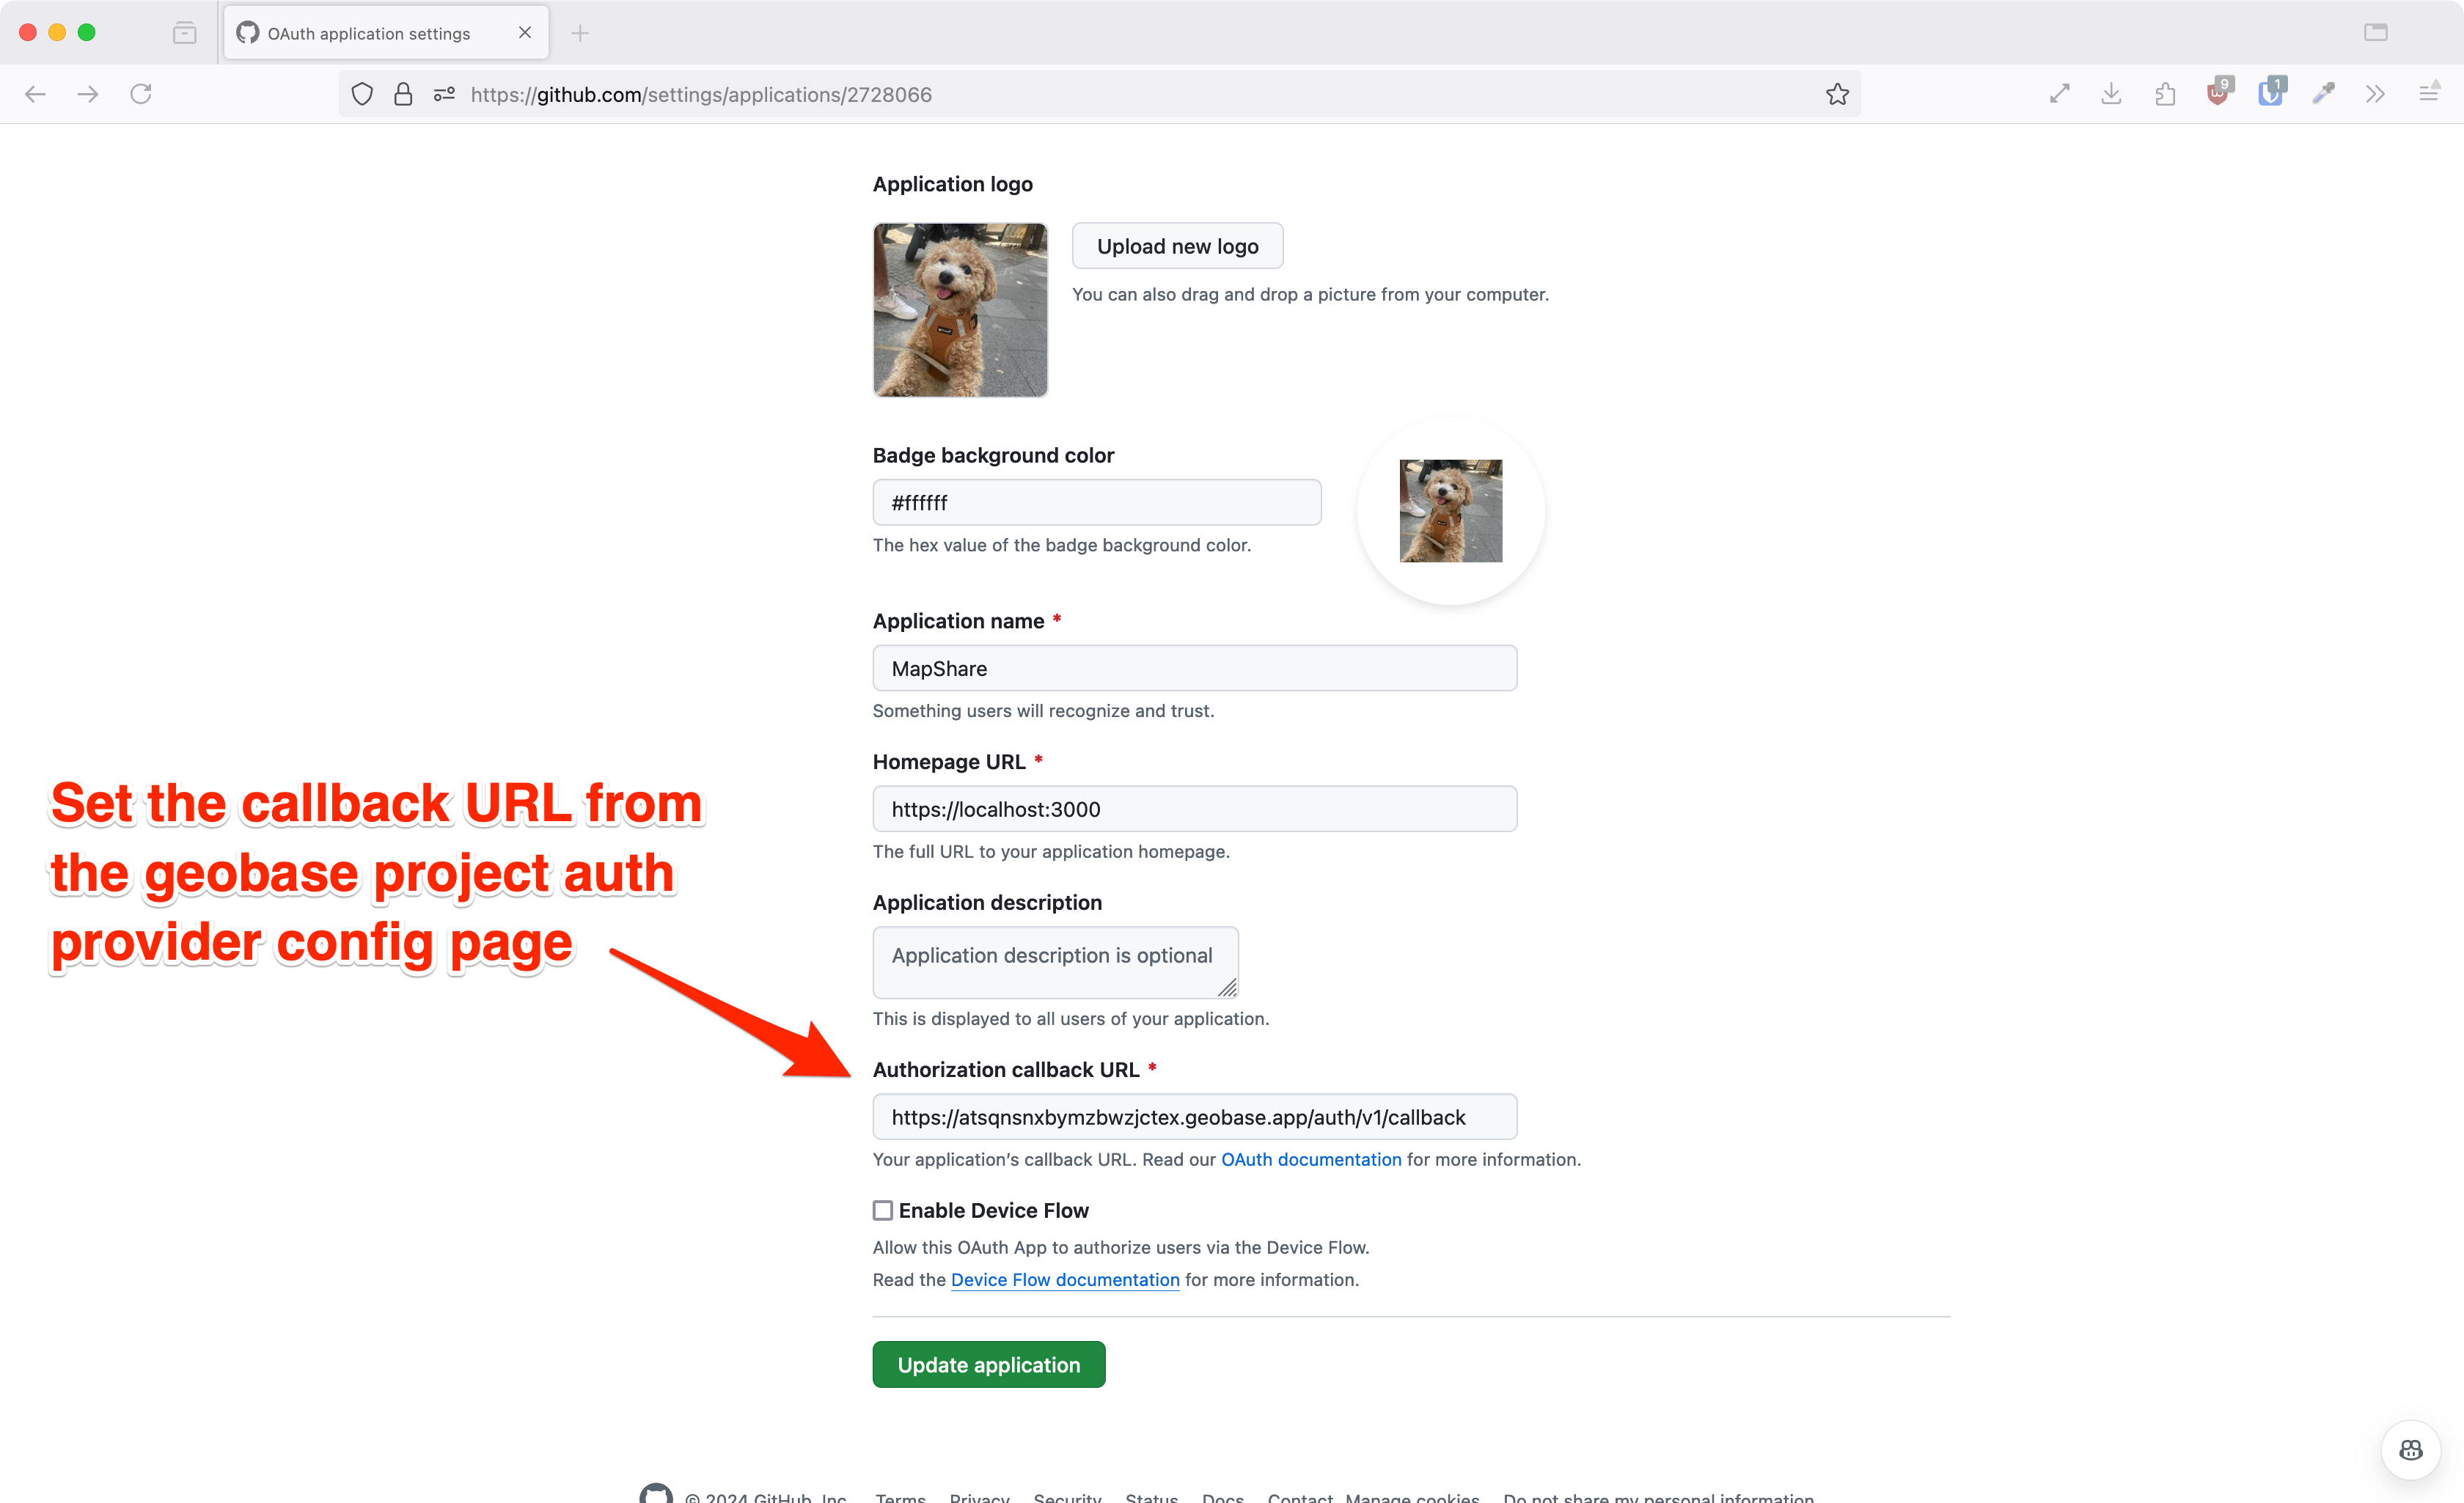
3. Back in the studio: Add the credentials into the Github tab in the studio which you find from the github app you just created.
The easiest way to deploy this blueprint app is to use the Vercel Platform from the creators of Next.js.
Check out the Next.js deployment documentation for more details.
A good summary of how the database is setup can be found in the setup migration file.
The database includes the following main tables:
public.profiles: Stores user profile information.public.smb_map_projects: Contains map project details.public.smb_drawings: Stores line drawings for map projects. 🗺️public.smb_pins: Holds pin locations for map projects. 🗺️public.smb_annotations: Stores annotations for map projects. 🗺️
🗺️ = Served as a vector map tile via the Geobase automatic tile server
public.handle_new_user(): Automatically creates a profile row when a new user is created.public.update_project_bounds(): Updates the bounds of a map project when drawings, pins, annotations, or attachments are added or removed.
Triggers:
on_auth_user_created: Callshandle_new_user()when a new user is created.update_bounds_on_drawing_change,update_bounds_on_pin_change,update_bounds_on_annotation_change,update_bounds_on_attachment_change: Callupdate_project_bounds()when respective items are added or removed from a project.
Row Level Security is implemented for all tables to ensure data privacy and access control:
-
profiles:- Users can read and modify their own profile.
- Everyone can read all profiles.
-
smb_map_projects:- Anyone can read published projects.
- Authenticated project owners have full access to their own projects.
-
smb_drawings,smb_pins,smb_annotations,smb_attachments:- Anyone can read items from published projects.
- Authenticated item owners have full access to their own items.
-
Storage:
- Policies are set for the 'avatars' bucket to control access to user avatars.
The components in all React blueprints are made with shadcn/ui. This makes it easy for you to customize and extend the existing code based on your project needs. This also means it's easier to use different components from other blueprints given they are made with the same tools - shadcn/ui, tailwindcss, react, etc.
🎥 Take a look at the blueprint overview video
We've separated all components into 3 main categories:
ui: This is where all the shadcn/ui and other base components are.views: These are compositions of the ui components that have a user flow in mind.providers: These are the components that provide state and utility functions.
These are not strict rules but rather guidelines to help you understand the project structure.
