In order to build an iOS app onto a physical device (not a simulator) you'll need to setup code signing certificates which Apple uses to track all of the software installed on iOS devices. This means you'll need to connect your Apple developer account to Xcode, Xcode can use this to automatically create an iOS Development Certificate and Provisioning Profile for your project.
💡 Certificates are saved to your local Keychain so you don't need to set them up often.
- Open your iOS project in Xcode with:
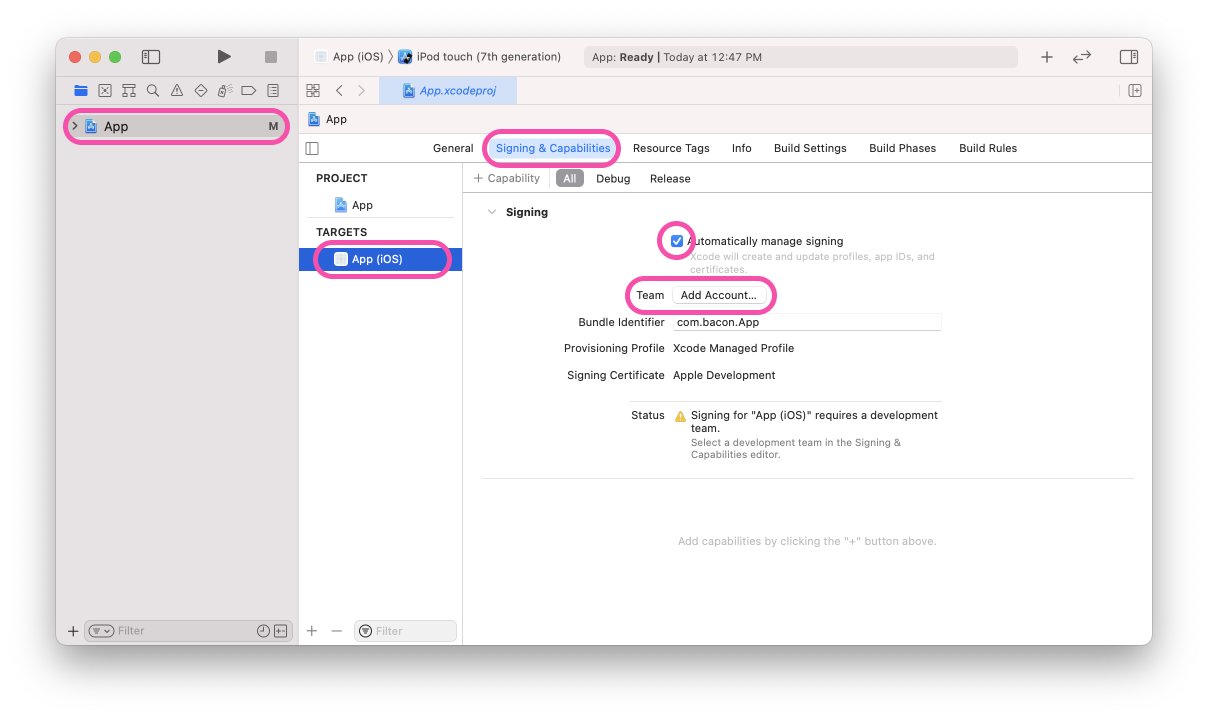
open ios/<yourproject>.xcworkspace - Select the first project in the navigator then the target with the matching native in the "project and targets list".
- Select "Signing & Capabilities", ensure you have "Automatically manage signing" selected.
- Ensure a "Development Team" is selected, this may require that you sign-in to your Apple Developer account.
- Press the "Add Account" button next to the team label. Follow the sign in flow.
- Select a physical device to build the app onto, Xcode will add this device to your account.
- Build the app onto your device.
- You may need to "trust" the device you just added to the Xcode "Development Certificate", this is done in your iOS device.
- Navigate: Settings > General > Device Management > [your new certificate] > Trust. Learn more: Apple docs (MaintainingCertificates).
Now you can return to Expo CLI and build your project locally with expo run:ios. This process only needs to be done once per computer / account, you don't need to do this for every new native project.